Drawing a toucan is fun and easy when you break it down into simple shapes. In this tutorial, we’ll build the toucan step by step, starting with basic ovals and guidelines, then slowly adding details like the beak, wings, and toes. Follow each step carefully, and you’ll have a complete toucan drawing by the end!
Step 1 : Mark the Size and Basic Shapes
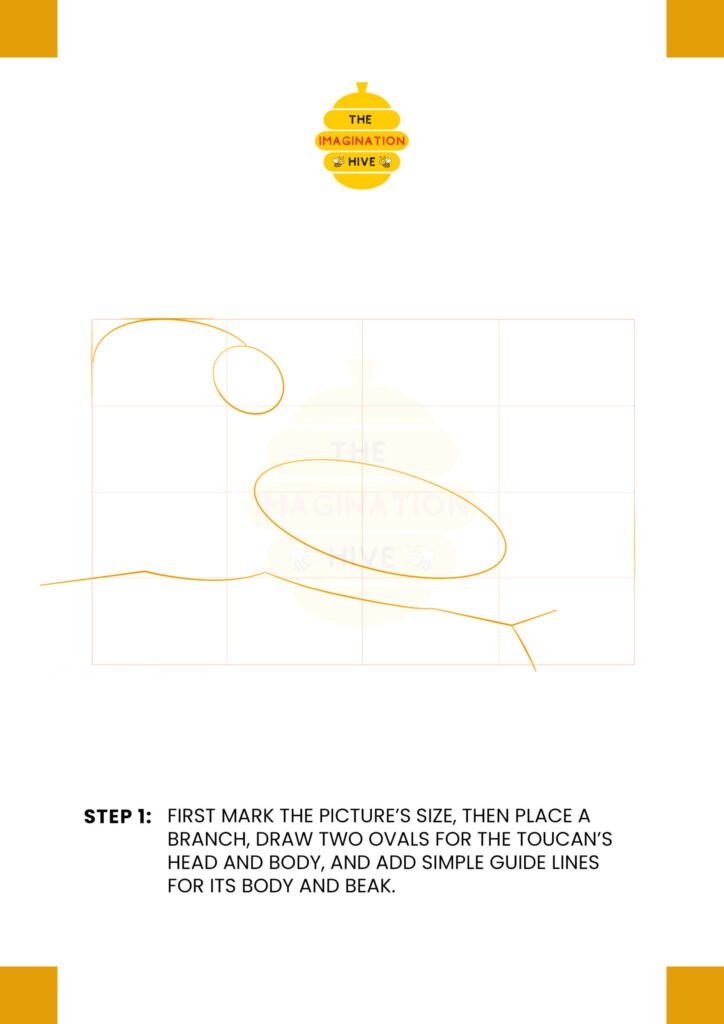
First, lightly mark the size of your picture area. Draw two ovals — a small one for the head and a larger one for the body. Add simple guide lines for the branch and the direction of the beak.
Short Tip: Keep your lines very light.
Light guidelines make it much easier to adjust shapes and erase mistakes later.
Step 2 : Draw the Neck, Back, and Branch
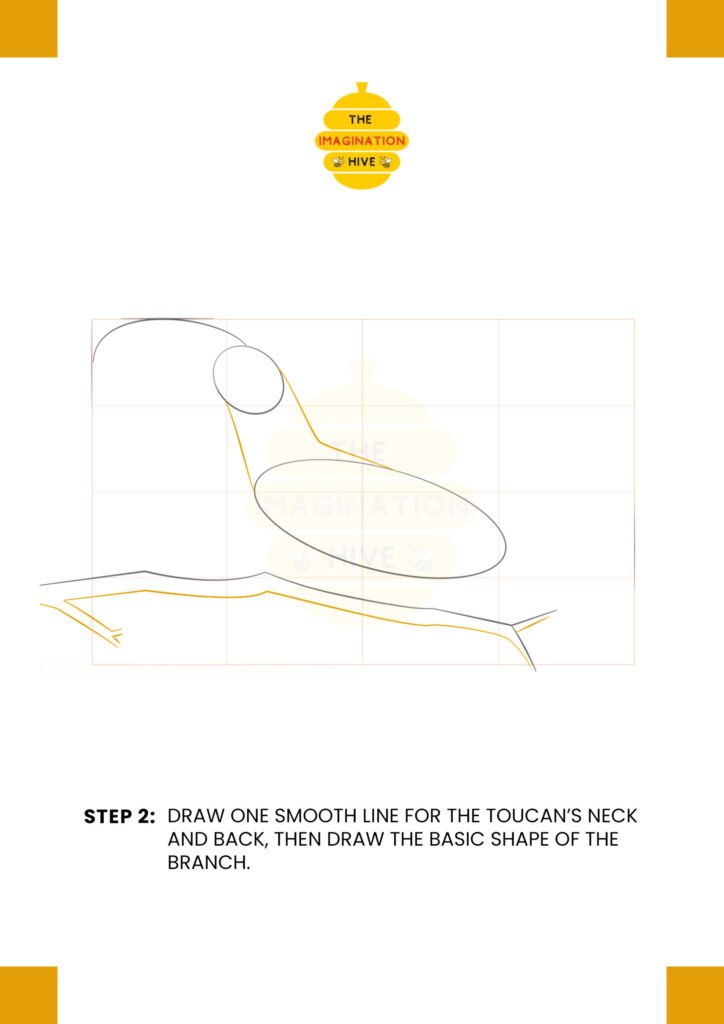
Draw one smooth curved line connecting the head to the body to form the neck and back. Then outline the basic shape of the branch under the toucan.
Short Tip: Use long, smooth strokes.
Clean curves will make your toucan look more natural and balanced.
Step 3 : Mark the Legs and Beak Placement
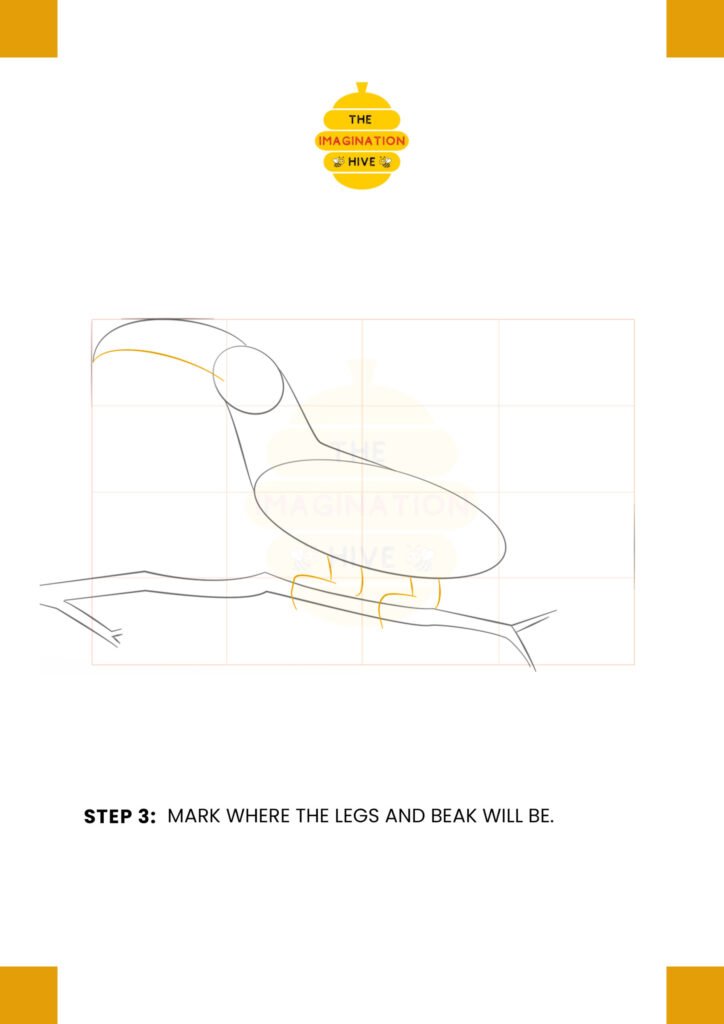
Add simple straight lines to show where the legs will rest on the branch. Refine the beak’s direction with a curved line across the head.
Short Tip: Check proportions before darkening.
Make sure the beak is large and slightly curved, as it’s the toucan’s main feature.
Step 4 : Add Toes, Tail, and Eye
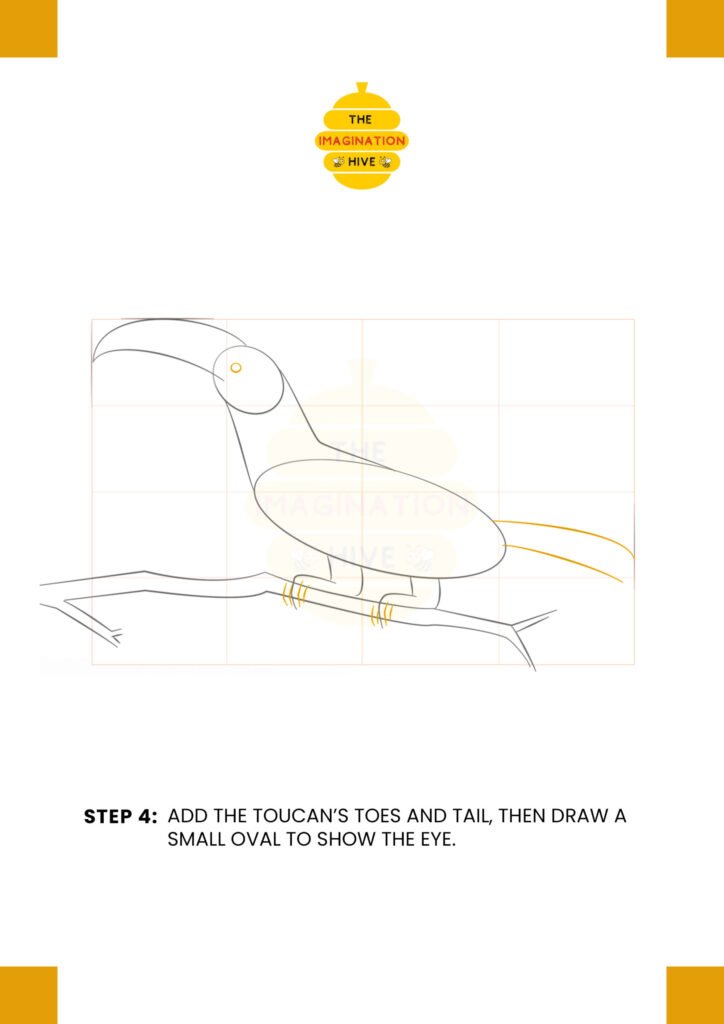
Draw the toes gripping the branch and sketch the long tail extending from the back of the body. Add a small oval inside the head to show the eye.
Short Tip: Wrap the toes around the branch.
This will help the toucan look like it’s naturally sitting and holding onto the branch.
Step 5 : Draw the Lower Beak and Wing
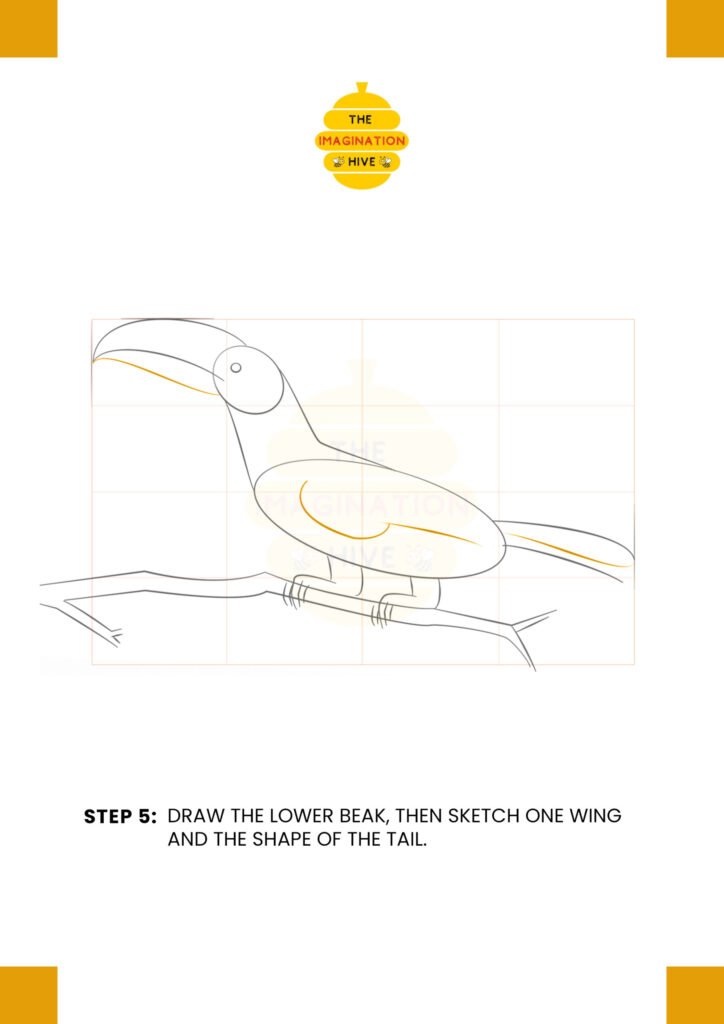
Outline the lower beak and refine the upper beak’s curve. Then draw a curved shape inside the body to form the wing. Shape the tail more clearly.
Short Tip: Keep the beak smooth and bold.
A clean beak outline makes the drawing instantly recognizable.
Step 6 : Refine the Beak, Belly, Legs, and Tail
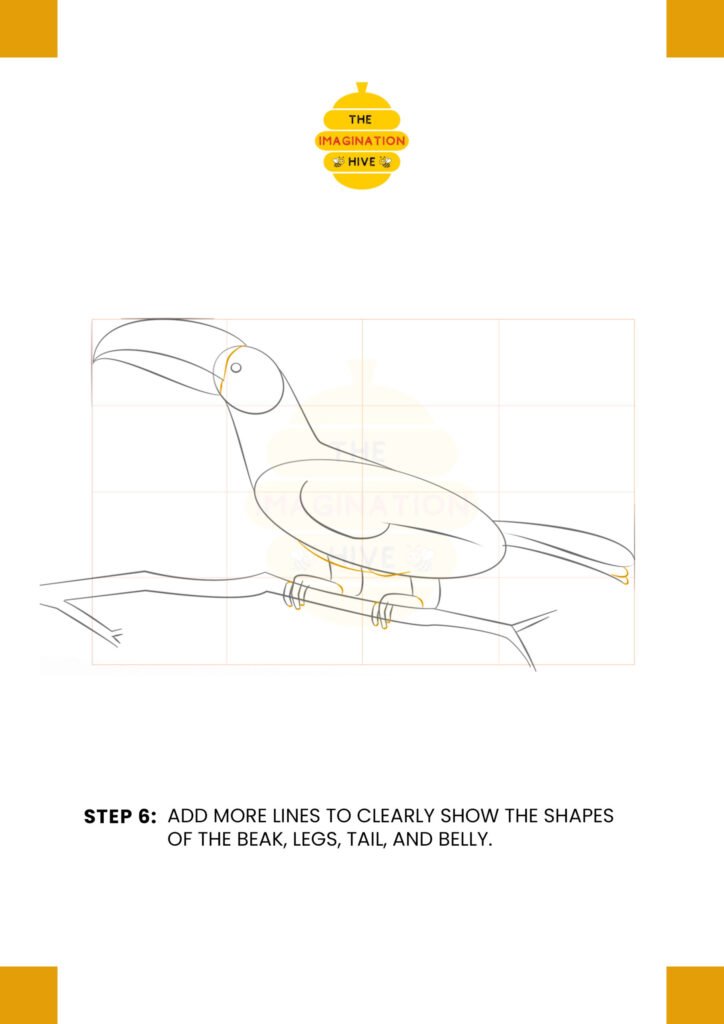
Add more definition to the beak, belly curve, legs, and tail feathers. Refine the claws so they look strong and curved.
Short Tip: Compare both sides carefully.
Balanced shapes make your drawing look more professional and neat.
Step 7 : Add Final Details to the Head and Body
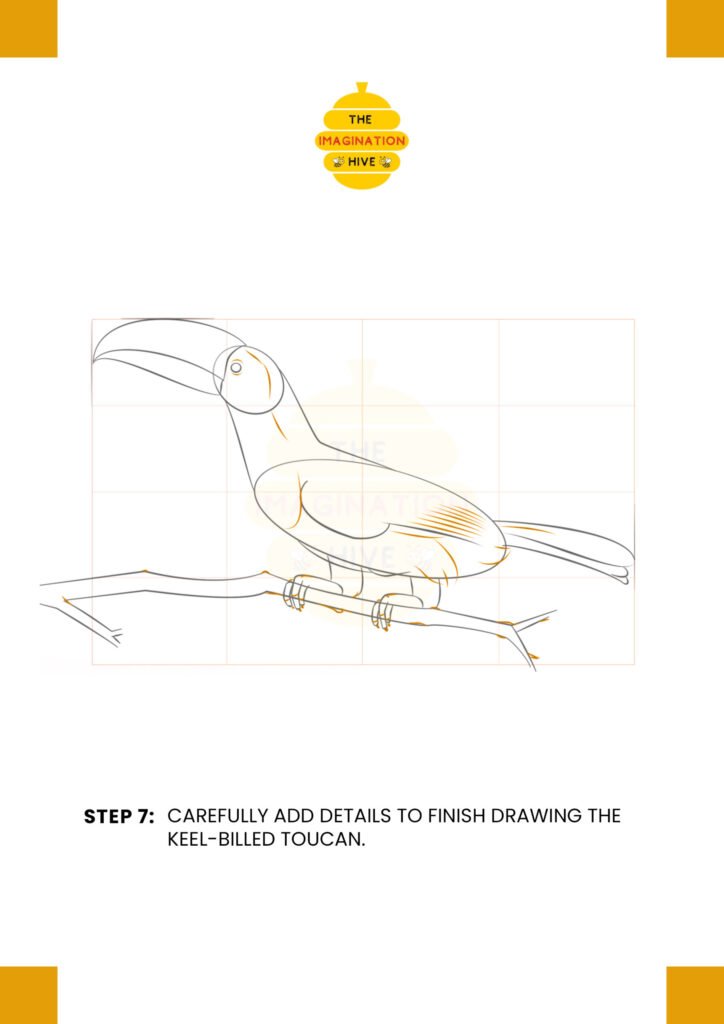
Refine the eye, smooth the body lines, and adjust the neck and wing curves. Clean up any uneven areas.
Short Tip: Focus on clean outlines.
Neat line work makes your drawing stand out even without shading.
Step 8 : Outline and Finish the Drawing
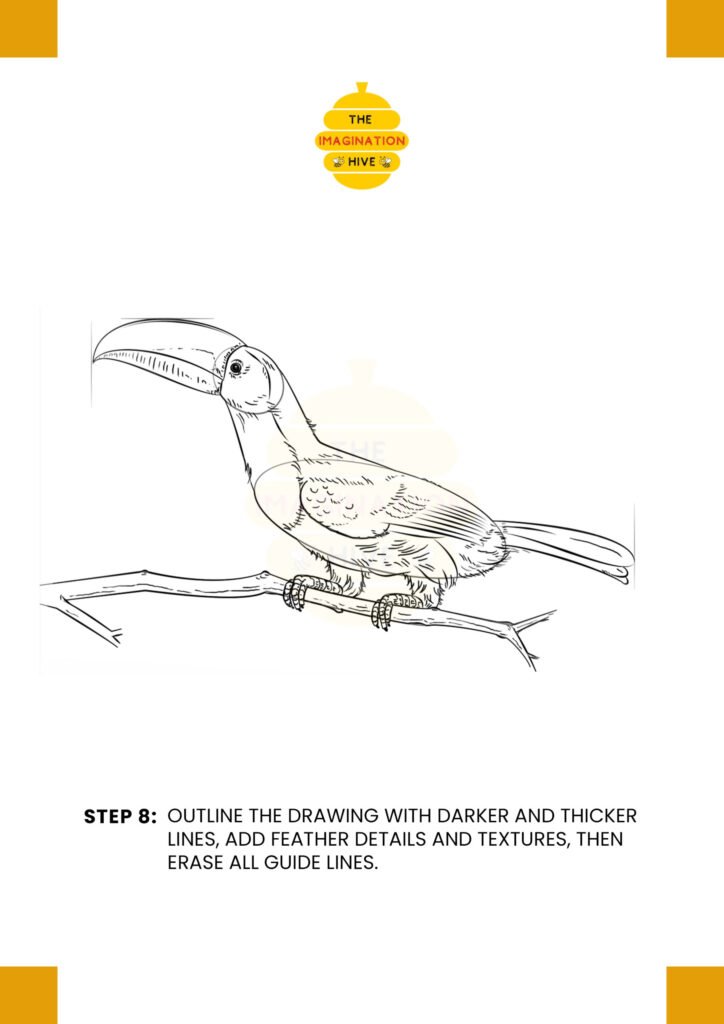
Go over the final lines with darker strokes. Add small details and texture to the branch and feathers. Finally, erase all remaining guidelines.
Short Tip: Use thicker outer lines and thinner inner lines.
This creates depth and makes your toucan drawing look complete and polished.