Learn how to draw a sea otter relaxing on the water by starting with simple shapes and slowly adding details and texture.
Step 1:
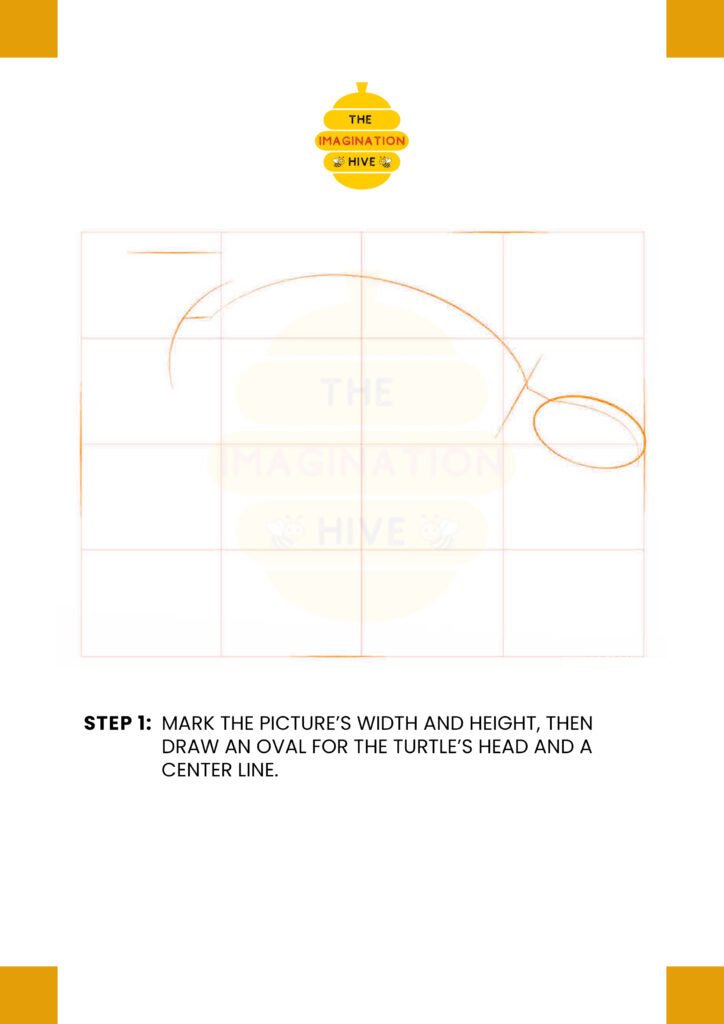
Mark the picture’s width and height, then draw an oval for the turtle’s head and a center line.
Short tip: Keep the lines light and loose so you can adjust the proportions easily later.
Step 2:
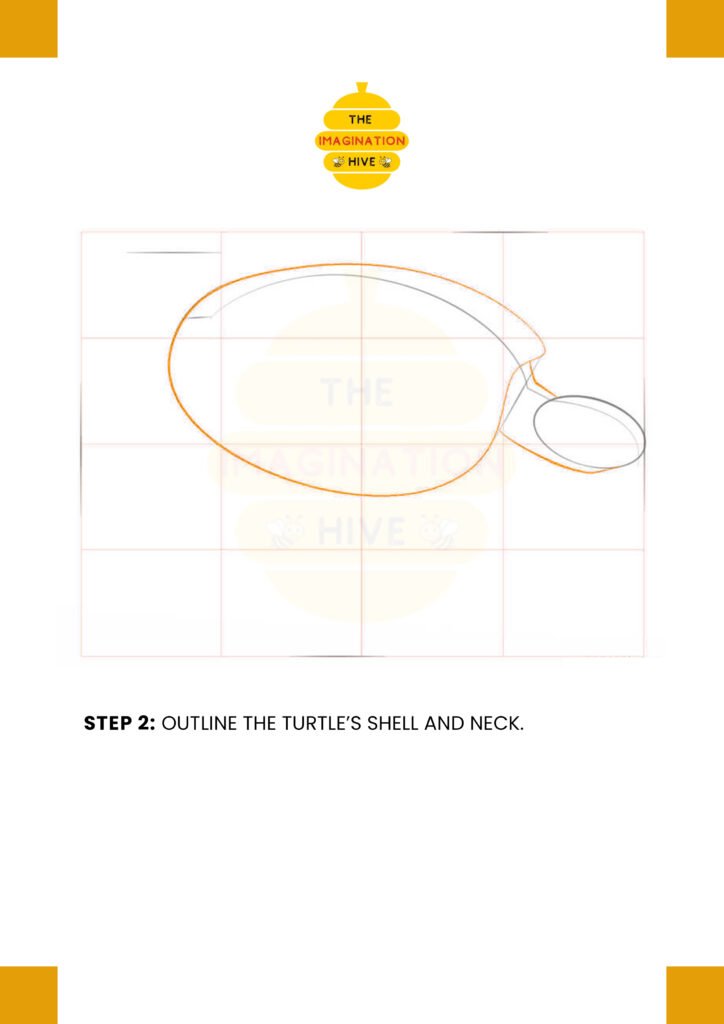
Outline the turtle’s shell and neck.
Short tip: Use smooth, curved lines to give the shell a natural, rounded shape.
Step 3:

Add guidelines showing where the turtle’s legs and mouth will go.
Short tip: Curved leg guidelines help suggest a gentle swimming motion.
Step 4:
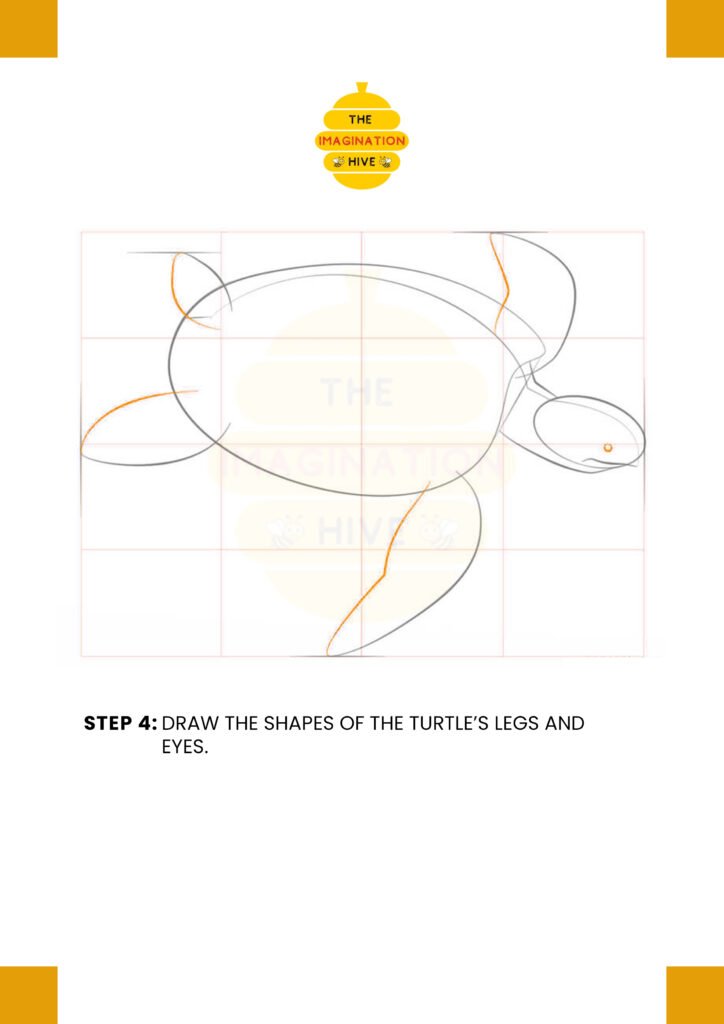
Draw the shapes of the turtle’s legs and eyes.
Short tip: Keep the flippers wide and flat — sea turtles have paddle-like legs.
Step 5:
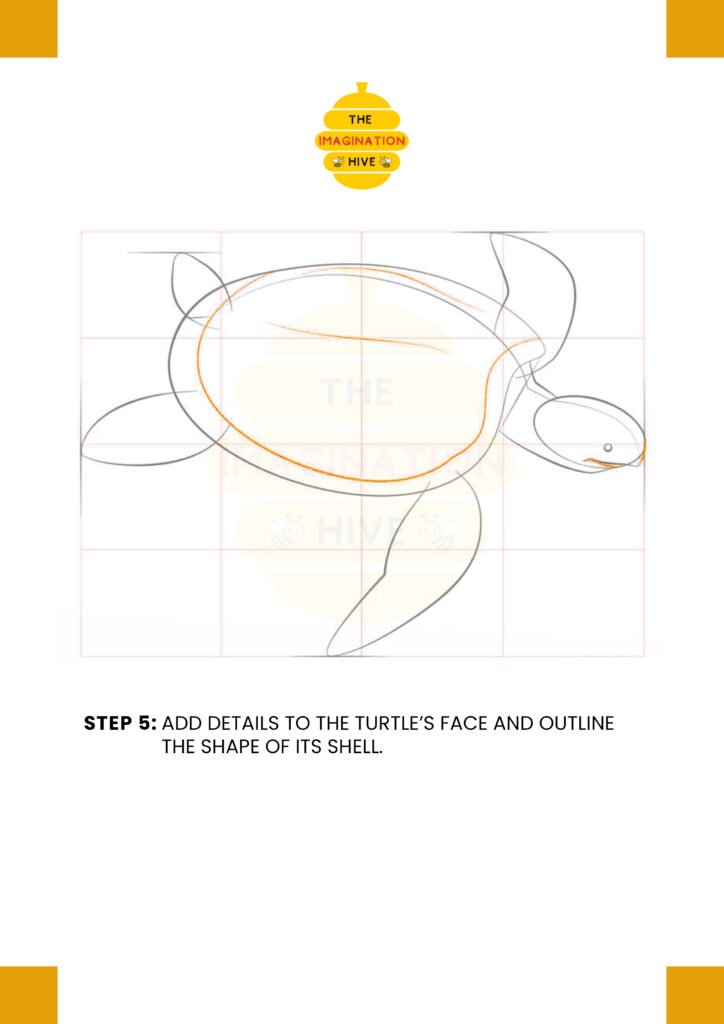
Add details to the turtle’s face and outline the shape of its shell.
Short tip: Small facial details like the eye and mouth bring the turtle to life.
Step 6:
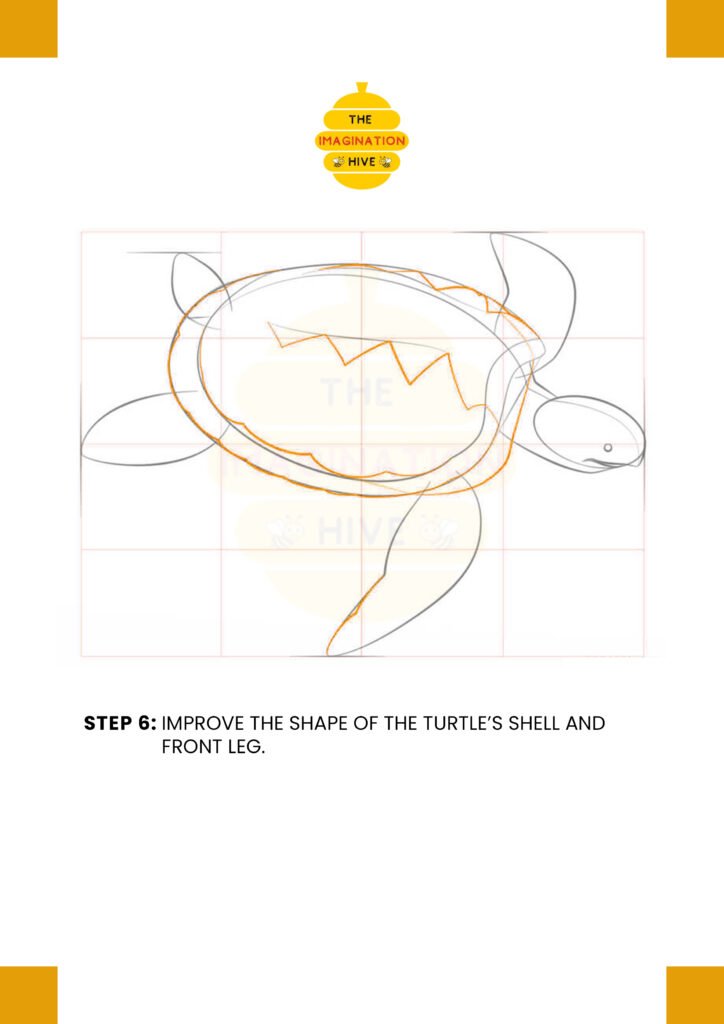
Improve the shape of the turtle’s shell and front leg.
Short tip: Refine the curves and edges to make the shell look solid and realistic.
Step 7:
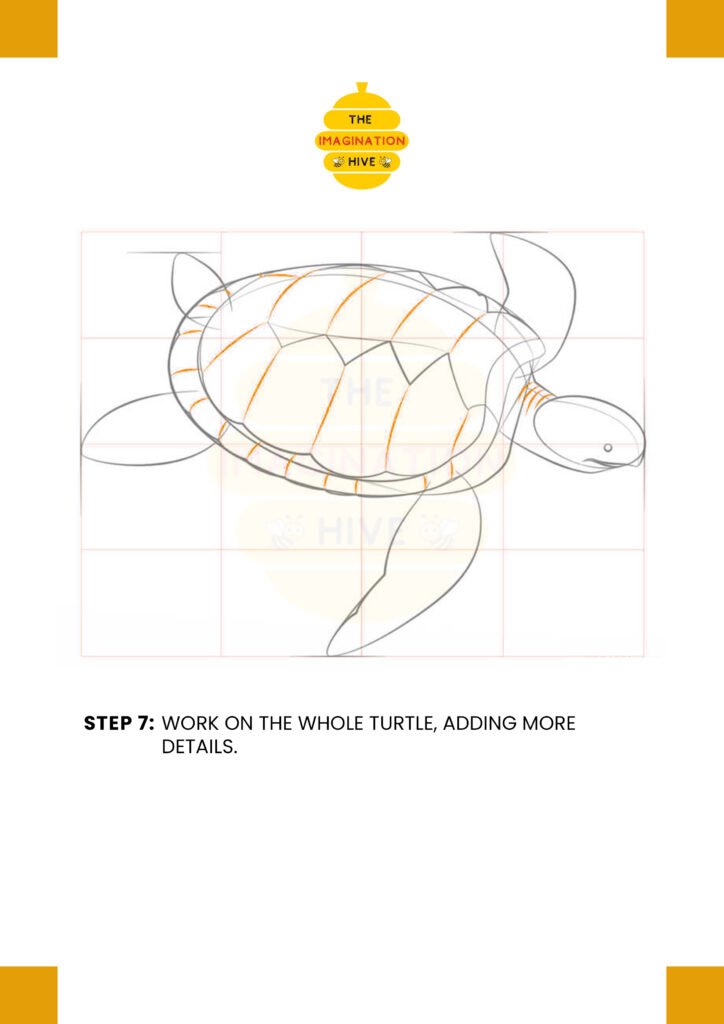
Work on the whole turtle, adding more details.
Short tip: Add shell patterns and texture lines carefully without overcrowding the drawing.
Step 8:
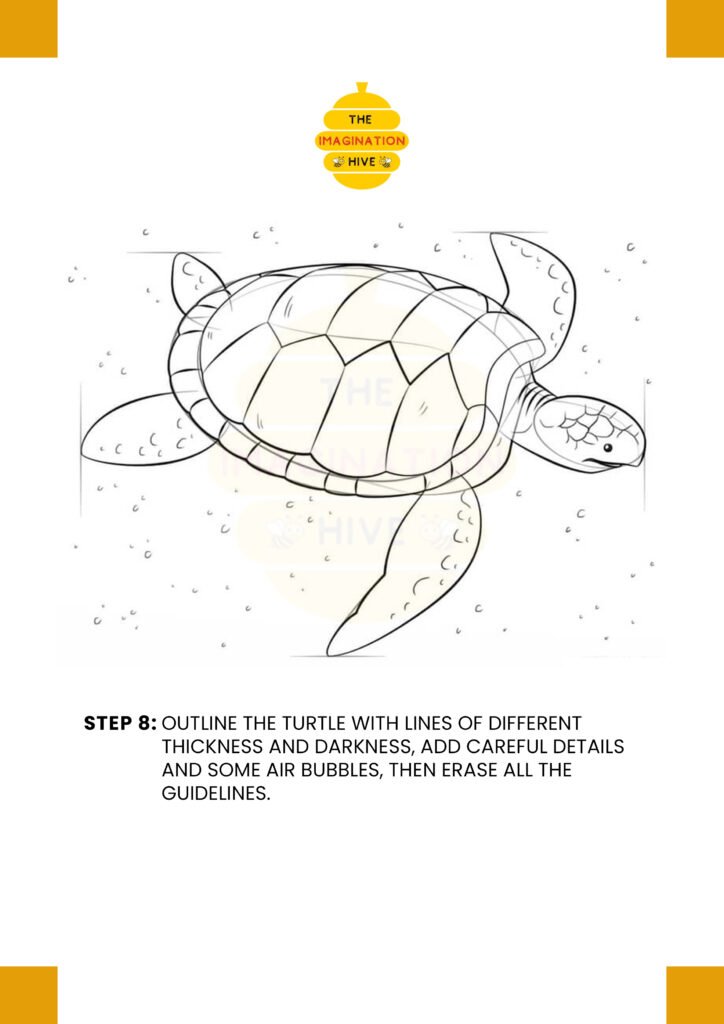
Outline the turtle with lines of different thickness and darkness, add careful details and some air bubbles, then erase all the guidelines.
Short tip: Thicker outer lines and thinner inner details give the drawing a clean, finished look.