In this step-by-step tutorial, you’ll learn how to draw a possum by building its shape with simple forms and slowly refining the details to create a natural pose on a tree branch.
STEP 1: Draw the Basic Head and Body Shapes
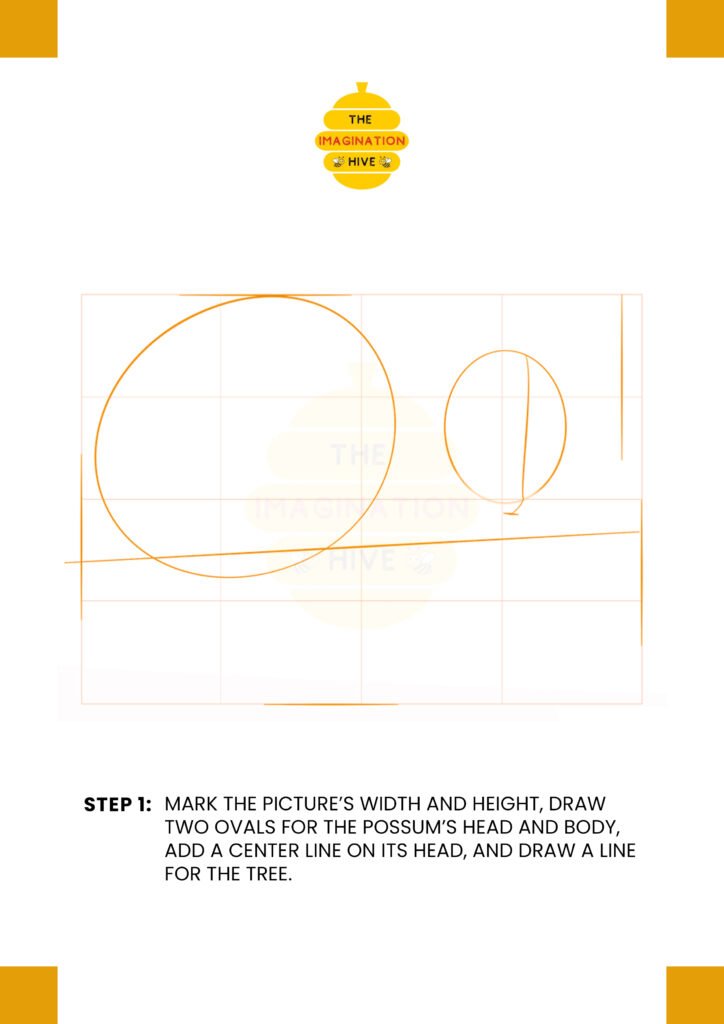
Mark the picture’s width and height first. Draw two ovals—one large oval for the possum’s body and a smaller oval for the head. Add a center line on the head and draw a straight line to represent the tree branch.
Short tip:
Keep all construction lines light so they’re easy to erase later.
STEP 2: Shape the Body, Neck, and Tail Guideline
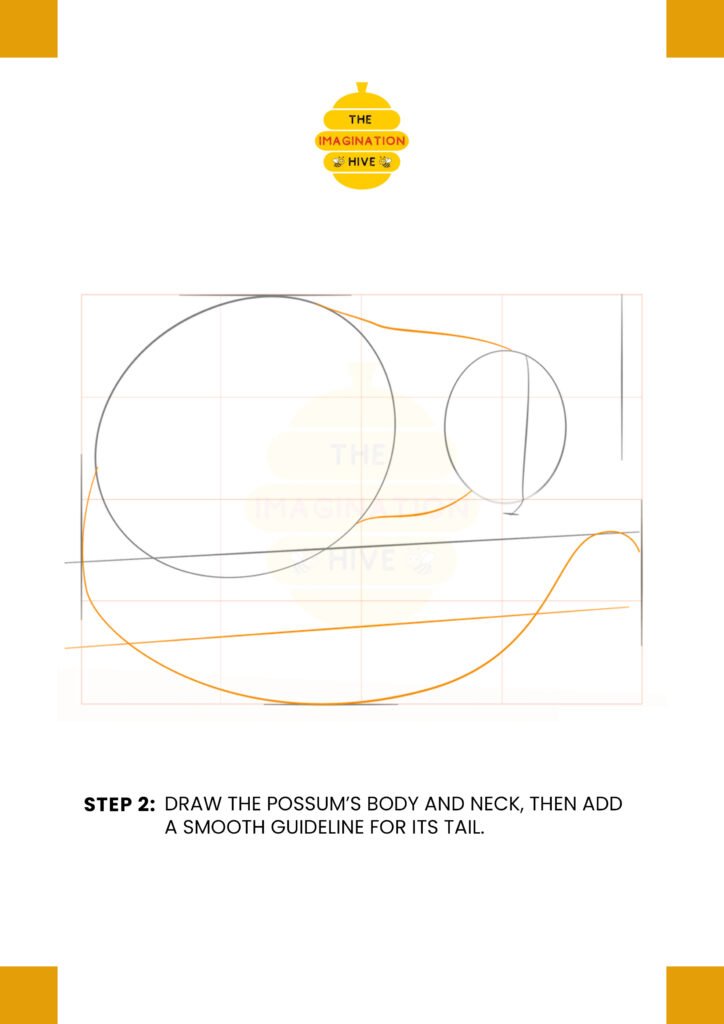
Connect the head to the body with smooth lines to form the neck. Then draw a long, curved guideline to show the direction and flow of the possum’s tail.
Short tip:
Use smooth curves to keep the body looking soft and flexible.
STEP 3: Add Guidelines for Legs, Eyes, and Snout
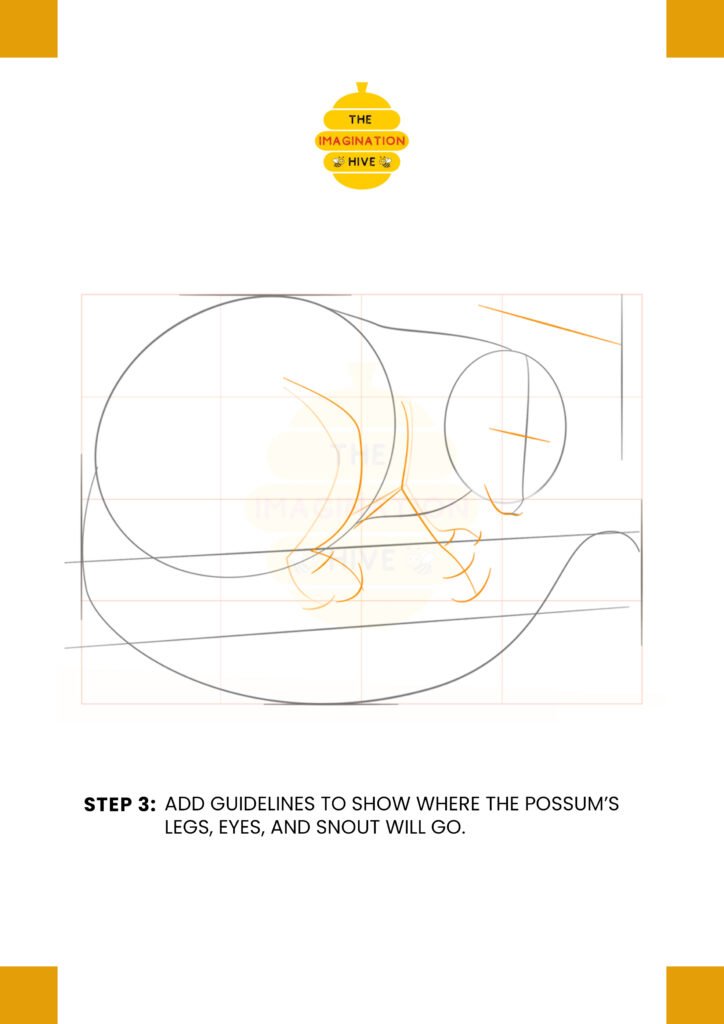
Sketch light guide lines to show where the legs will bend, where the eyes will sit, and how the snout will extend from the head.
Short tip:
Guidelines help you place features accurately before adding details.
STEP 4: Sketch the Legs, Feet, Snout, and Ears
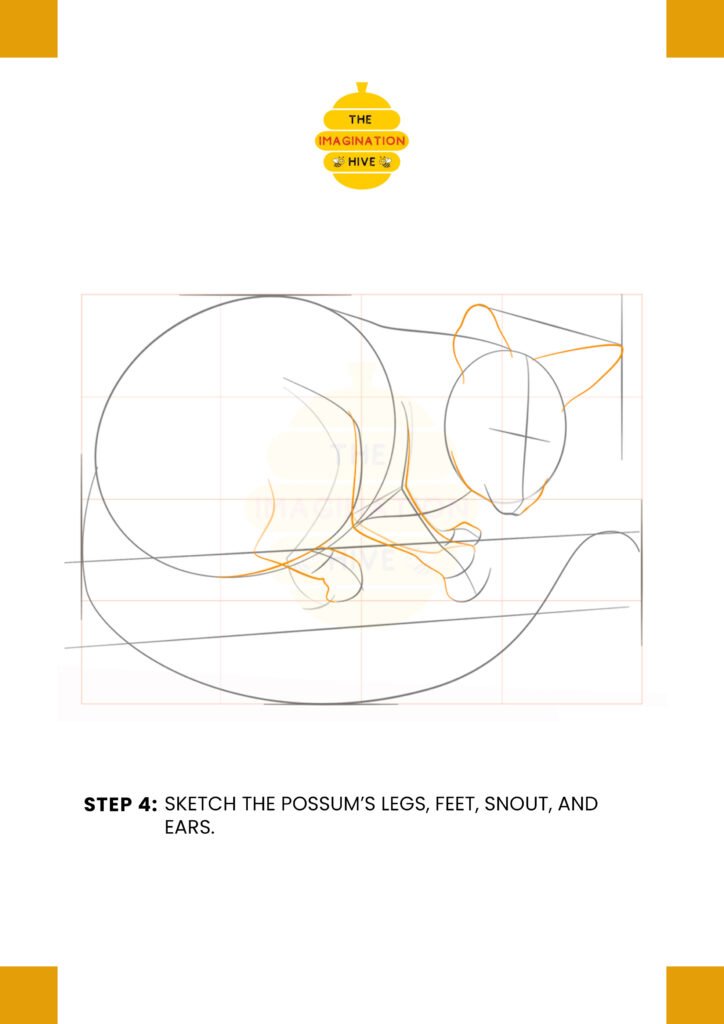
Start shaping the possum’s legs and feet as it grips the branch. Draw the snout and outline the large ears using the head shape as a guide.
Short tip:
Keep the shapes simple and rounded at this stage.
STEP 5: Add Eyes, Tail, Ear Details, Nose, and Toes
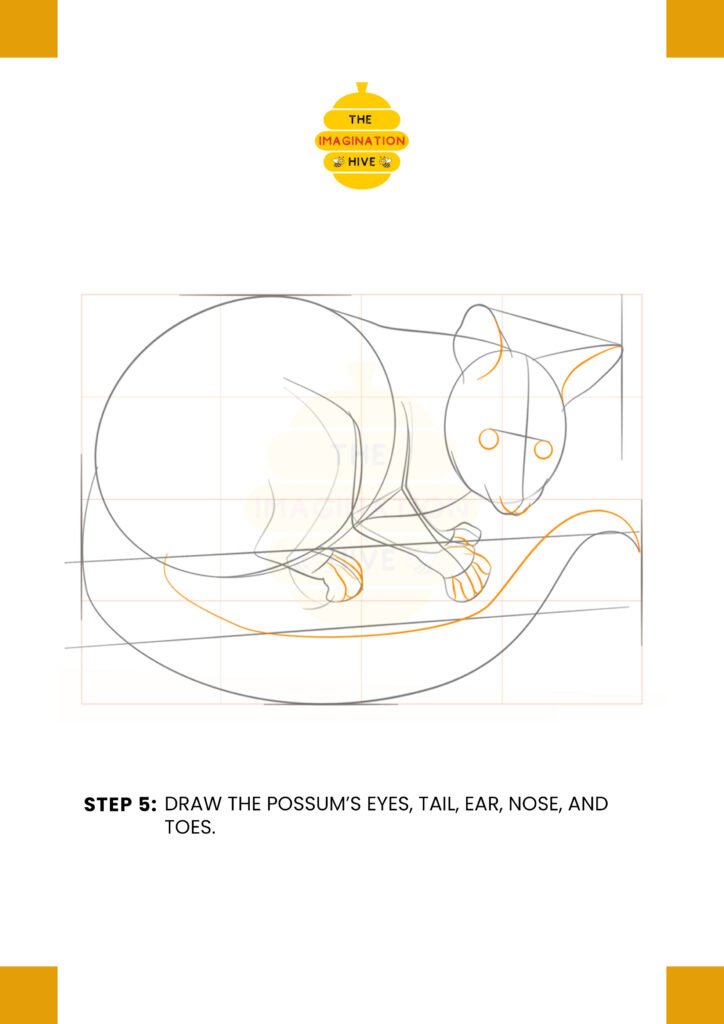
Draw the eyes, refine the ears, shape the nose, add toes to the feet, and begin defining the tail more clearly.
Short tip:
Small details bring the drawing to life—add them gradually.
STEP 6: Refine the Drawing and Add Claws
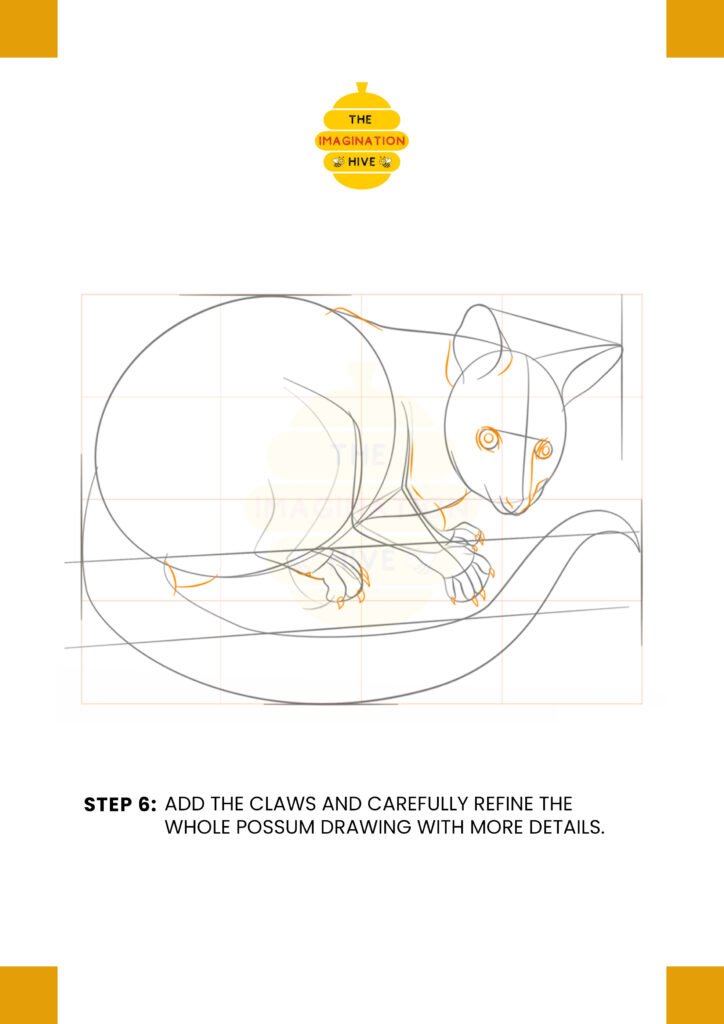
Carefully refine the entire possum by adding claws, smoothing outlines, and improving the body proportions and facial details.
Short tip:
Work slowly and cleanly to avoid messy lines.
STEP 7: Final Outline and Cleanup
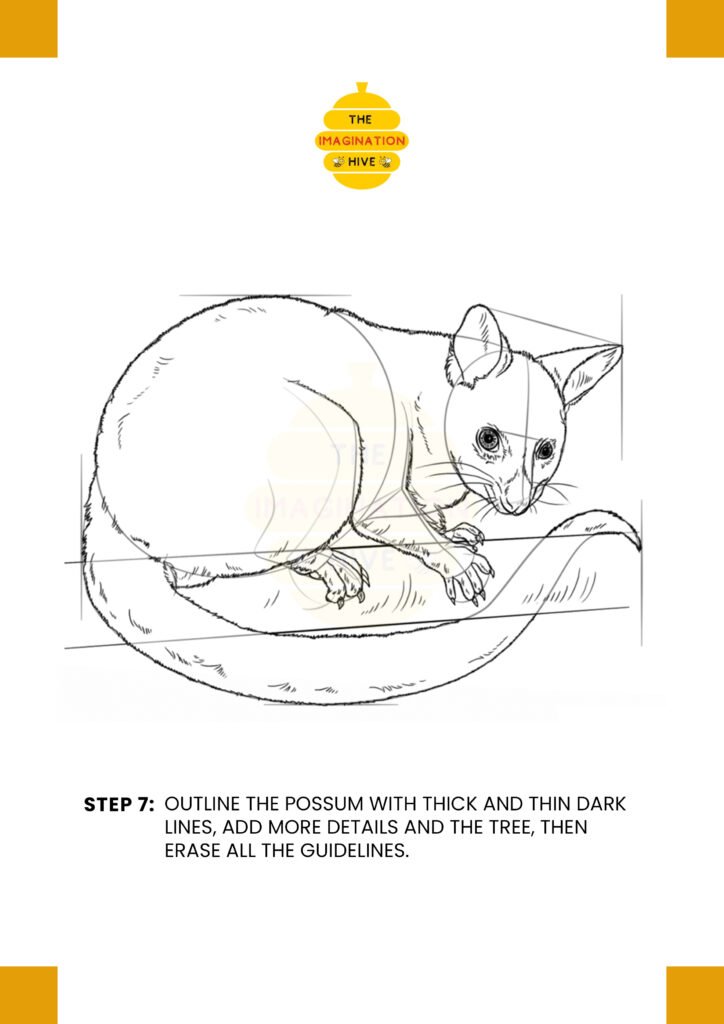
Outline the possum using thick and thin dark lines, add fur texture and tree details, then erase all remaining guidelines to finish the drawing.
Short tip:
Varying line thickness gives the drawing depth and a polished look.