Learn how to draw a sea otter relaxing on the water by starting with simple shapes and slowly adding details and texture.
Step 1:
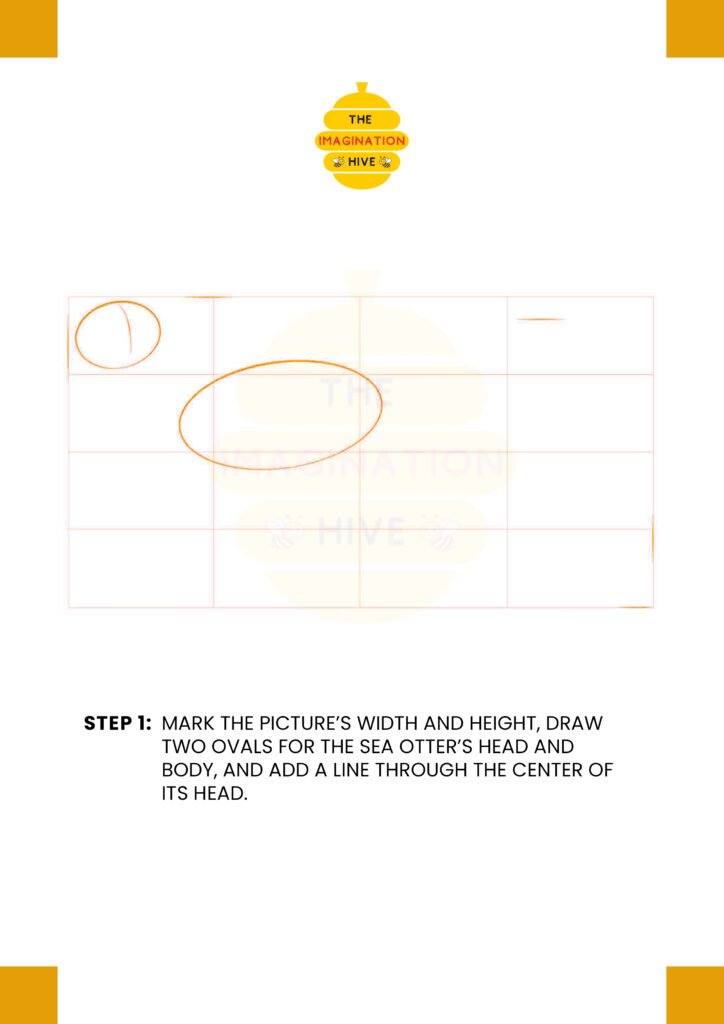
Mark the picture’s width and height, draw two ovals for the sea otter’s head and body, and add a line through the center of its head.
Short tip: Keep the head oval slightly smaller than the body to maintain cute proportions.
Step 2:
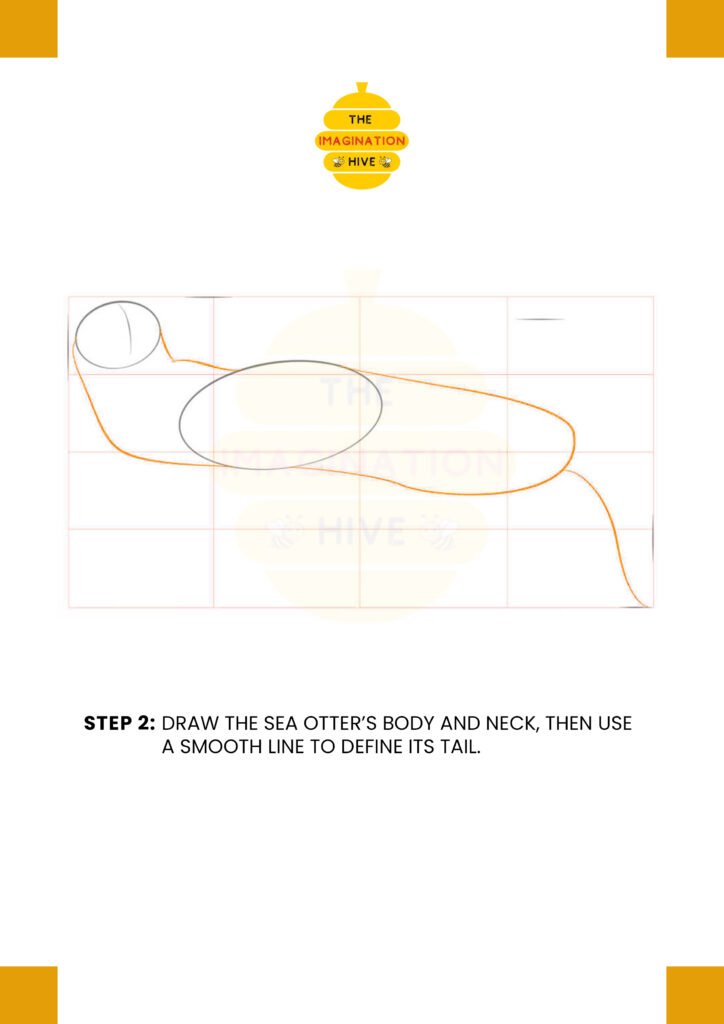
Draw the sea otter’s body and neck, then use a smooth line to define its tail.
Short tip: Use long, curved lines to give the otter a floating, relaxed look.
Step 3:
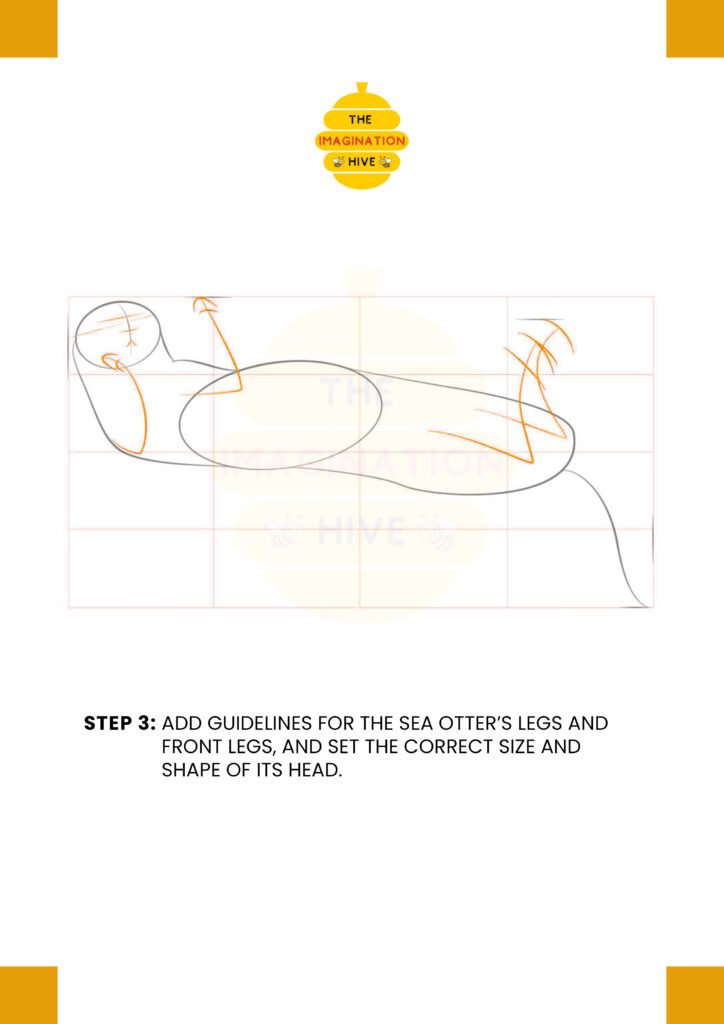
Add guidelines for the sea otter’s legs and front legs, and set the correct size and shape of its head.
Short tip: Position the legs upward to show the otter resting on its back.
Step 4:
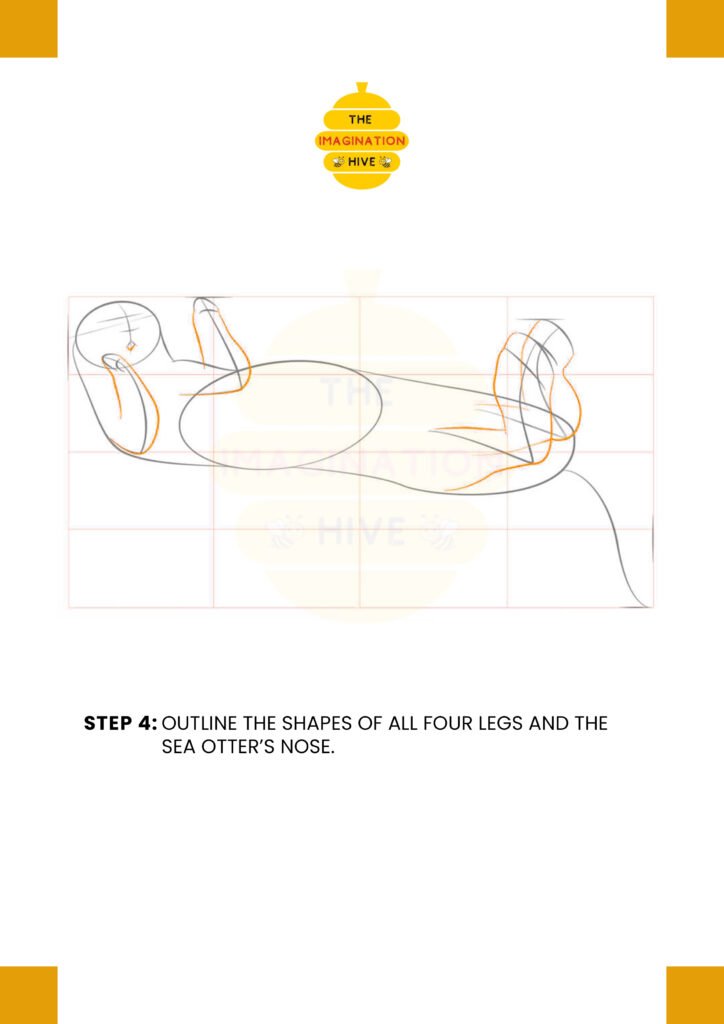
Outline the shapes of all four legs and the sea otter’s nose.
Short tip: Keep the paws rounded and soft to match the otter’s fluffy appearance.
Step 5:
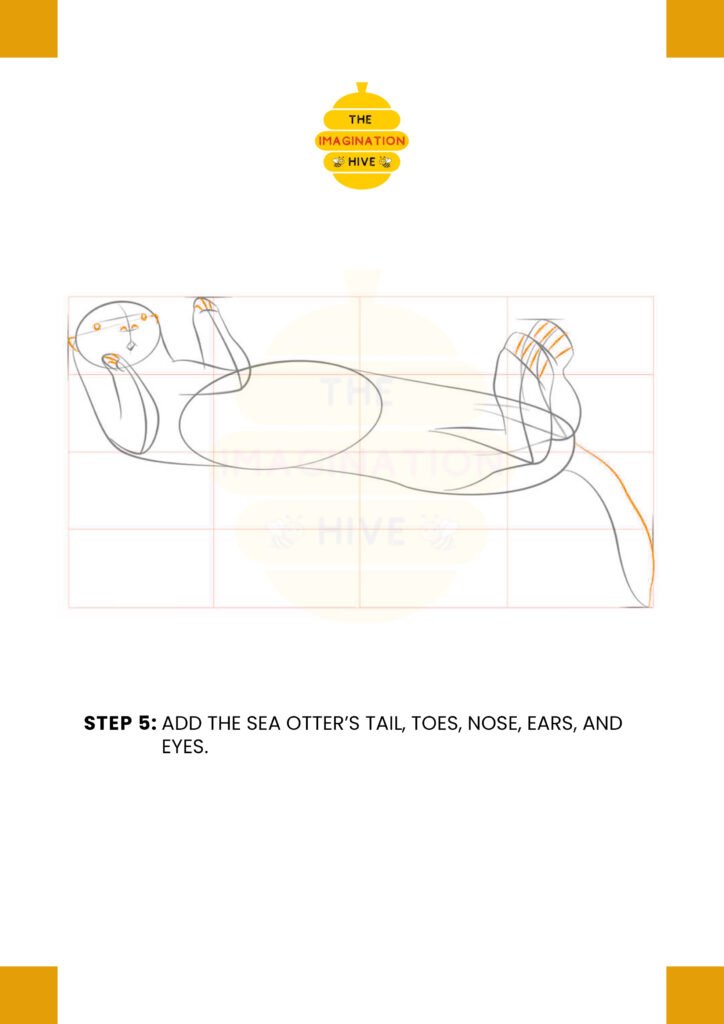
Add the sea otter’s tail, toes, nose, ears, and eyes.
Short tip: Small facial features placed close together help create an adorable expression.
Step 6:

Finish the whole drawing and carefully add the small details.
Short tip: Light fur lines and gentle curves make the otter look soft and natural.
Step 7:
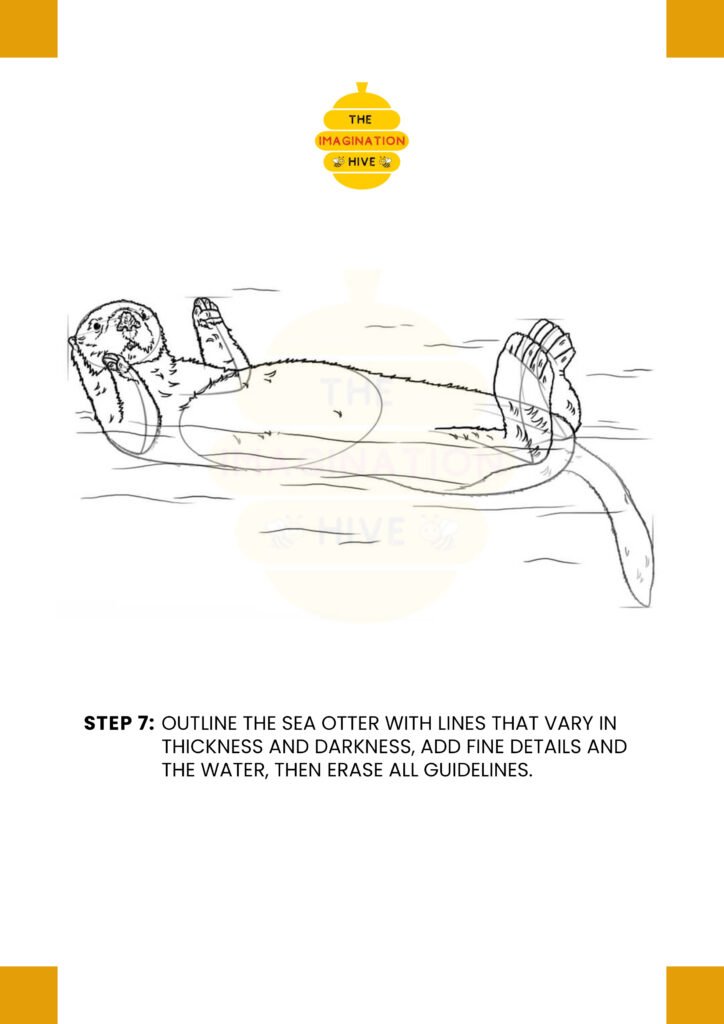
Outline the sea otter with lines that vary in thickness and darkness, add fine details and the water, then erase all guidelines.
Short tip: Thicker outer lines and softer inner details give the drawing a polished finish.