In this simple step-by-step lesson, you’ll learn how to draw an aardvark using basic shapes first, then slowly building up the details. Follow each stage carefully and your drawing will come together smoothly.
STEP 1: Draw the Head and Body Ovals
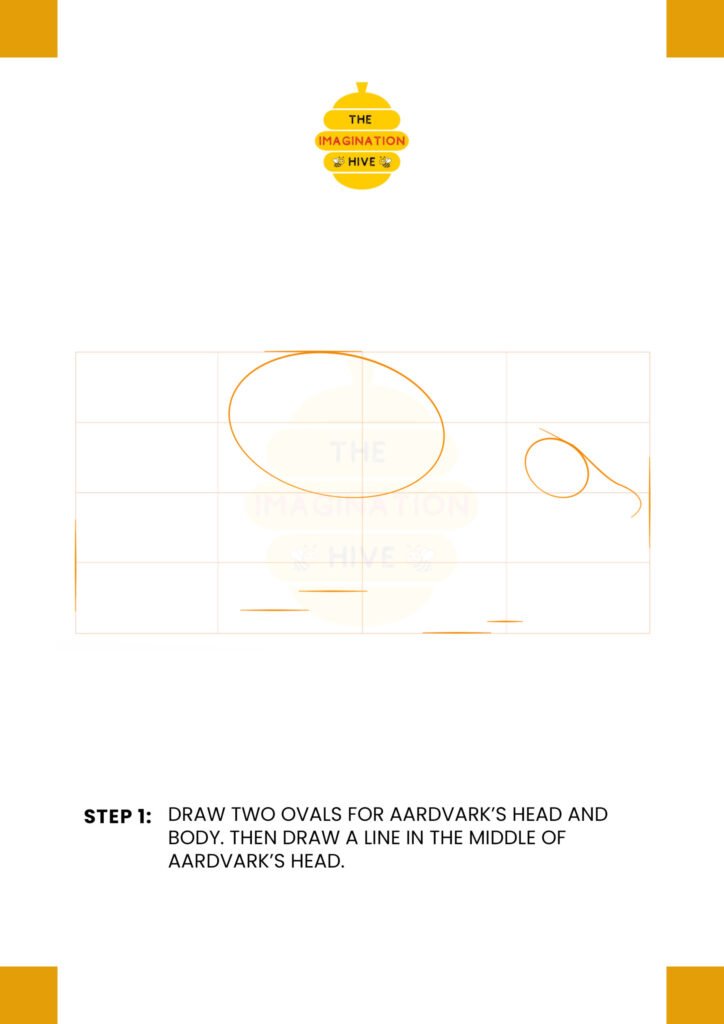
Start by drawing two ovals — a large horizontal oval for the body and a smaller oval for the head. Add a light guideline down the center of the head to help place the facial features later.
Short tip: Keep your sketch light.
Draw softly with a pencil so you can easily erase and adjust the shapes as needed.
STEP 2: Shape the Body and Add the Tail Line
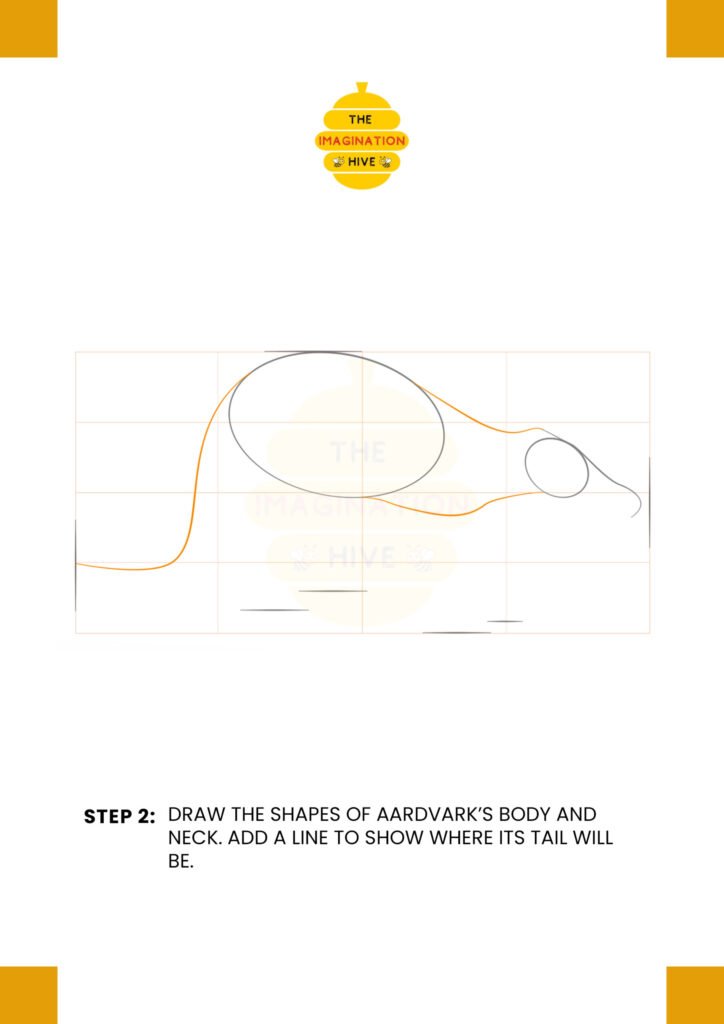
Refine the body by connecting the head and body with smooth lines to form the neck and back. Draw a long curved line extending from the back to show where the tail will be.
Short tip: Use smooth curves.
Avoid sharp corners — aardvarks have rounded, flowing body shapes.
STEP 3: Mark the Legs and Facial Placement
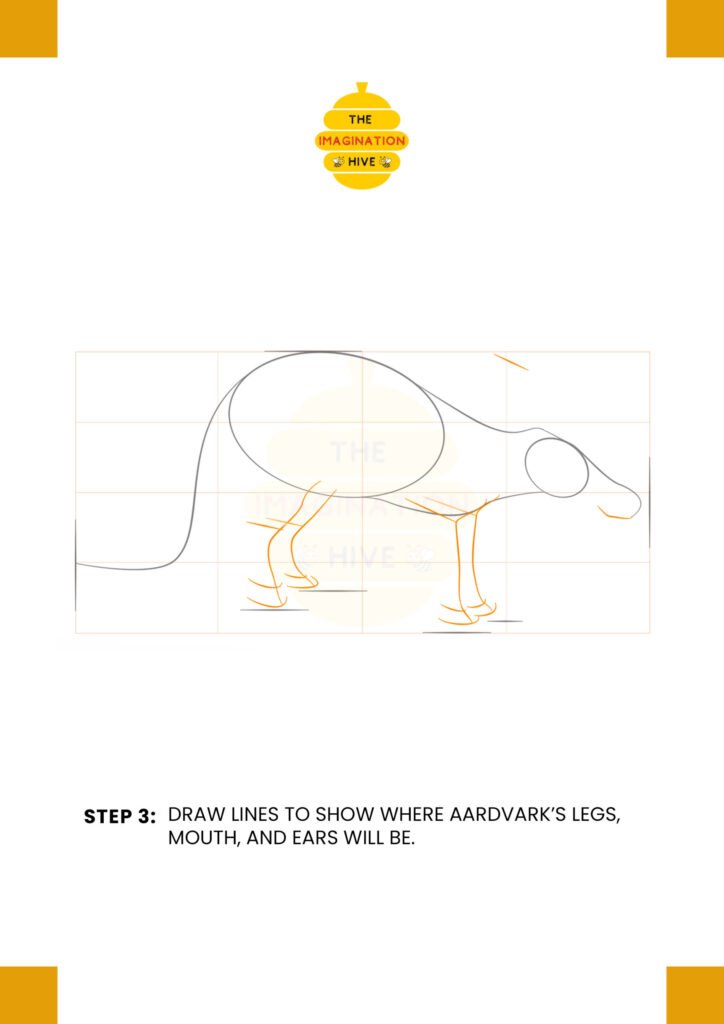
Draw simple guide lines to show where the legs will be positioned. Sketch light marks to indicate the mouth and ear placement on the head.
Short tip: Check balance.
Make sure the legs are spaced evenly so the aardvark looks stable.
STEP 4: Define the Legs, Snout, and Ears
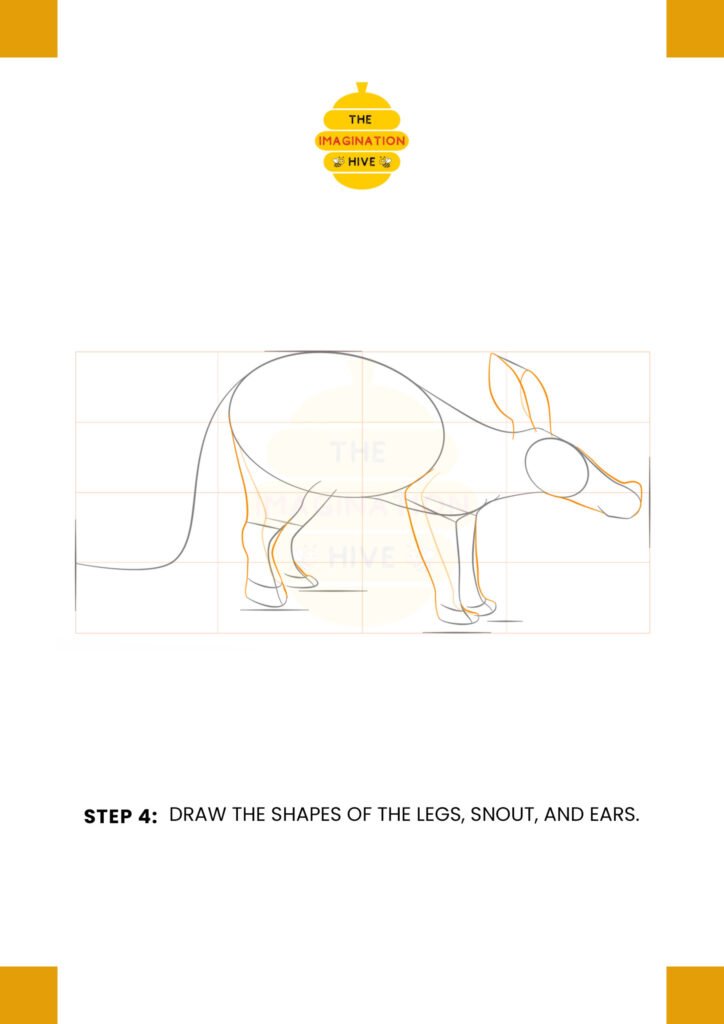
Add thickness to the legs and shape the long snout. Draw the large upright ears on top of the head and refine the body outline.
Short tip: Compare proportions.
The snout should be long and narrow, but not longer than the head itself.
STEP 5: Add Toes, Tail, and Nose Details
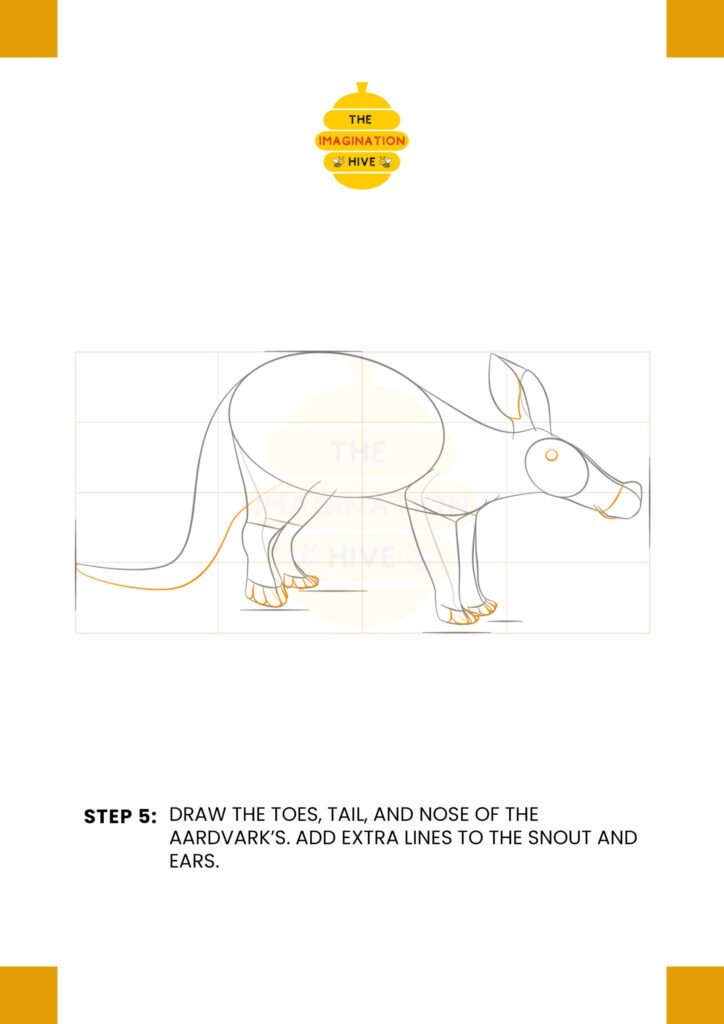
Draw the toes on each foot and refine the tail shape. Add small lines to define the nose and inner ear details.
Short tip: Focus on the feet.
Aardvarks have strong toes and claws, so give them clear shape and definition.
STEP 6: Draw Claws and Facial Details
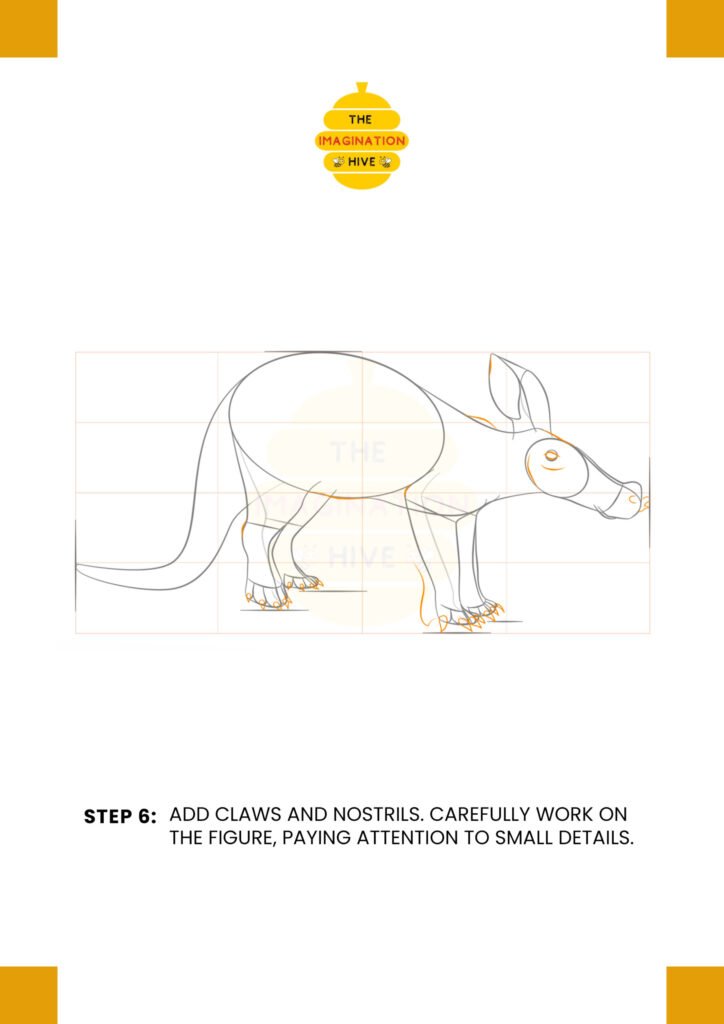
Add sharp claws to each toe. Refine the eye, nostrils, and small facial lines to give the aardvark more character.
Short tip: Keep details neat.
Small, clean lines will make your drawing look more polished.
STEP 7: Final Outline and Finishing Touches
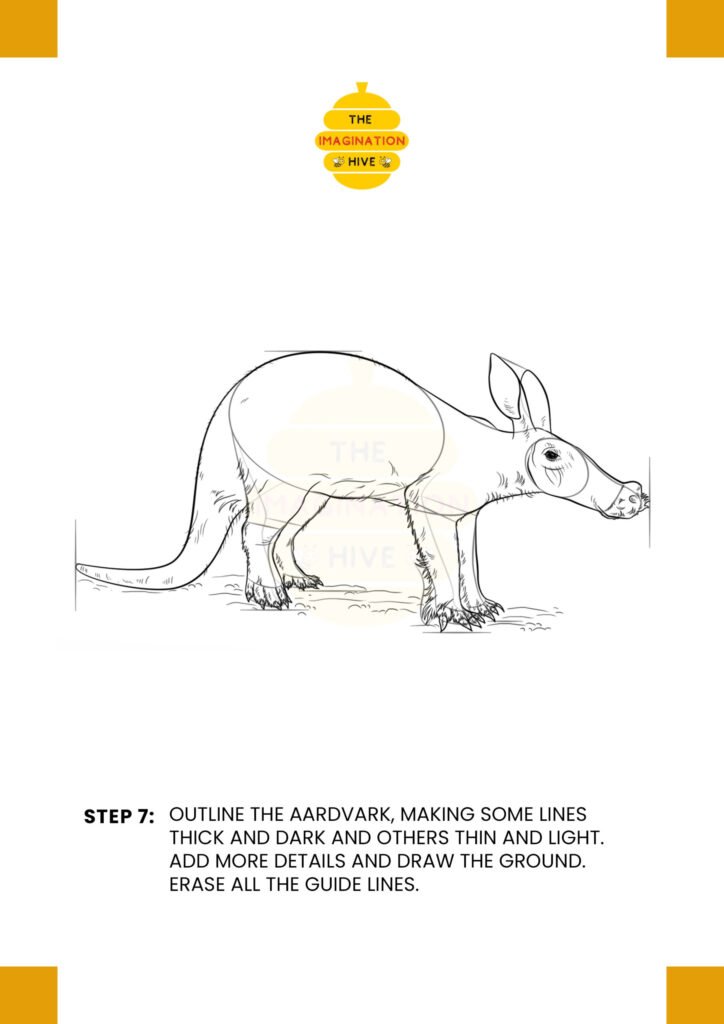
Outline the entire aardvark, making some lines thicker and others thinner for depth. Add texture details and draw the ground beneath the feet. Finally, erase all remaining guidelines.
Short tip: Vary your line weight.
Using thicker and thinner lines will make your aardvark look more realistic and complete.