In this step-by-step tutorial, you’ll learn how to draw a wolverine by starting with simple shapes and guidelines, then slowly refining the body, legs, head, and fur to create a strong, realistic animal pose.
STEP 1: Mark the Picture’s Width and Height

Mark the overall width and height of the drawing area. Draw two ovals for the wolverine’s head and body, add a center line on the head, and sketch the basic shape of the tree beneath it.
Short tip:
Keep all shapes light and loose so adjustments are easy later.
STEP 2: Draw the Body and Neck
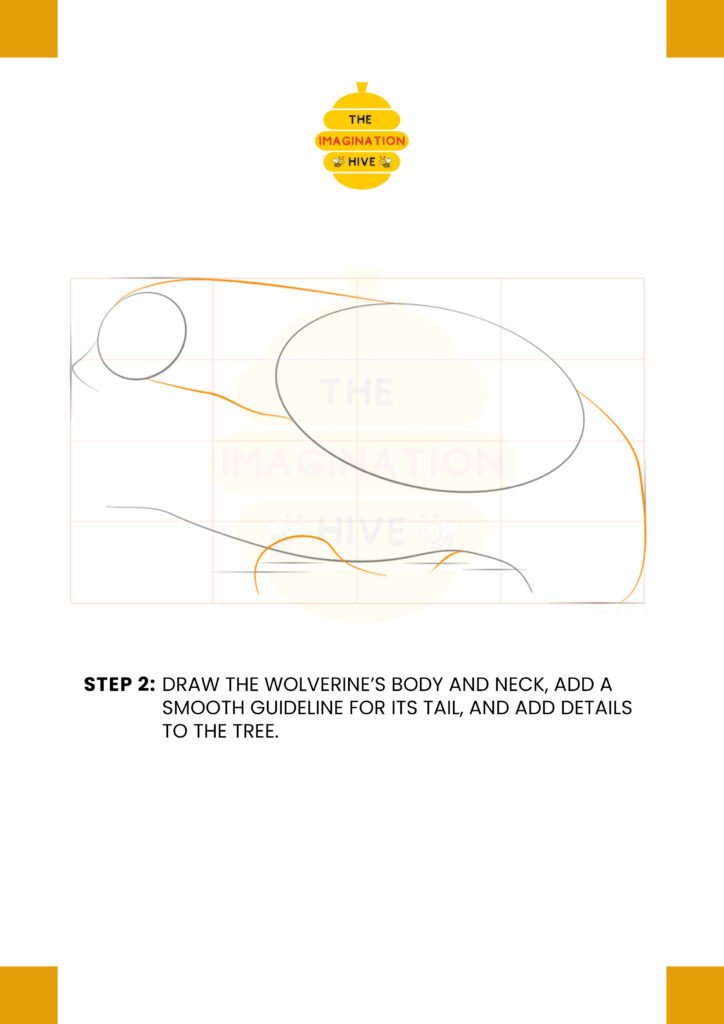
Connect the head and body ovals to form the neck and back. Add a smooth guideline for the tail and refine the tree shape slightly.
Short tip:
Use long, flowing curves to show the wolverine’s heavy body.
STEP 3: Add Guidelines for Legs, Ears, and Snout

Sketch simple guide lines to show where the legs, ears, and snout will be placed. This helps balance the pose and proportions.
Short tip:
Focus on placement, not details, at this stage.
STEP 4: Sketch the Legs, Feet, Snout, and Ears

Begin drawing the legs and feet using the guidelines. Sketch the snout and ears, keeping all forms simple and rounded.
Short tip:
Think of legs as basic tubes before refining their shape.
STEP 5: Draw the Eyes, Tail, Nose, and Toes

Add the eyes, nose, tail, and toes to bring more structure and expression to the wolverine.
Short tip:
Small details work best when added gradually.
STEP 6: Add Claws and Refine the Drawing

Draw the claws and carefully refine the entire wolverine by smoothing lines and improving the shapes of the head, body, and legs.
Short tip:
Refine one area at a time to keep the drawing balanced.
STEP 7: Outline and Finish the Wolverine

Outline the wolverine using thick and thin dark lines. Add fur details and the tree texture, then erase all remaining guidelines.
Short tip:
Varying line thickness gives the drawing depth and realism.
If you’re ready, send the next animal images and I’ll keep this exact same format.