Learn how to draw a warthog by breaking it down into simple shapes and gradually adding details. Follow each step carefully and you’ll have a complete warthog drawing by the end.
STEP 1: Mark the Basic Shapes
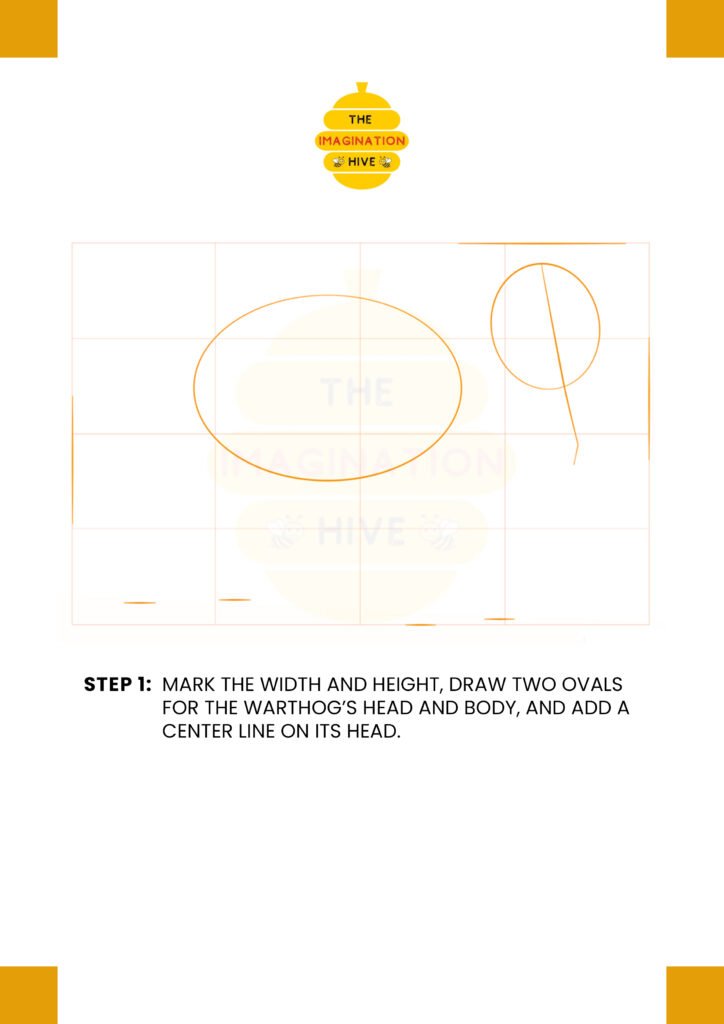
Start by marking the width and height of your drawing area. Draw two ovals—one for the warthog’s body and one for its head—and add a center guideline on the head to help with facial placement.
Short tip:
Keep your lines light so they’re easy to erase later.
STEP 2: Shape the Body and Neck
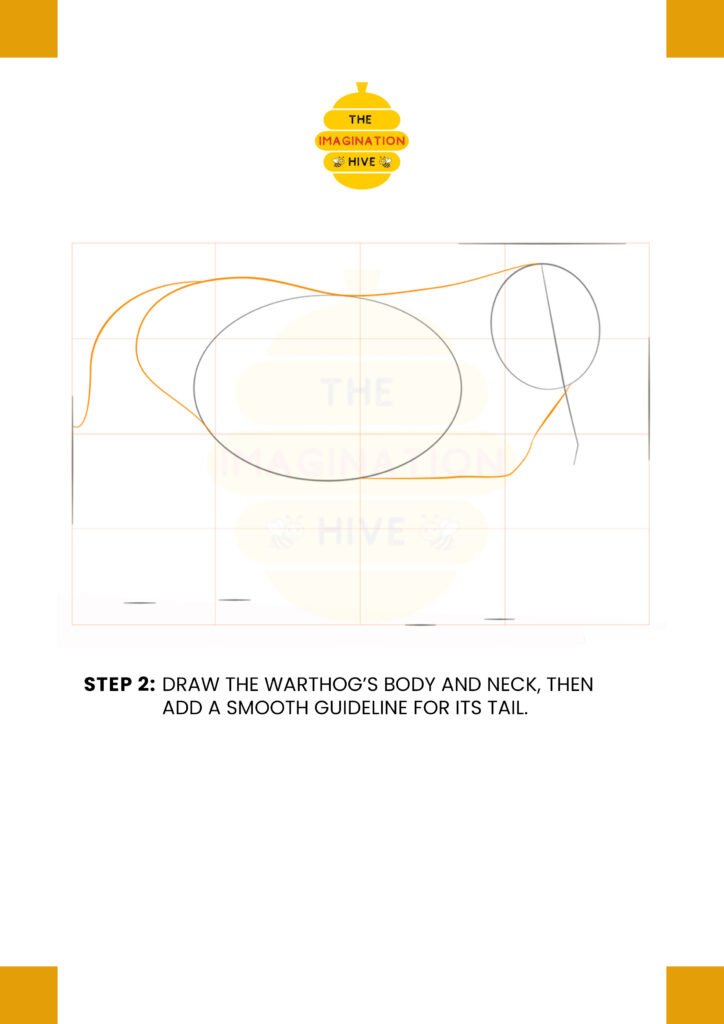
Refine the body by connecting the head and body ovals to form the neck. Add a smooth, flowing guideline at the back for the tail.
Short tip:
Use long, gentle curves to keep the body looking natural.
STEP 3: Add Position Guidelines
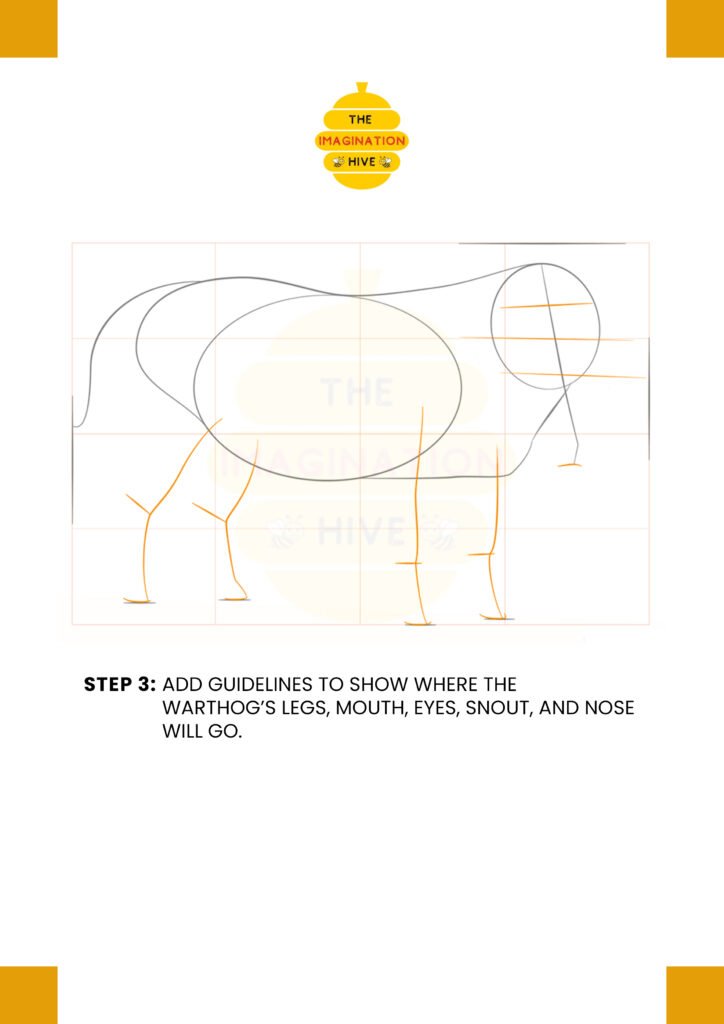
Sketch simple lines to show where the legs, mouth, eyes, snout, and nose will be placed. These guides help keep everything proportional.
Short tip:
Don’t worry about details yet—focus only on placement.
STEP 4: Sketch Legs and Snout
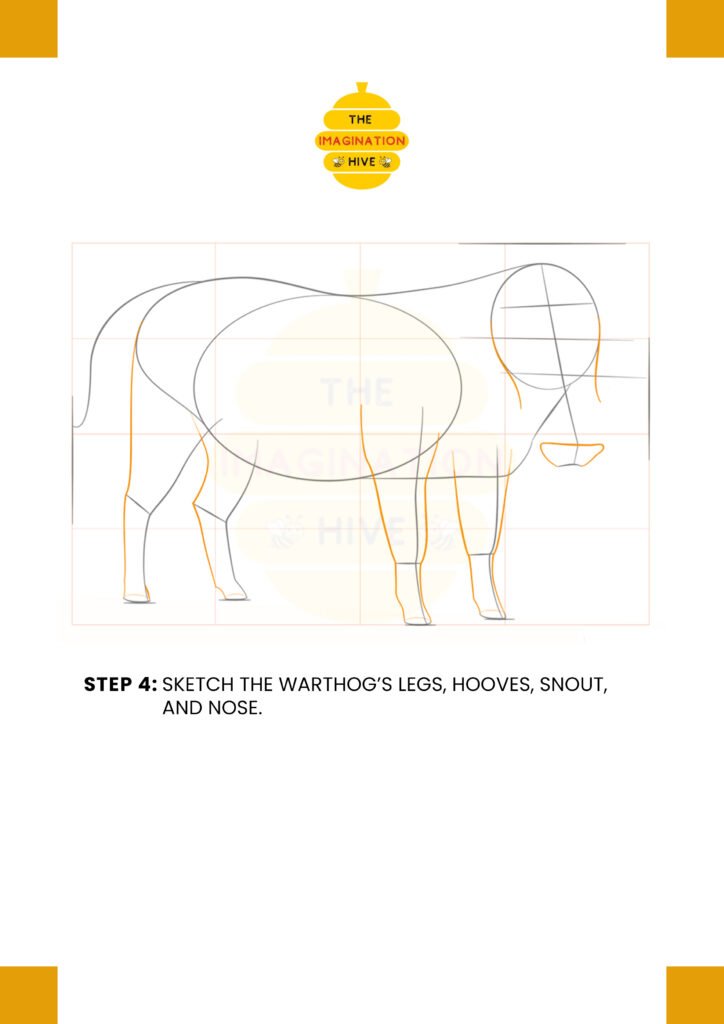
Begin drawing the legs, hooves, snout, and nose using the guidelines as reference. Keep the shapes simple and slightly rounded.
Short tip:
Think of the legs as simple tubes before adding joints.
STEP 5: Outline Tail, Eyes, and Ears
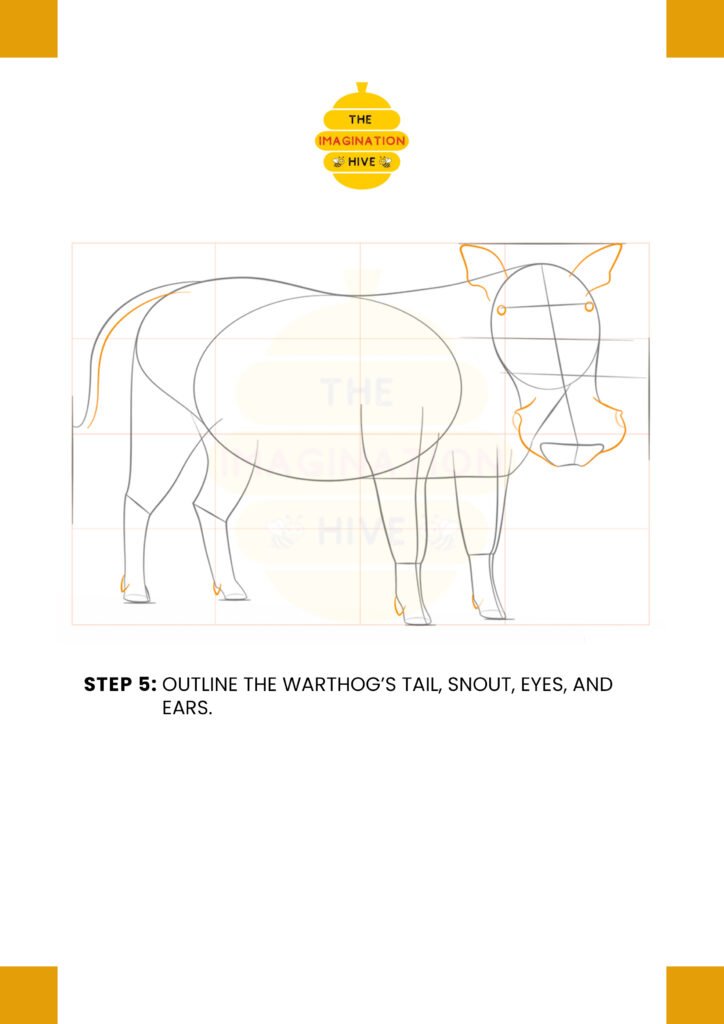
Draw the tail, refine the snout, and add the eyes and ears. This step gives the warthog more personality and expression.
Short tip:
Check symmetry on the face so both sides look balanced.
STEP 6: Add Facial and Body Details
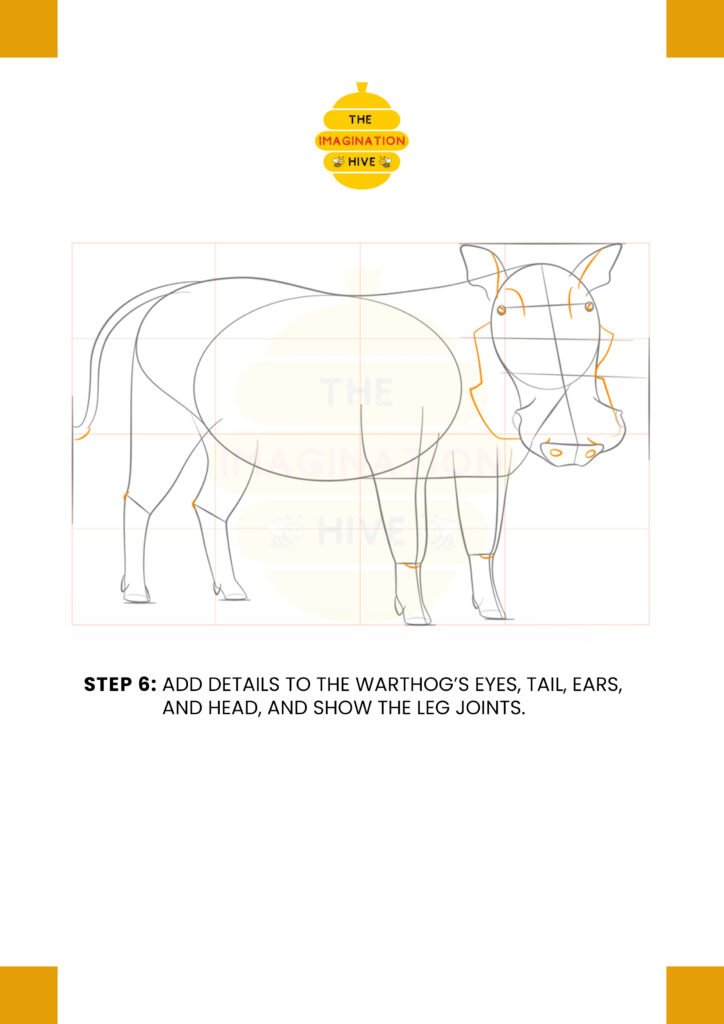
Add more definition to the eyes, ears, head, and tail. Show leg joints and refine the overall body shape.
Short tip:
Build details slowly to avoid overcrowding the drawing.
STEP 7: Draw the Mane and Tusks
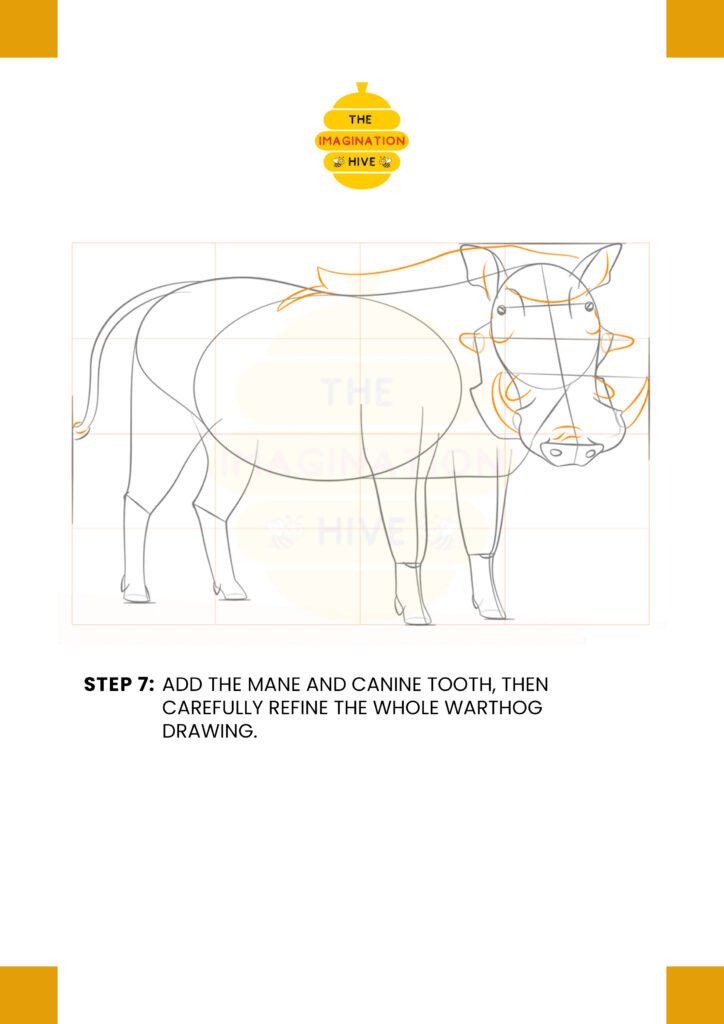
Sketch the mane along the back and add the warthog’s distinctive canine teeth (tusks). Refine the overall form.
Short tip:
Use short strokes for the mane to suggest texture.
STEP 8: Final Outline and Cleanup
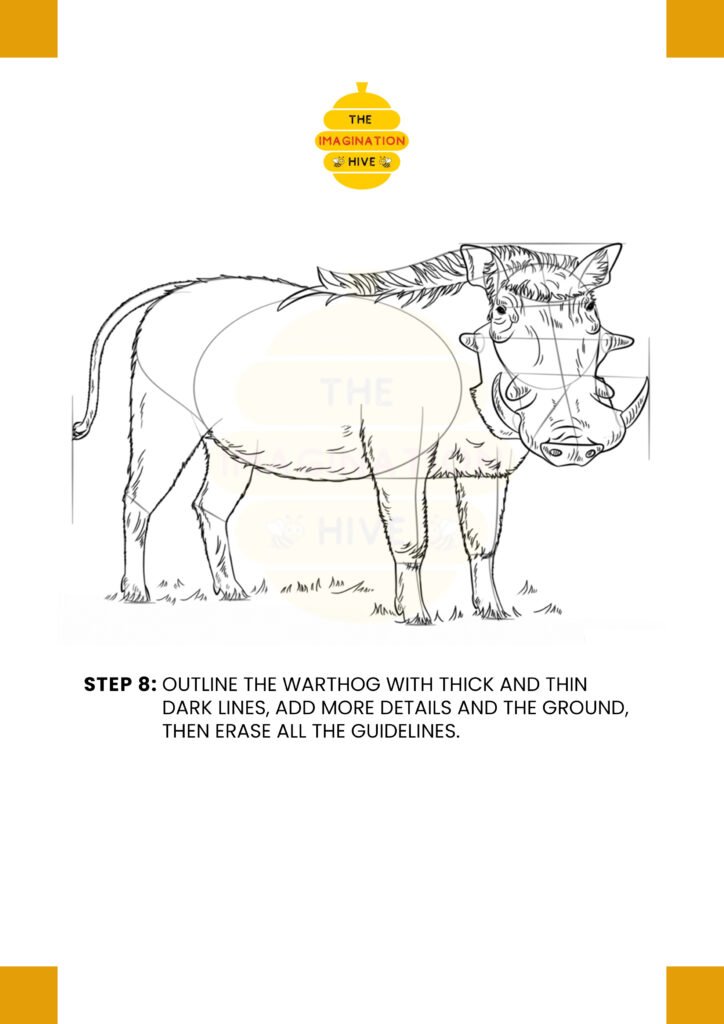
Outline the warthog with thicker, confident lines. Add extra details and ground if desired, then erase all remaining guidelines.
Short tip:
Vary line thickness to make the drawing look more dynamic.