Learn how to draw a Spinosaurus by building its long body, powerful legs, and iconic back sail using simple shapes and smooth lines.
Step 1:
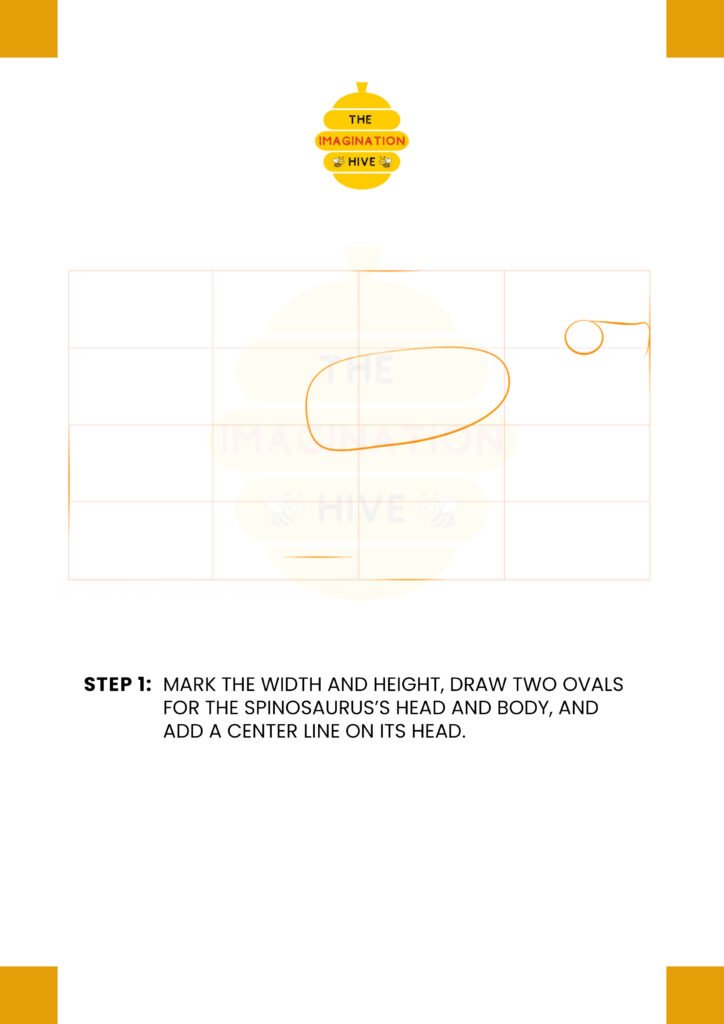
Mark the width and height, draw two ovals for the Spinosaurus’s head and body, and add a center line on its head.
Short tip: Keep the head oval smaller and narrower than the body to match the Spinosaurus’s long-snouted look.
Step 2:
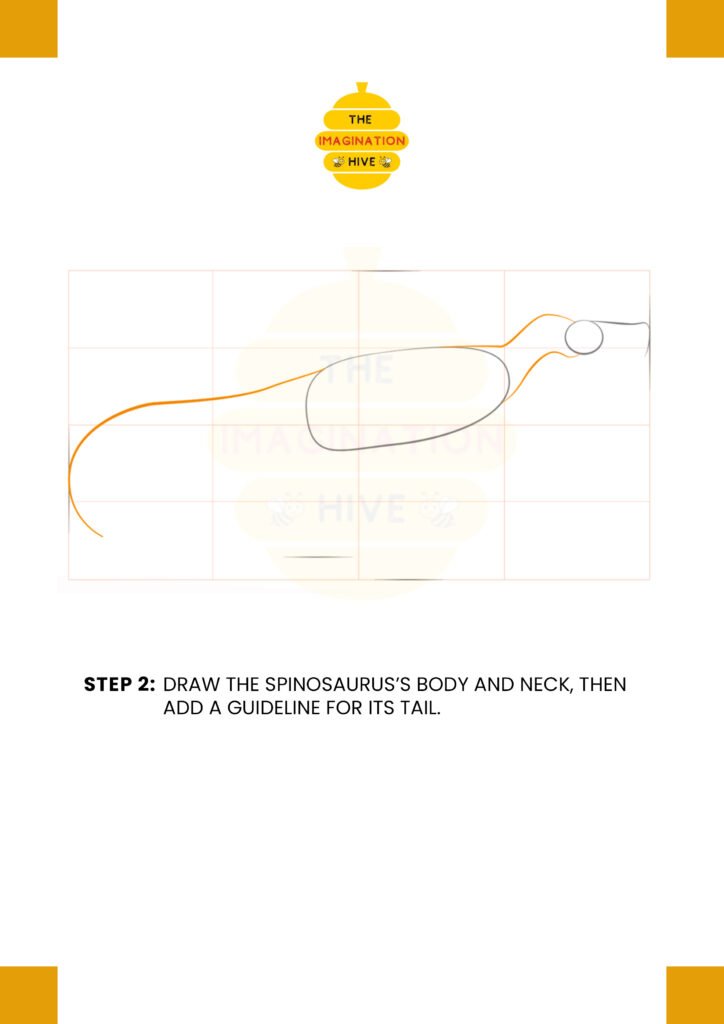
Draw the Spinosaurus’s body and neck, then add a guideline for its tail.
Short tip: Let the tail curve gently — Spinosaurus tails are long and flexible.
Step 3:
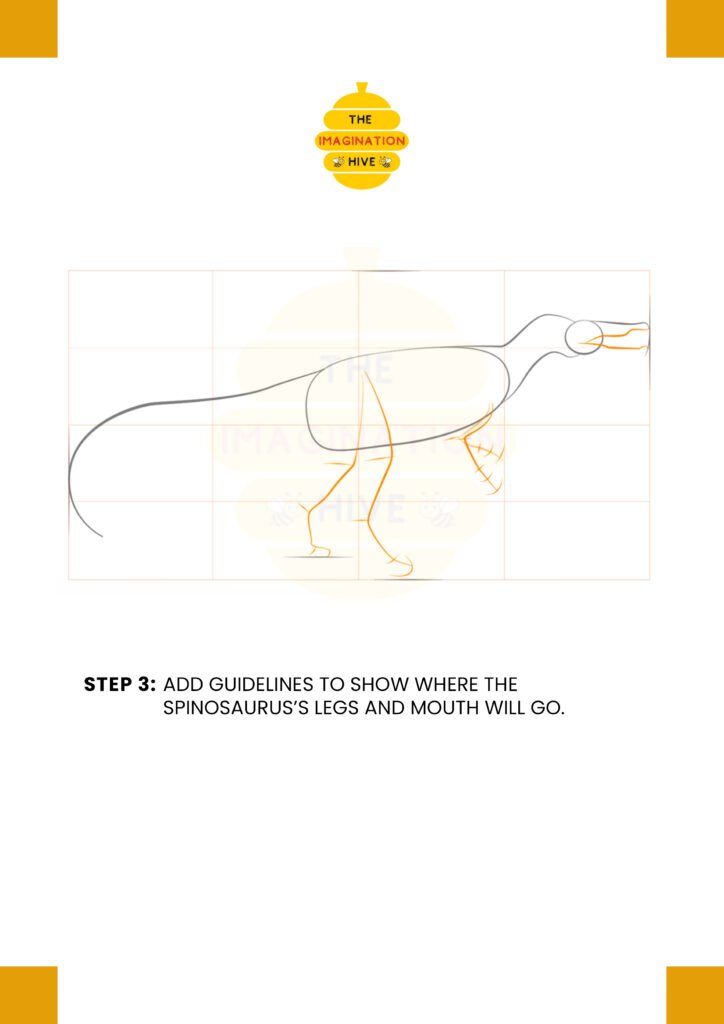
Add guidelines to show where the Spinosaurus’s legs and mouth will go.
Short tip: Use angled leg guidelines to suggest a strong, forward-moving stance.
Step 4:
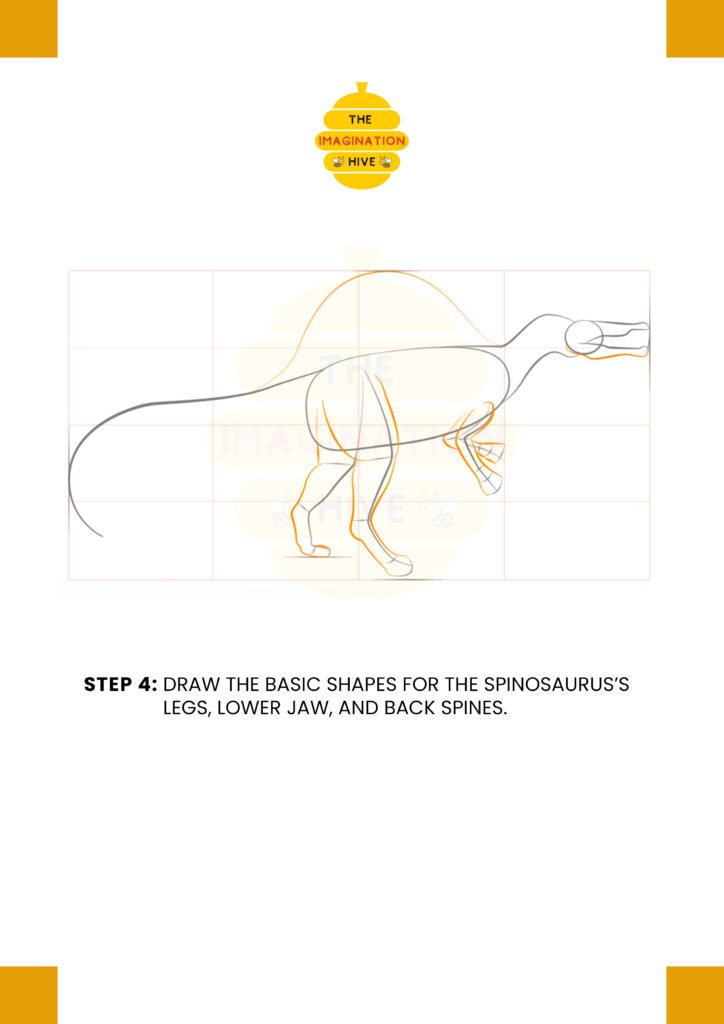
Draw the basic shapes for the Spinosaurus’s legs, lower jaw, and back spines.
Short tip: Keep the back spines evenly spaced to prepare for the sail shape later.
Step 5:
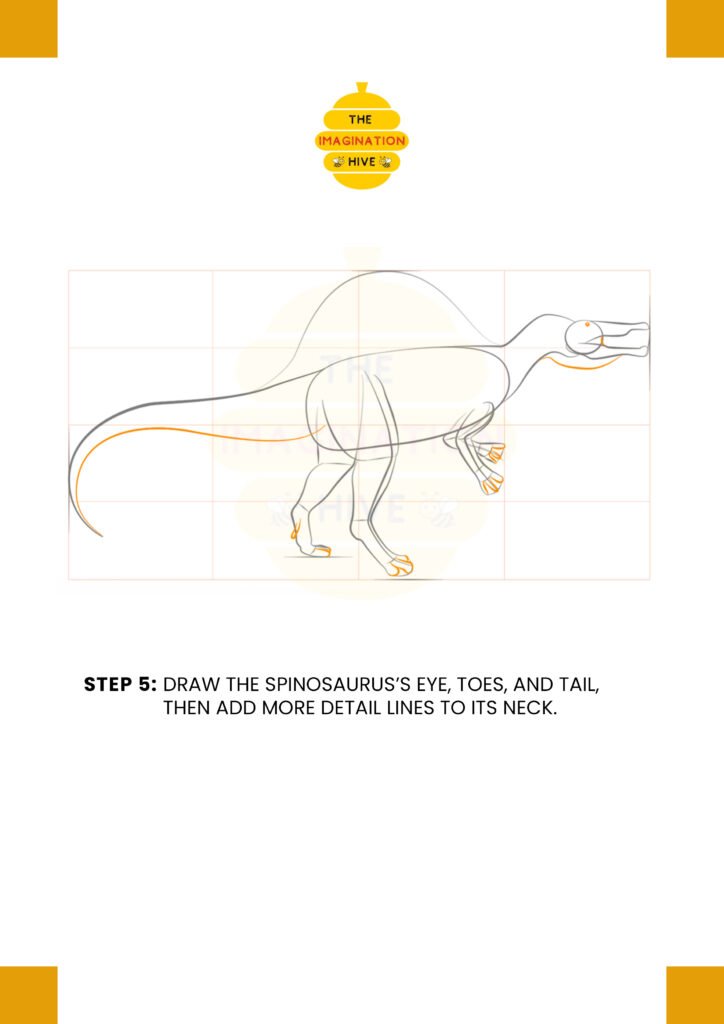
Draw the Spinosaurus’s eye, toes, and tail, then add more detail lines to its neck.
Short tip: Small facial details help bring life and expression to the dinosaur.
Step 6:
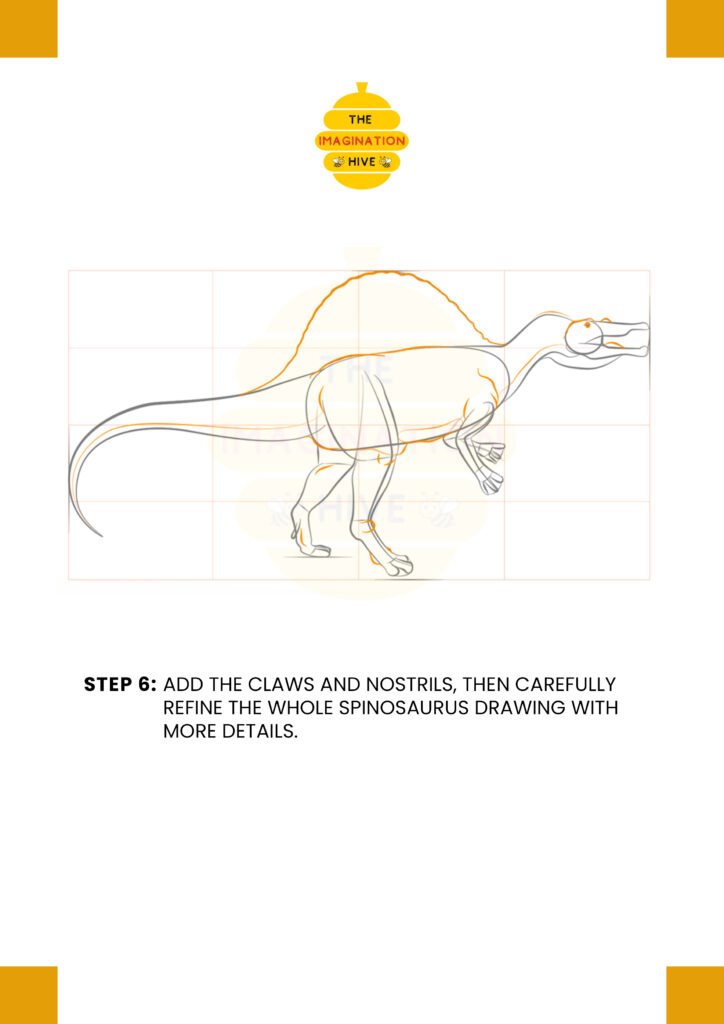
Add the claws and nostrils, then carefully refine the whole Spinosaurus drawing with more details.
Short tip: Focus on clean curves and smooth connections between body parts.
Step 7:

Add details to the spines, body, and legs by showing joints, then draw the tongue and skin patterns.
Short tip: Light texture lines give the skin a realistic, reptile-like feel.
Step 8:
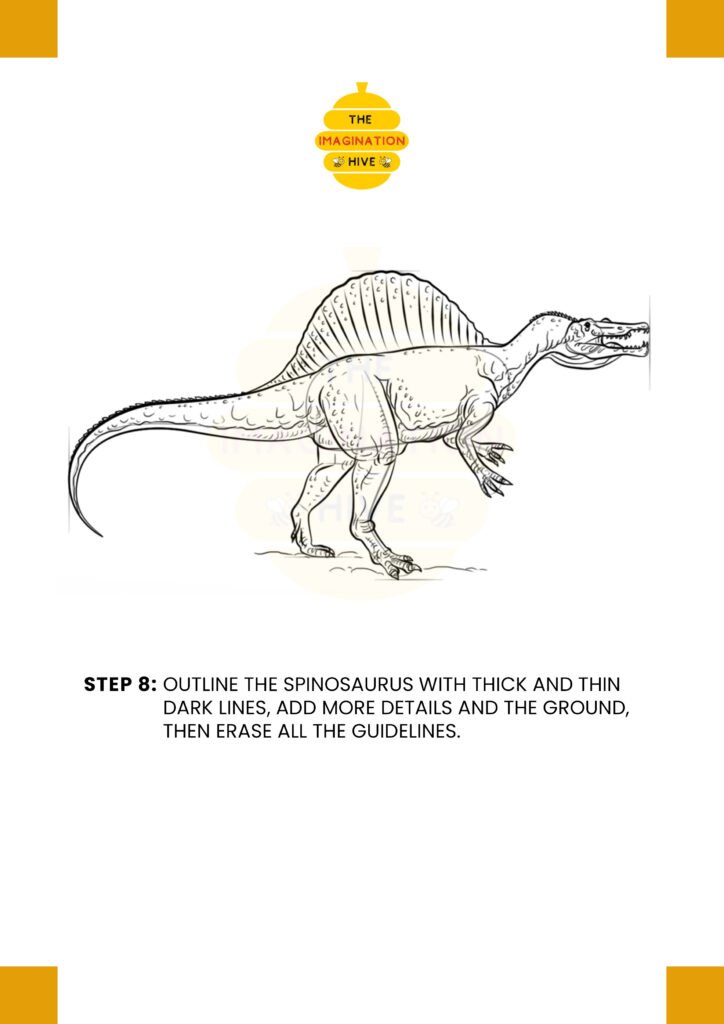
Outline the Spinosaurus with thick and thin dark lines, add more details and the ground, then erase all the guidelines.
Short tip: Thicker outer lines and thinner inner details make the drawing look bold and finished.