Learn how to draw a spider monkey hanging from a tree branch by using flowing guidelines and refining the body step by step.
Step 1:
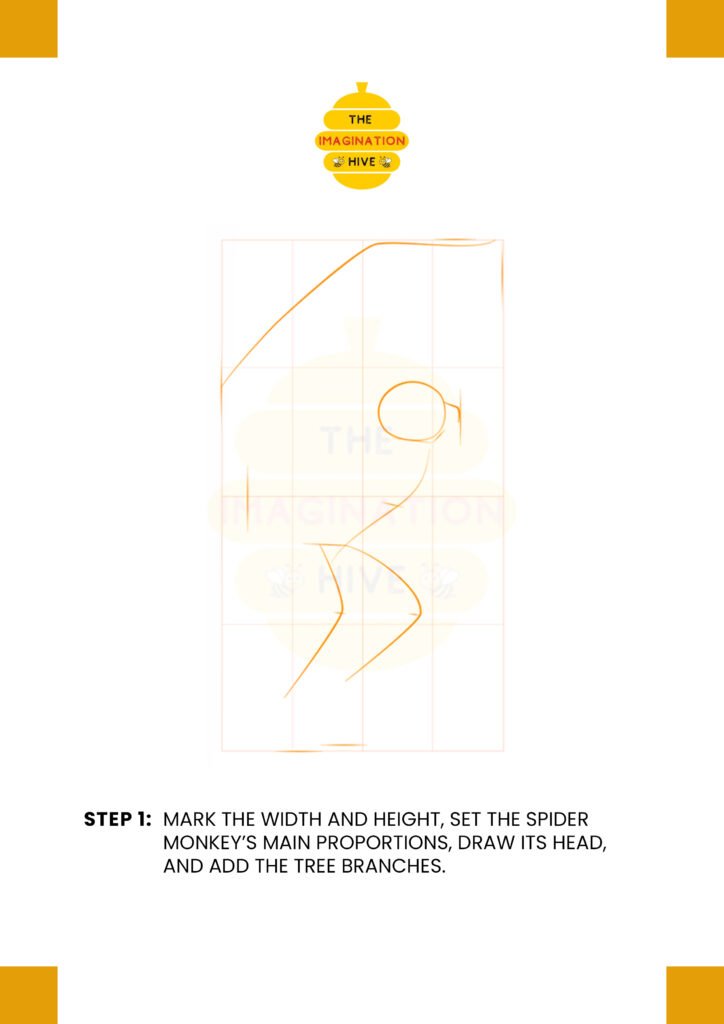
Mark the width and height, set the spider monkey’s main proportions, draw its head, and add the tree branches.
Short tip: Keep the pose loose and dynamic — spider monkeys look best when their bodies feel flexible and curved.
Step 2:

Draw the shapes of the spider monkey’s body and neck, add a guideline for its tail, and sketch the tree.
Short tip: Use long, smooth curves for the body and tail to show agility and movement.
Step 3:
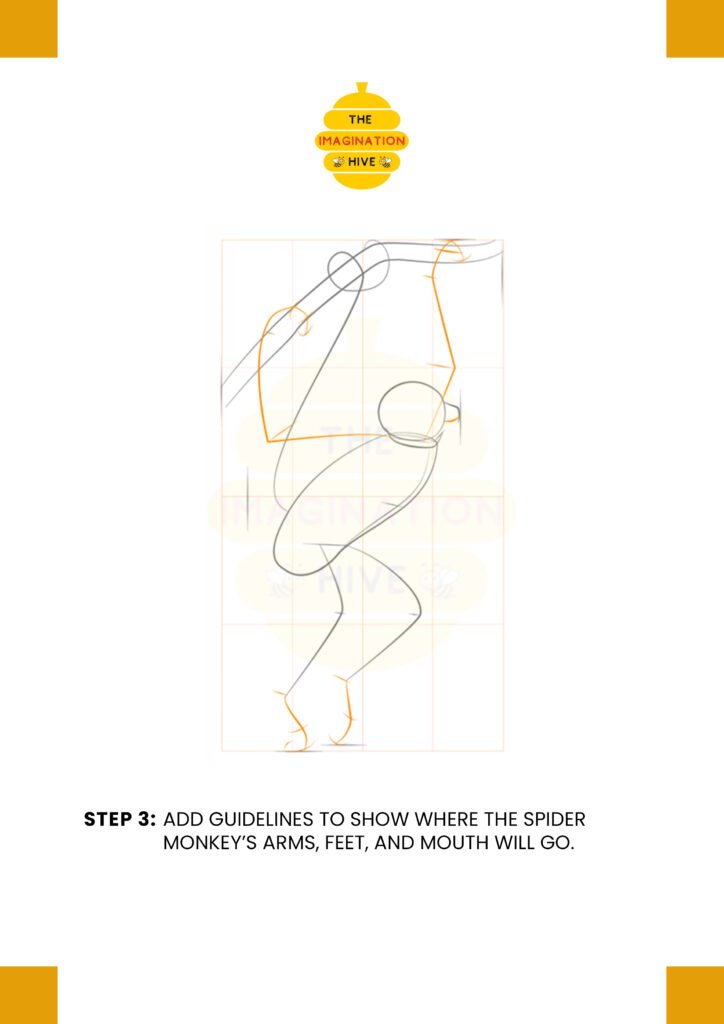
Add guidelines to show where the spider monkey’s arms, feet, and mouth will go.
Short tip: Long arm guidelines help emphasize the monkey’s ability to hang and swing.
Step 4:
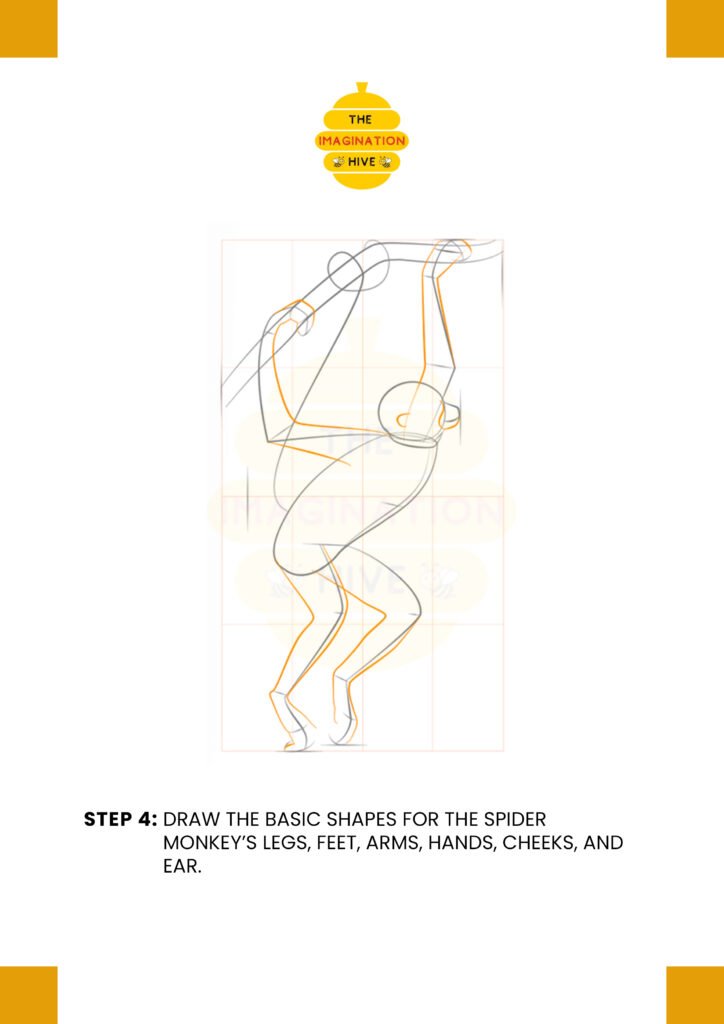
Draw the basic shapes for the spider monkey’s legs, feet, arms, hands, cheeks, and ear.
Short tip: Keep the limbs thin and elongated — spider monkeys have very slender arms and legs.
Step 5:
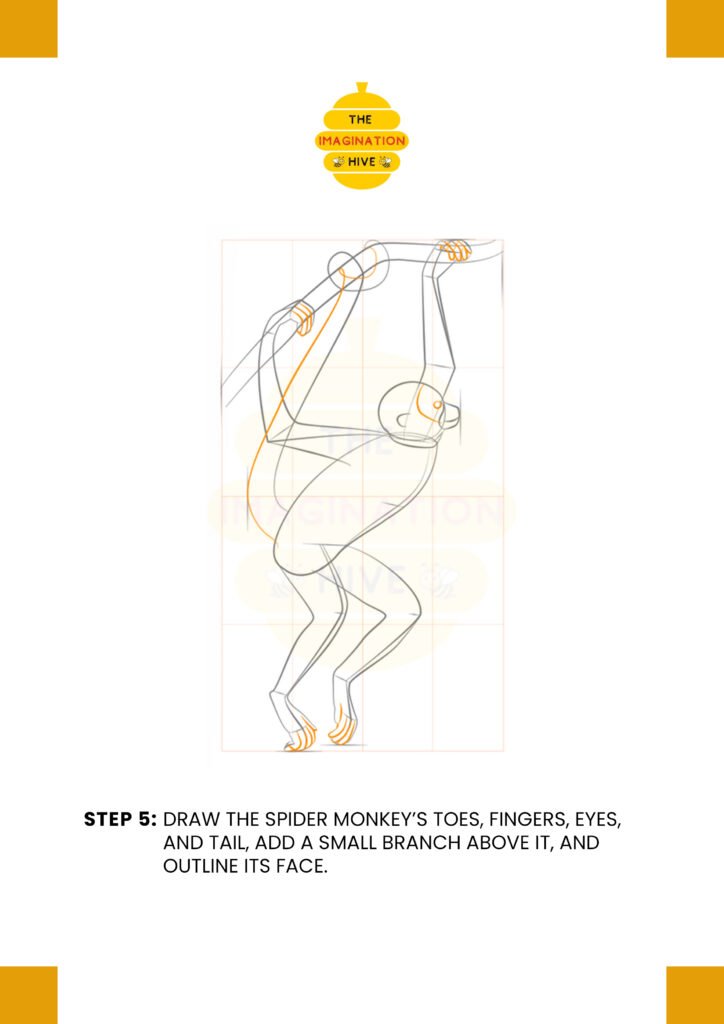
Draw the spider monkey’s toes, fingers, eyes, and tail, add a small branch above it, and outline its face.
Short tip: Focus on the gripping hands and feet to make the pose feel natural.
Step 6:
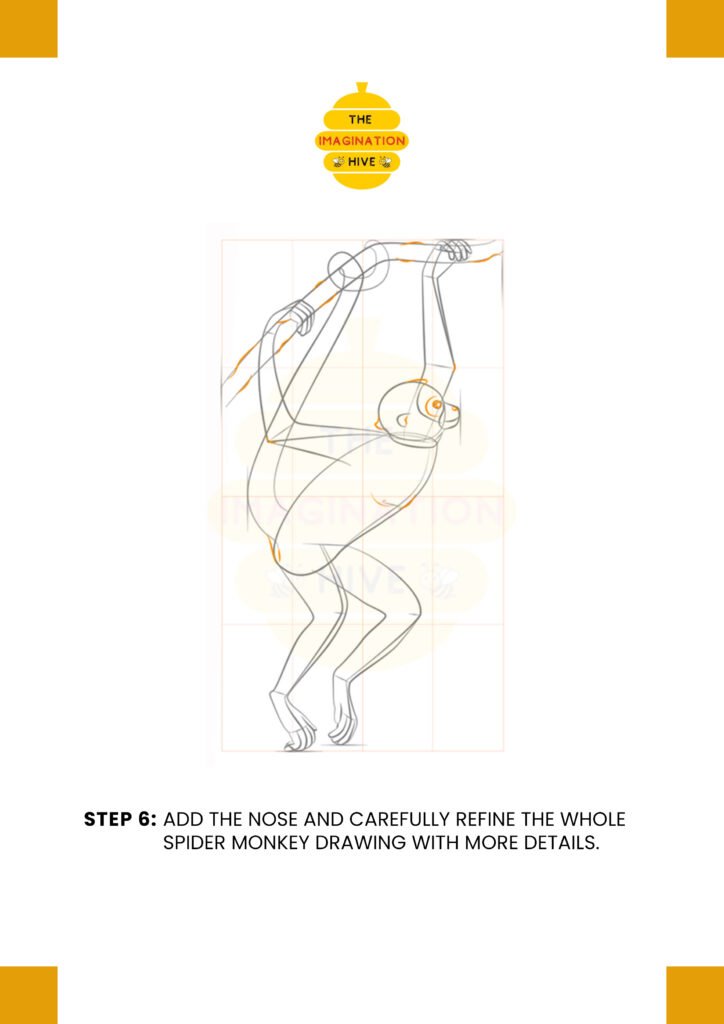
Add the nose and carefully refine the whole spider monkey drawing with more details.
Short tip: Smooth out curves and lightly define muscles without making them bulky.
Step 7:
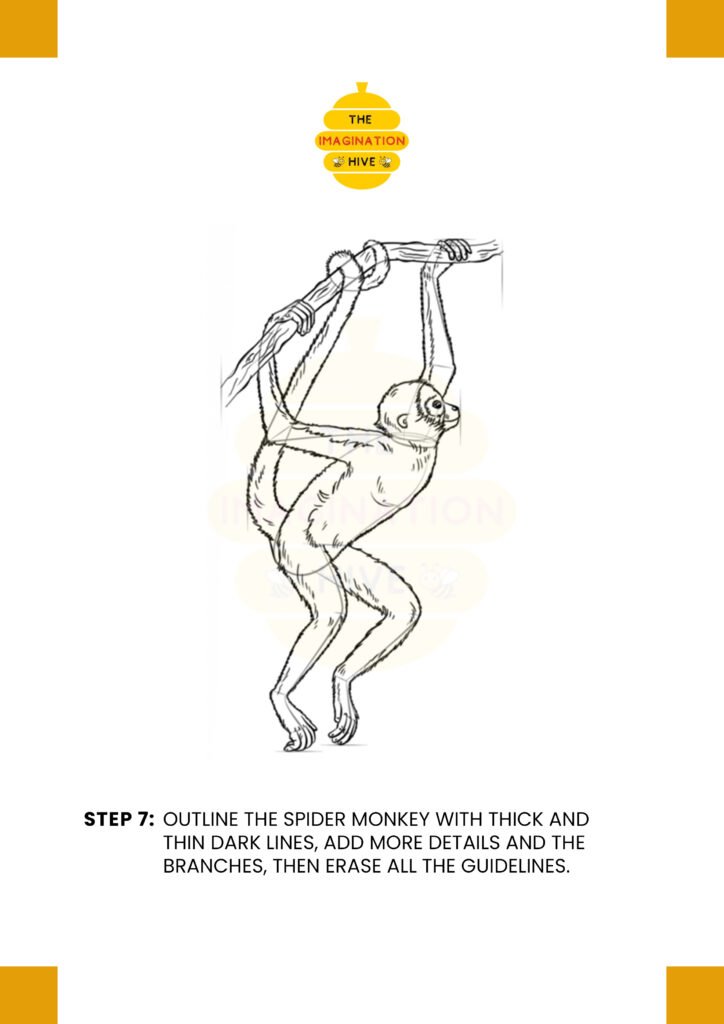
Outline the spider monkey with thick and thin dark lines, add more details and the branches, then erase all the guidelines.
Short tip: Use thicker lines on the outer shape and thinner lines for inner details to finish cleanly.