In this step-by-step tutorial, you’ll learn how to draw a skunk by starting with simple shapes and gradually refining them into a realistic walking pose with a fluffy tail.
STEP 1: Draw the Basic Shapes
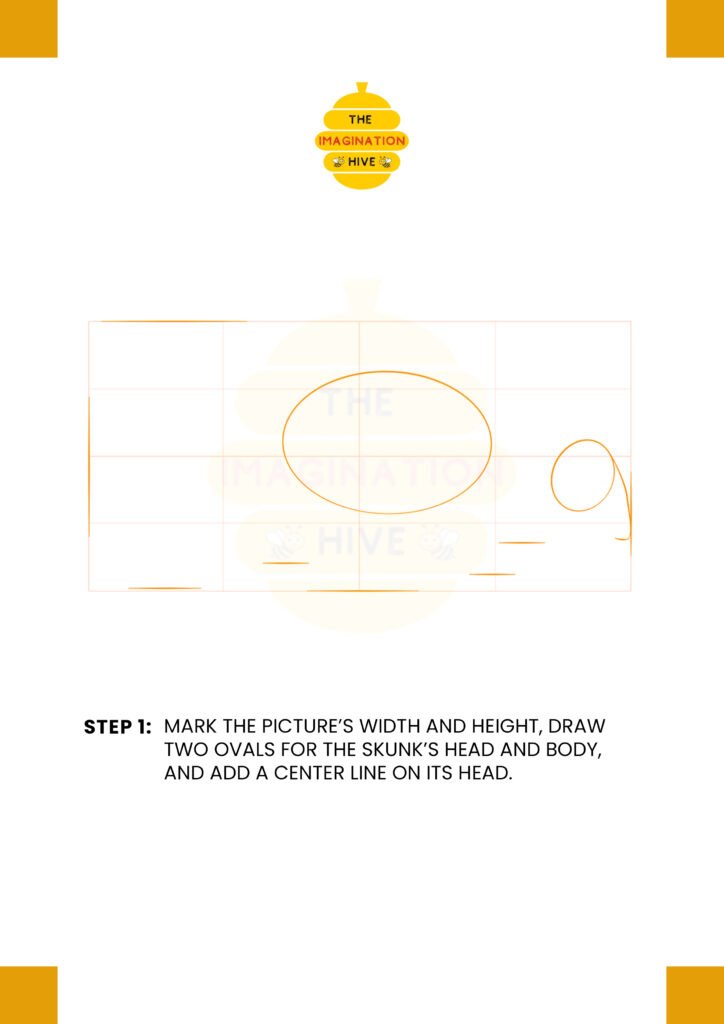
Mark the picture’s width and height, draw two ovals for the skunk’s head and body, and add a center line on its head to guide facial features.
Tip: Keep all construction lines light.
Light lines are easier to erase and adjust as you build the drawing.
STEP 2: Shape the Body and Tail Guideline

Draw the skunk’s body and neck using smooth curves, then add a long flowing guideline to show the direction and curve of the tail.
Tip: Use long, smooth strokes for the body.
This helps the skunk look natural and balanced.
STEP 3: Add Leg and Mouth Guidelines

Add simple guidelines to show where the skunk’s legs and mouth will go, keeping the pose low and close to the ground.
Tip: Don’t worry about details yet.
These lines are just for placement.
STEP 4: Sketch the Legs, Feet, and Jaw
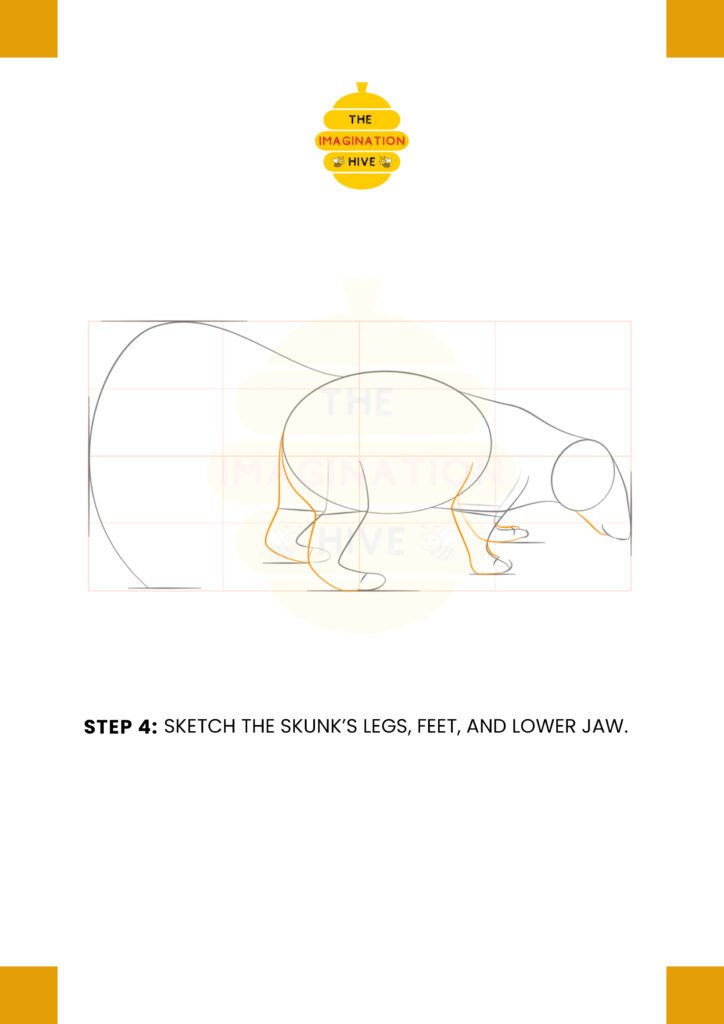
Sketch the skunk’s legs and feet around the guidelines, and draw the lower jaw to begin shaping the head.
Tip: Keep the legs short and sturdy.
Skunks have a low, grounded stance.
STEP 5: Add Facial Features and Tail Shape
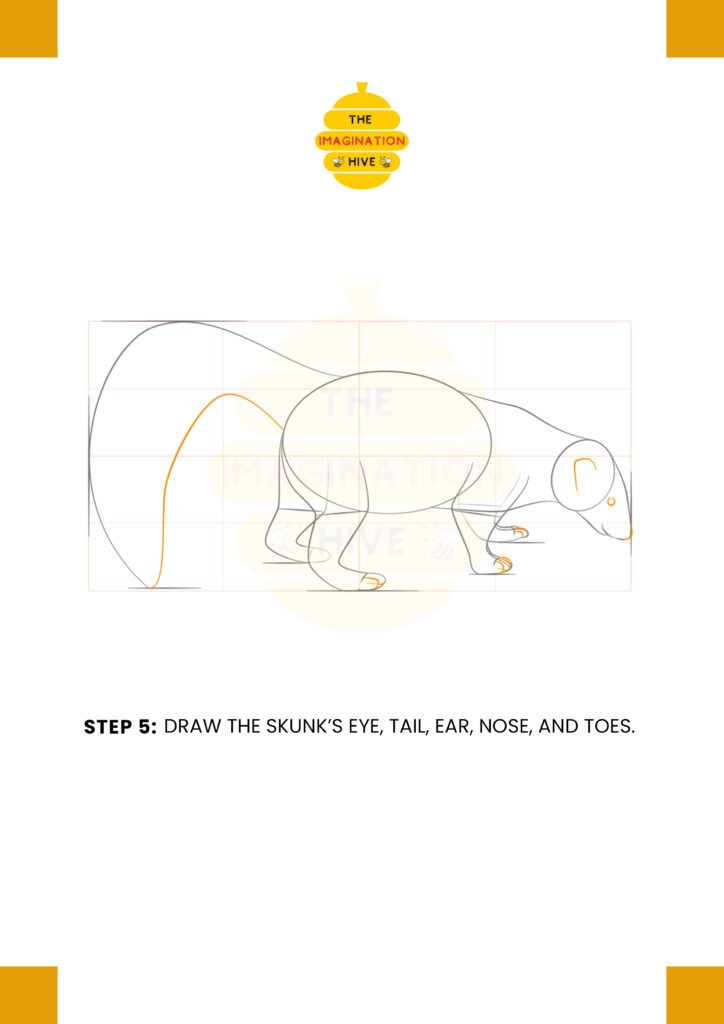
Draw the skunk’s eye, ear, nose, toes, and refine the tail by shaping its curve and thickness.
Tip: Small facial details add personality.
Place them carefully for a natural look.
STEP 6: Refine Claws and Body Details

Add the skunk’s claws, refine the nose, and carefully improve the entire body with smoother lines and more detail.
Tip: Refine gradually instead of rushing.
Slow improvements lead to cleaner results.
STEP 7: Final Outline and Cleanup
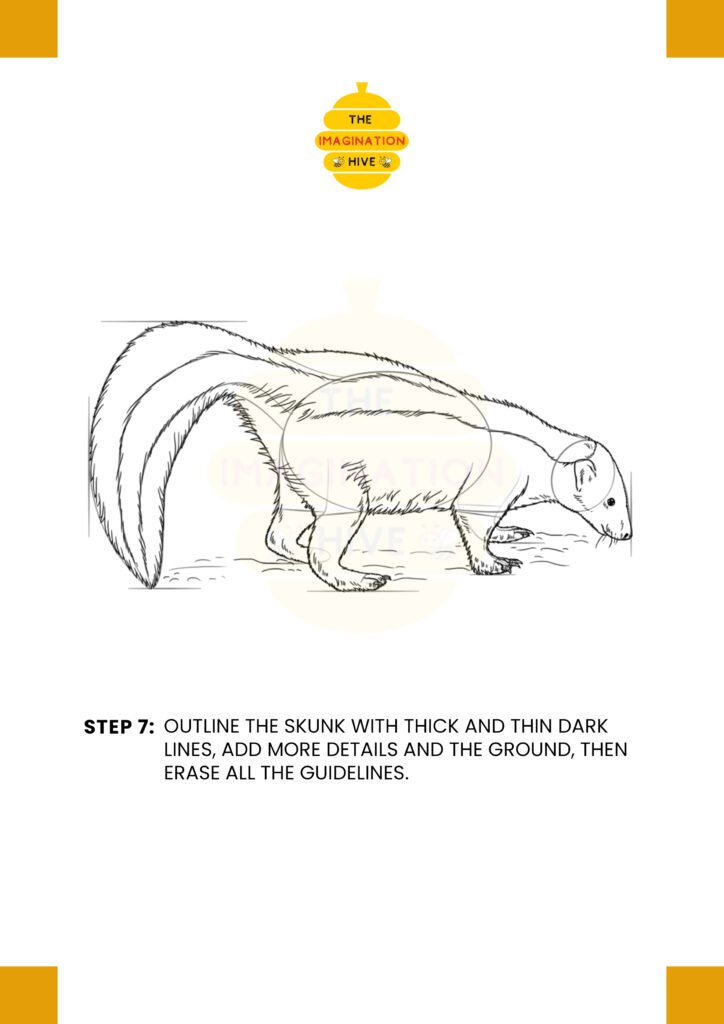
Outline the skunk with thick and thin dark lines, add extra details and ground lines, then erase all remaining guidelines.
Tip: Vary line thickness for depth.
Thicker outlines make the drawing look finished and polished.