Learn how to draw a salamander by breaking its long, smooth body into simple shapes and refining the details step by step.
Step 1:
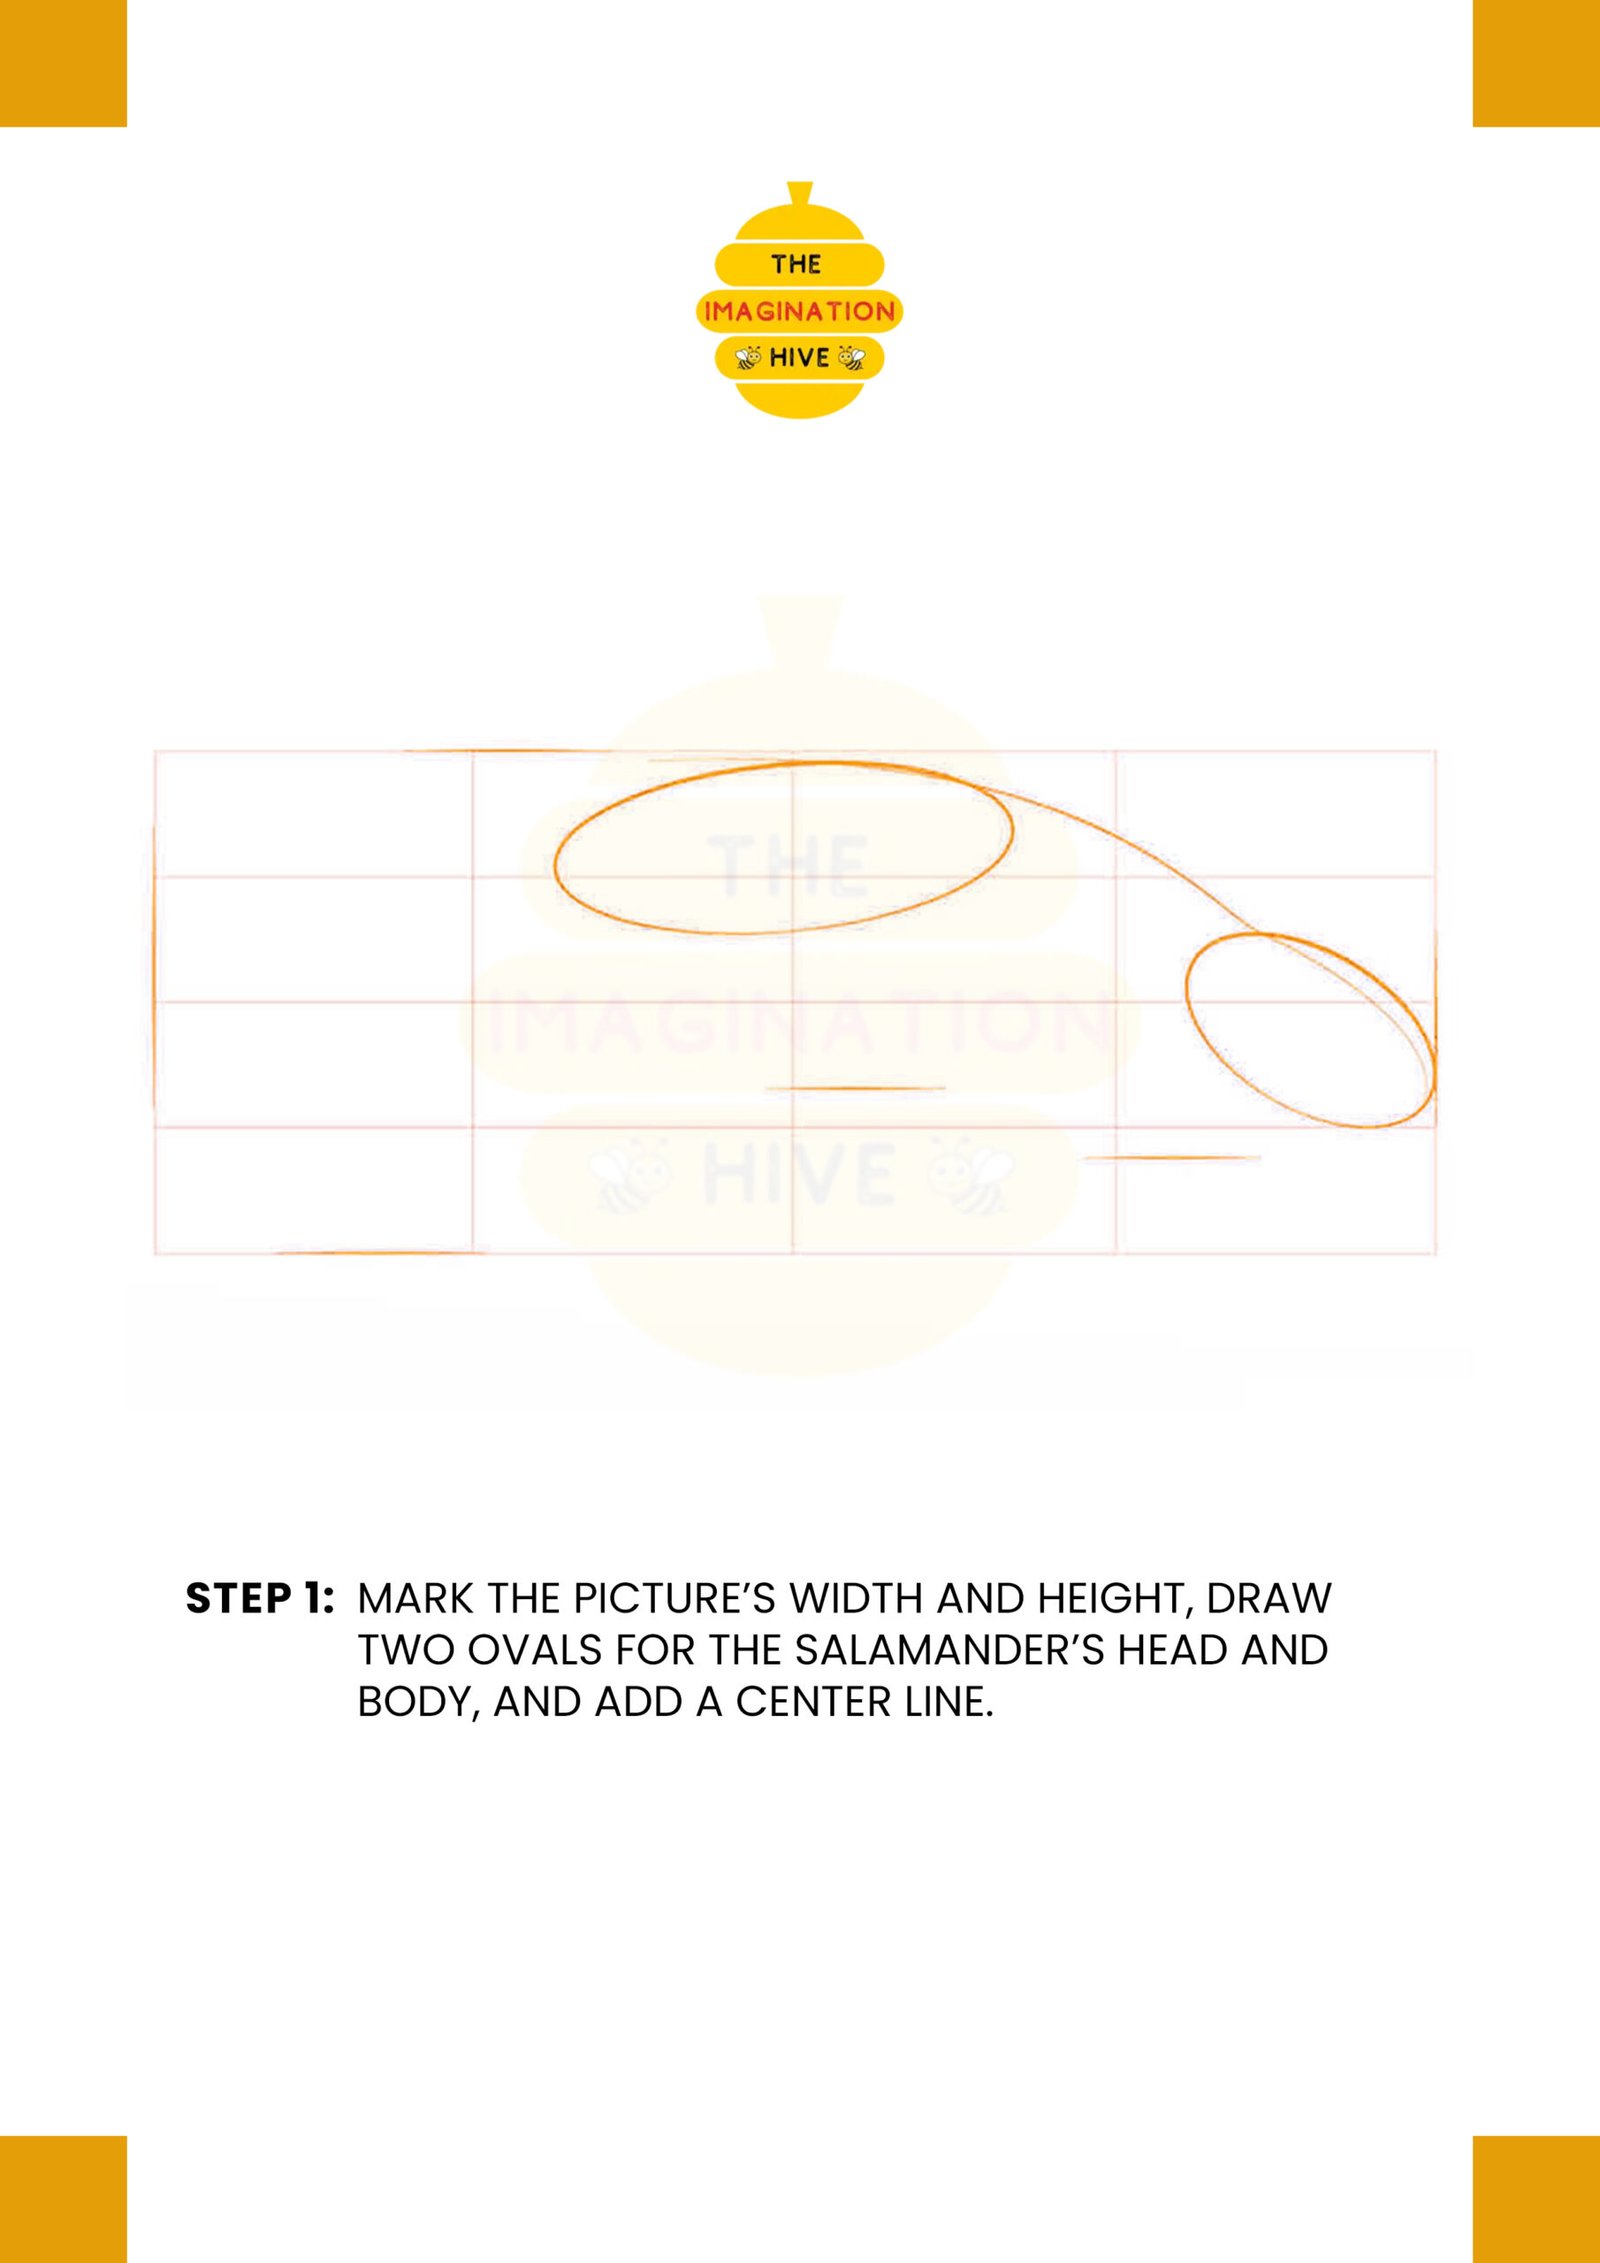
Mark the picture’s width and height, draw two ovals for the salamander’s head and body, and add a center line.
Short tip: Keep the ovals light and well-spaced to maintain proper proportions.
Step 2:
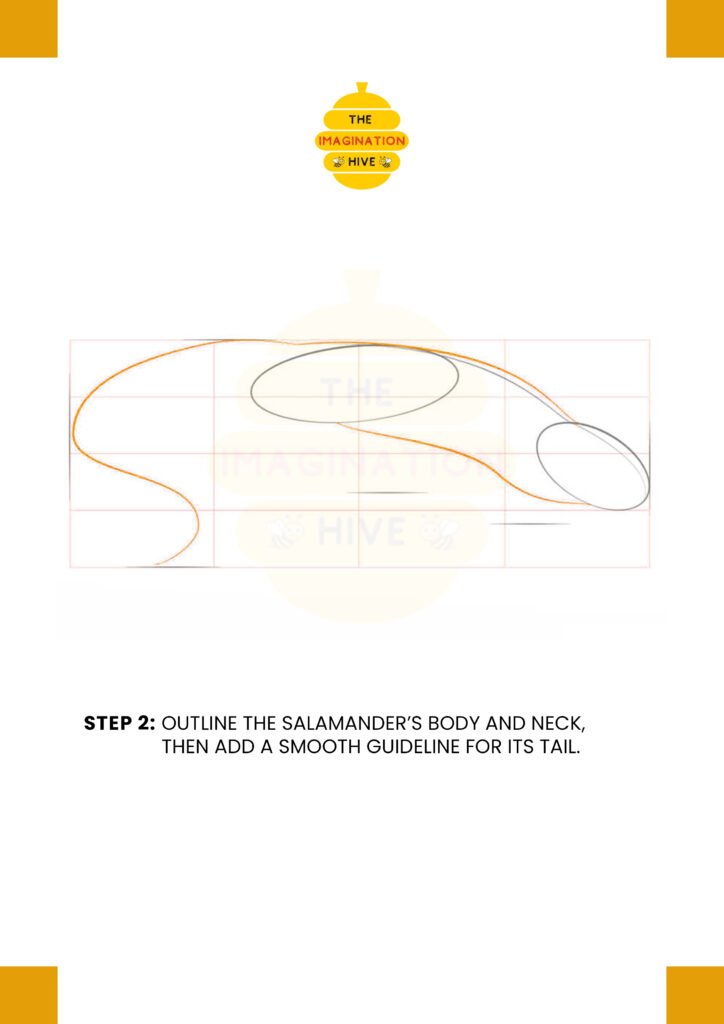
Outline the salamander’s body and neck, then add a smooth guideline for its tail.
Short tip: Use long, flowing curves to give the salamander a natural, crawling pose.
Step 3:

Add guidelines for the salamander’s legs and set the correct size and shape of its head.
Short tip: Place the legs low on the body to keep the salamander close to the ground.
Step 4:
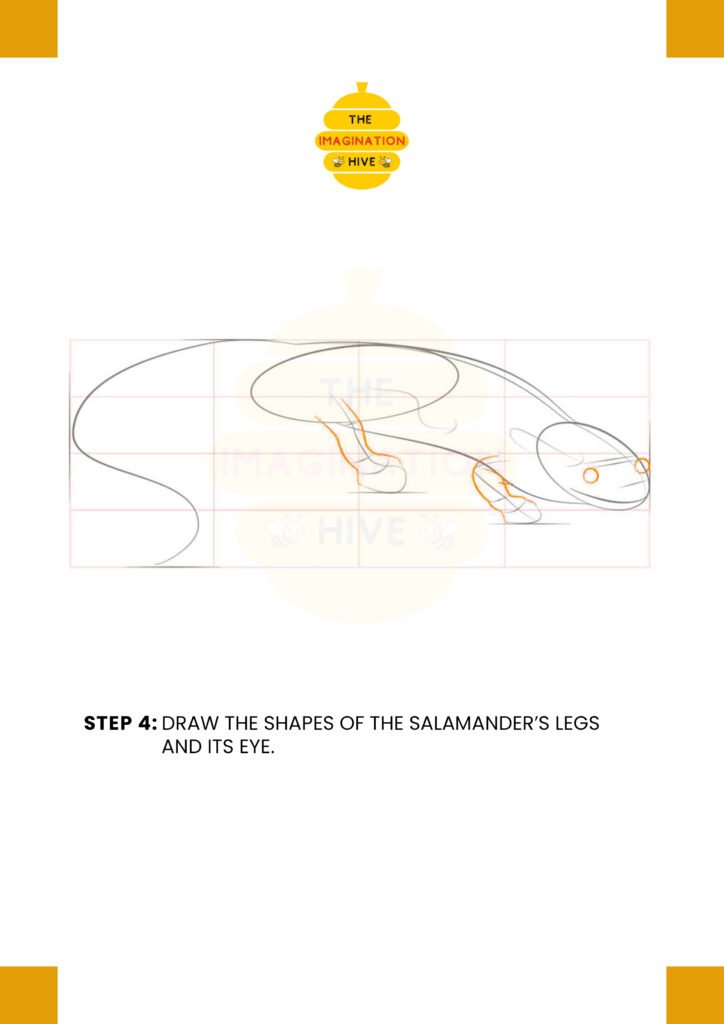
Draw the shapes of the salamander’s legs and its eye.
Short tip: Keep the legs short and slightly bent for a realistic stance.
Step 5:
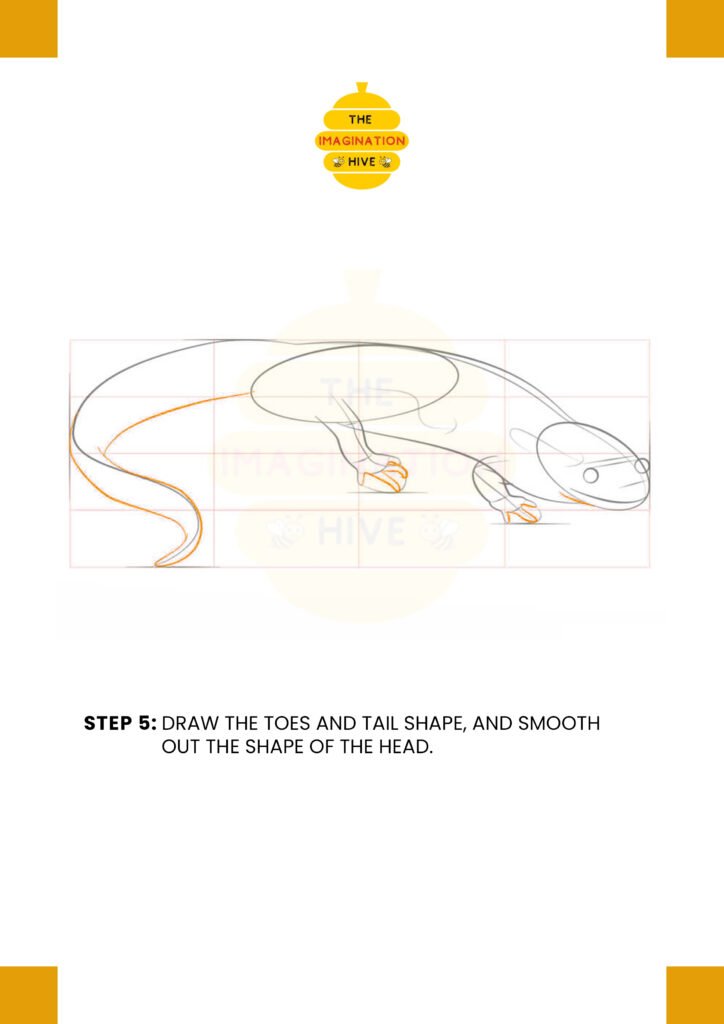
Draw the toes and tail shape, and smooth out the shape of the head.
Short tip: Salamanders have small toes — simple rounded shapes work best.
Step 6:
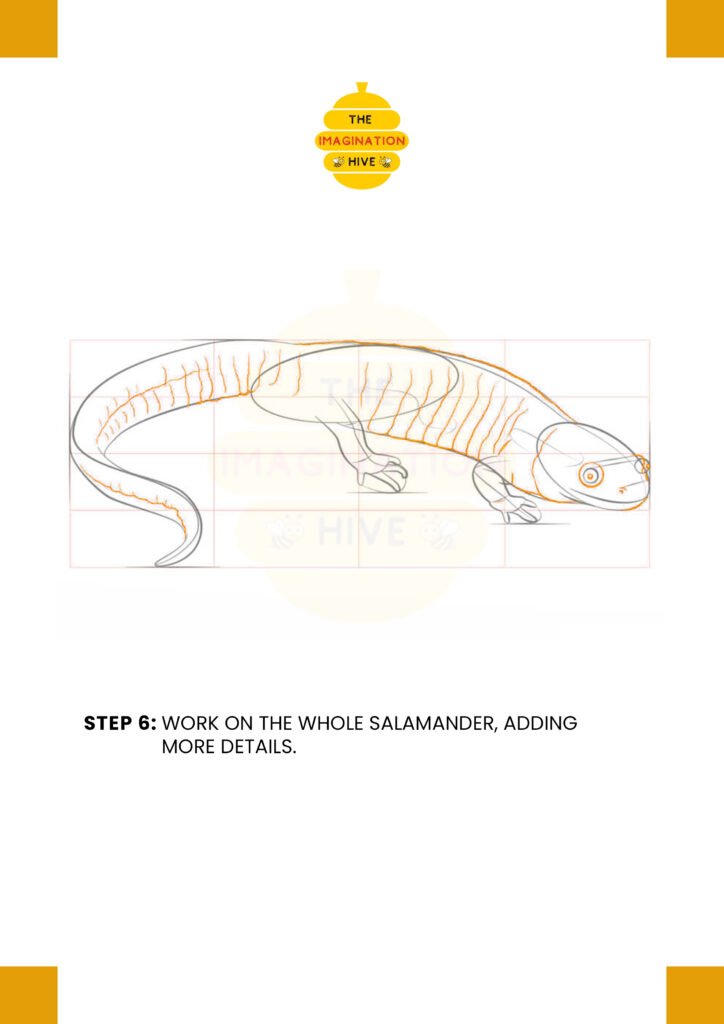
Work on the whole salamander, adding more details.
Short tip: Add skin lines, spots, and subtle texture without overcrowding the drawing.
Step 7:
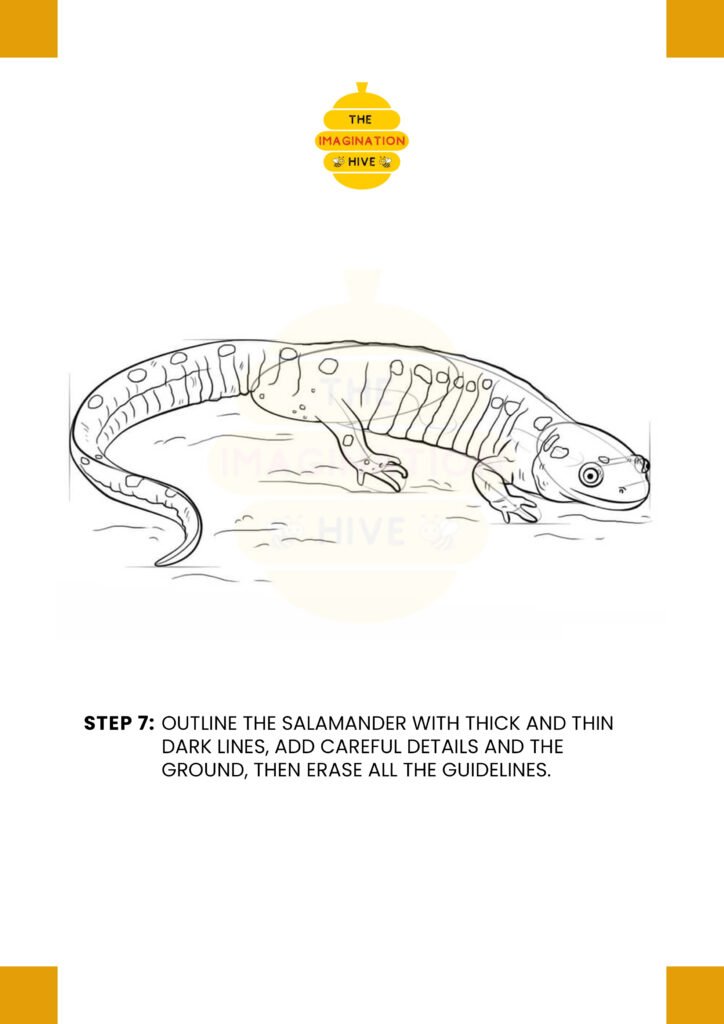
Outline the salamander with thick and thin dark lines, add careful details and the ground, then erase all the guidelines.
Short tip: Use thicker lines for the outer shape and thinner lines for inner details to finish cleanly.