In this step-by-step tutorial, you’ll learn how to draw a rooster by starting with simple shapes and gradually adding details to create a bold, standing pose with flowing tail feathers.
STEP 1: Draw the Basic Head and Body Shapes
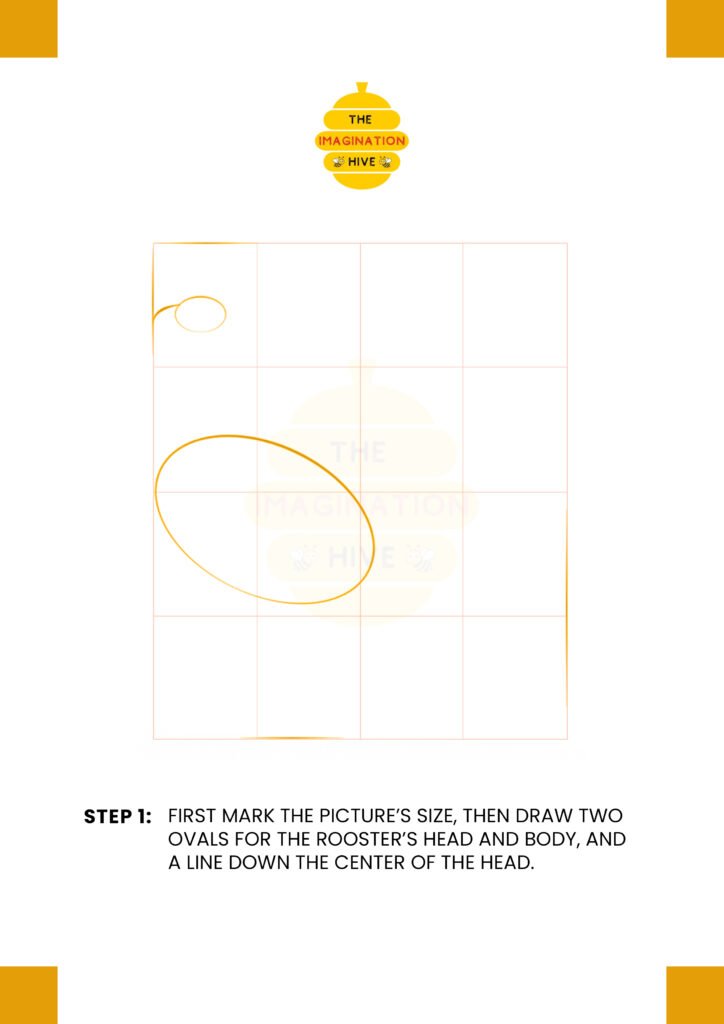
First, mark the picture’s size. Draw two ovals for the rooster’s head and body, then add a vertical center line on the head to guide facial features.
Short tip:
Light construction lines make it easier to adjust proportions later.
STEP 2: Shape the Neck and Body

Draw smooth lines connecting the head to the body to form the rooster’s long neck and rounded body shape.
Short tip:
Keep the neck tall and slightly curved for a proud rooster stance.
STEP 3: Add Leg Lines, Beak, and Wing Placement
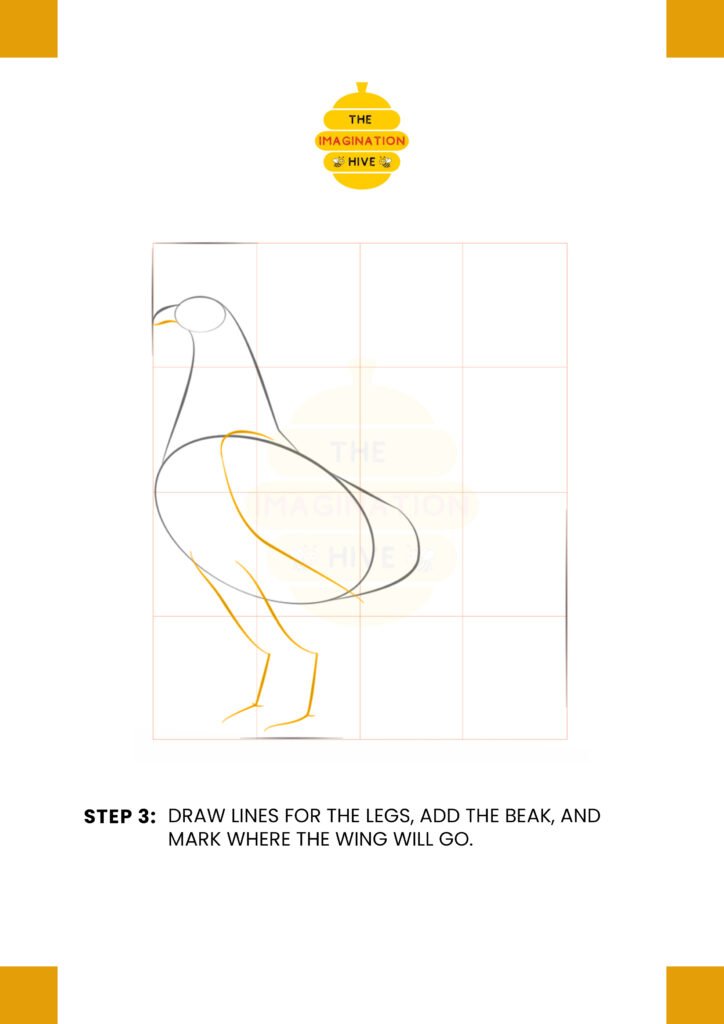
Sketch simple lines for the legs, draw the beak shape on the head, and lightly mark where the wing will sit on the body.
Short tip:
Use straight lines for legs first, then refine them later.
STEP 4: Draw the Comb, Hocks, and Tail Direction
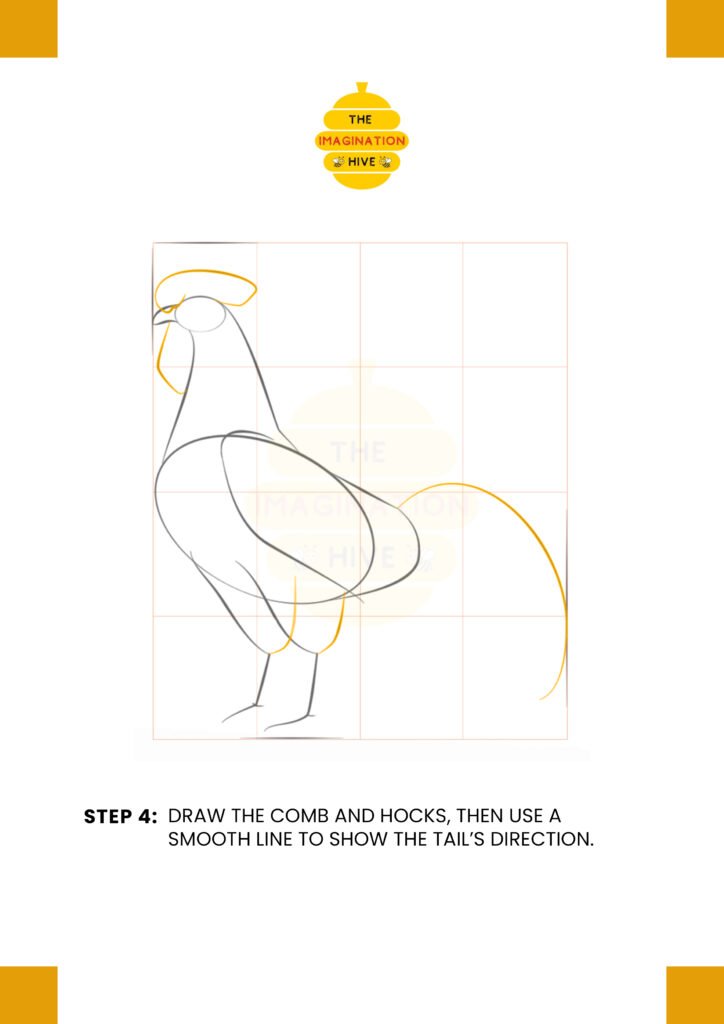
Add the rooster’s comb on top of the head, shape the hocks on the legs, and draw a smooth curved line to show the tail’s direction.
Short tip:
The tail curve helps set the rooster’s overall balance and flow.
STEP 5: Sketch the Comb Points, Wing, and Tail
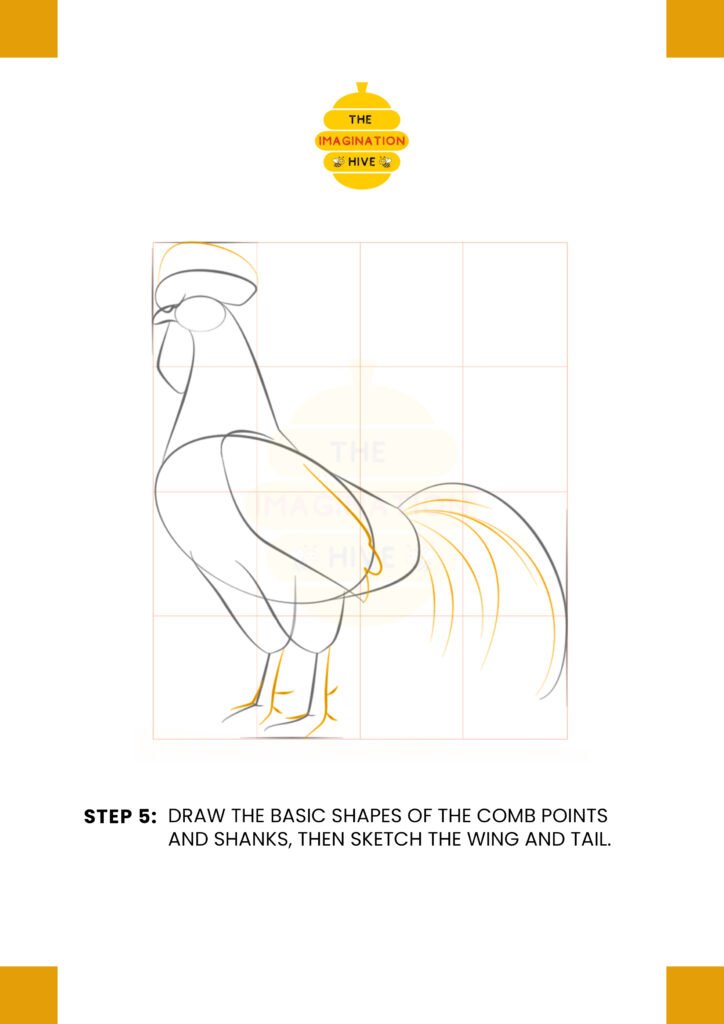
Draw the basic shapes of the comb points and shanks, then sketch the wing and long tail feathers using curved strokes.
Short tip:
Overlapping feather lines make the tail look fuller.
STEP 6: Add Shanks, Toes, and Feather Details
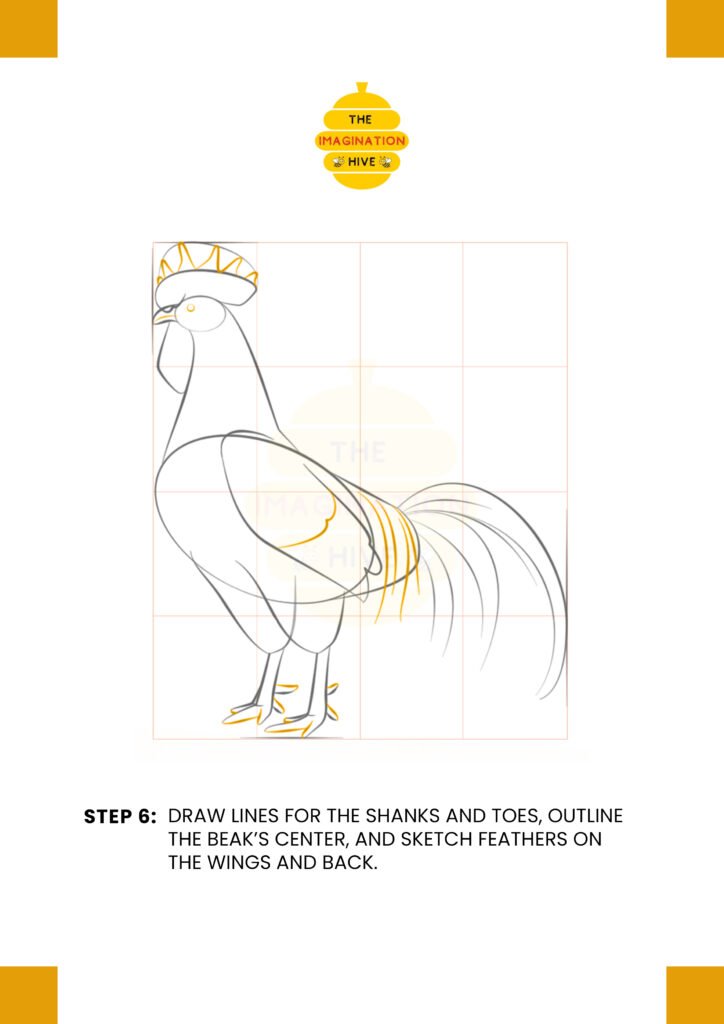
Refine the legs by adding shanks and toes, outline the center of the beak, and sketch feather lines on the wings and back.
Short tip:
Short, curved strokes work best for feather texture.
STEP 7: Refine and Add Final Details
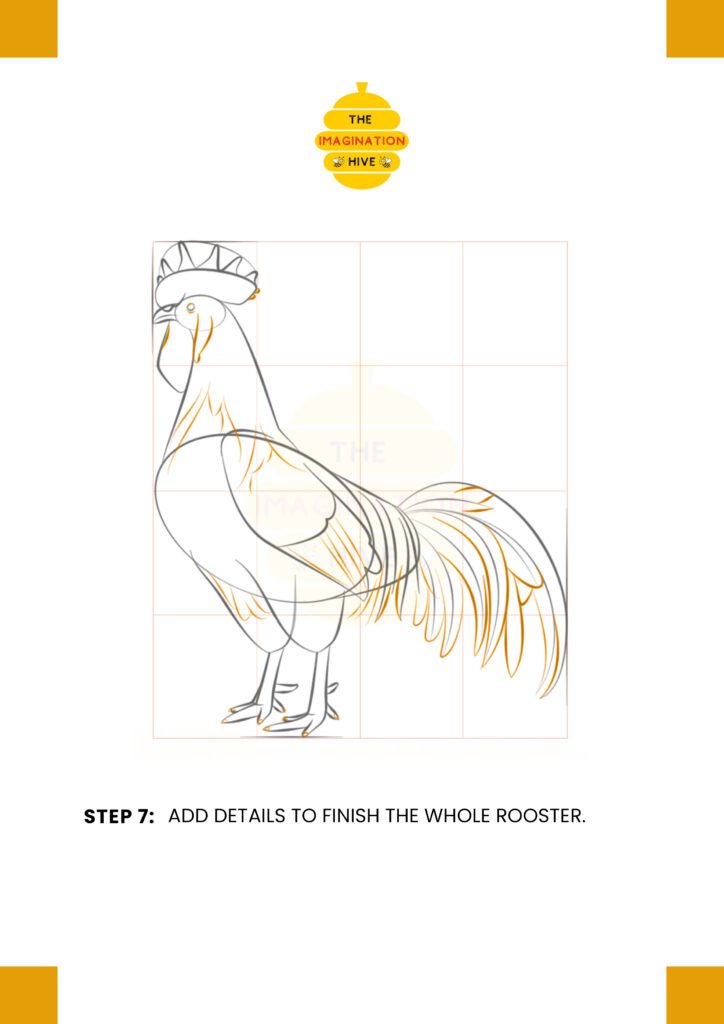
Add more feather details across the body, refine the face, comb, and tail, and clean up the overall shape of the rooster.
Short tip:
Build feather details gradually to avoid clutter.
STEP 8: Final Outline and Cleanup
Outline the rooster using thick and thin lines, add ground details, and erase all remaining guidelines to finish the drawing.
Short tip: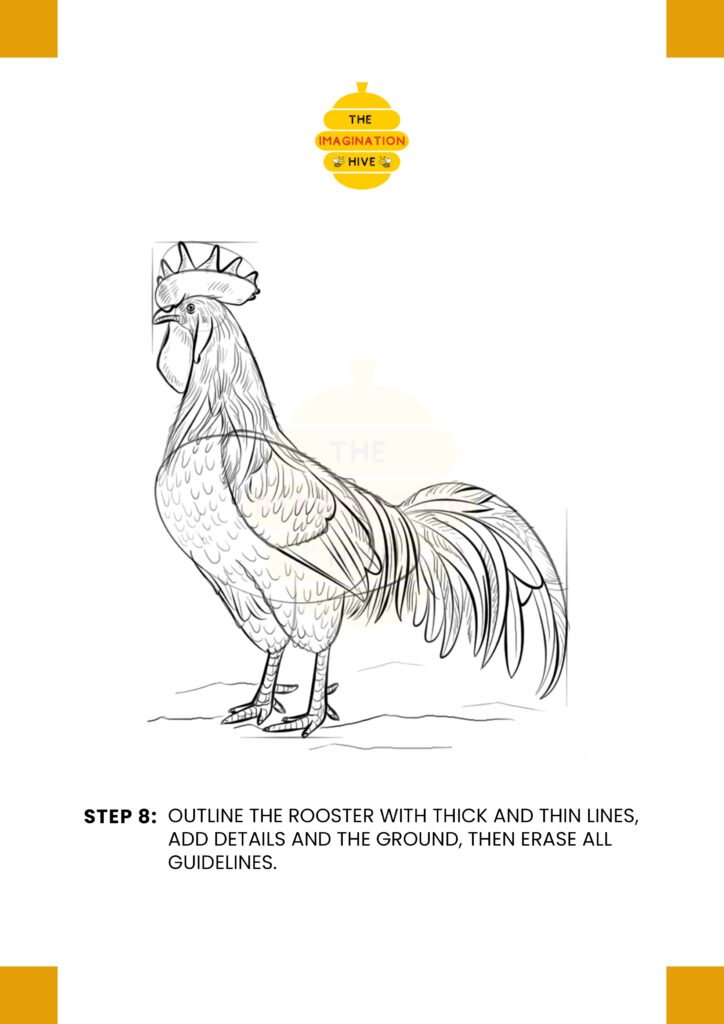
Varying line thickness gives the rooster a strong, finished look.