Learn how to draw a pug by starting with simple shapes and gradually adding details, facial features, and clean outlines.
Step 1:
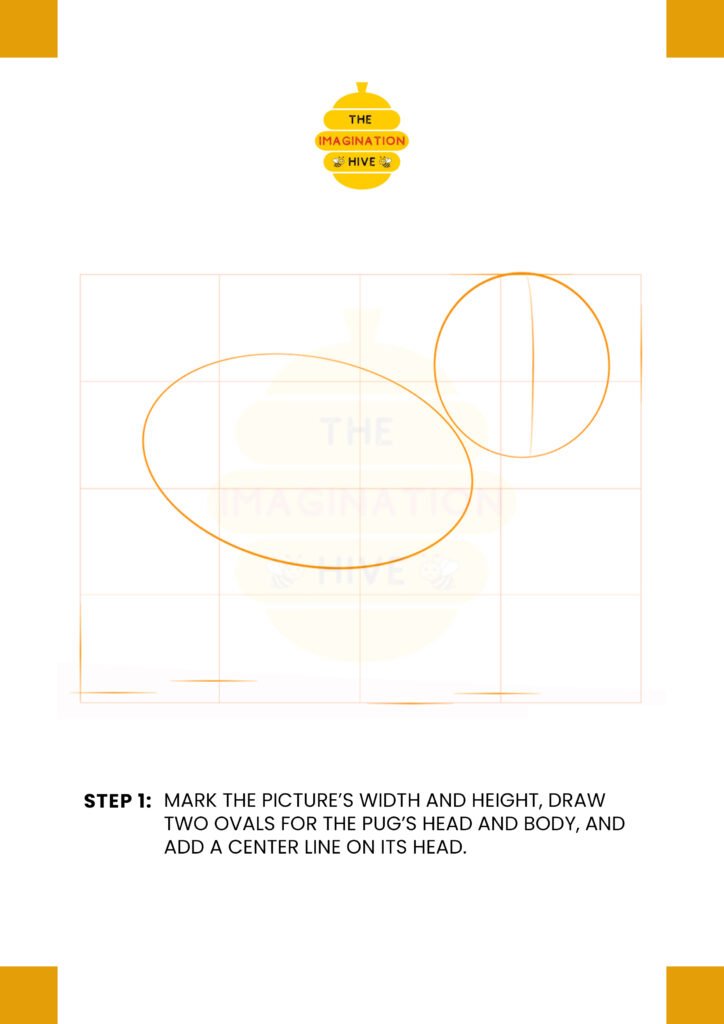
Mark the picture’s width and height, draw two ovals for the pug’s head and body, and add a center line on its head.
Tip: Keep your lines light so you can easily erase later.
Step 2:
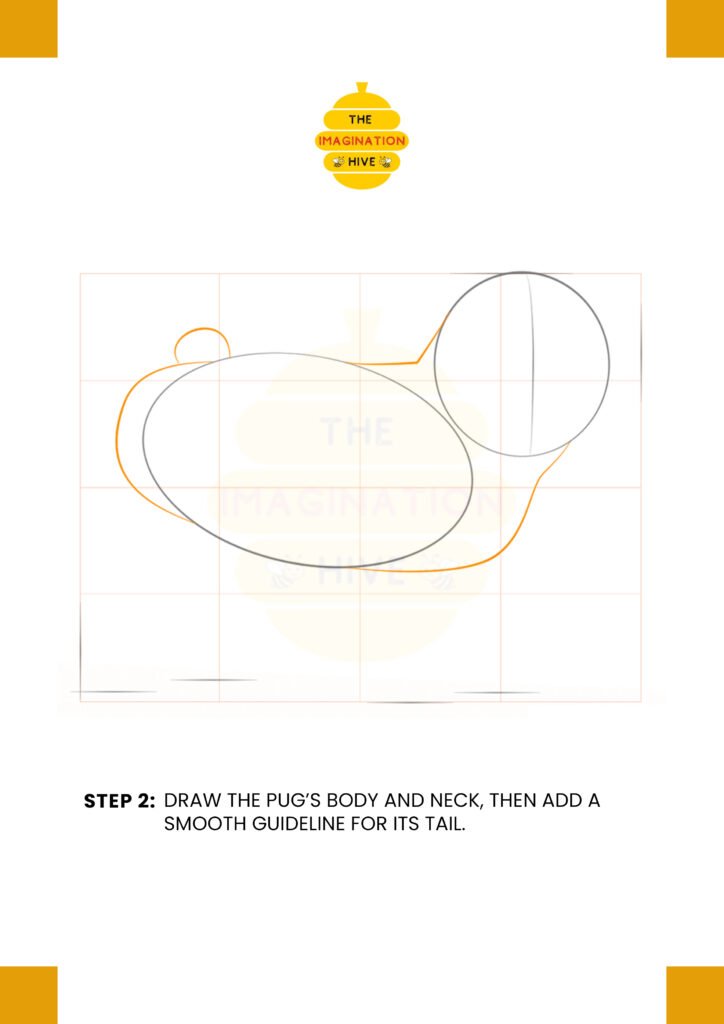
Draw the pug’s body and neck, then add a smooth guideline for its tail.
Tip: Use rounded shapes to capture the pug’s chunky body.
Step 3:
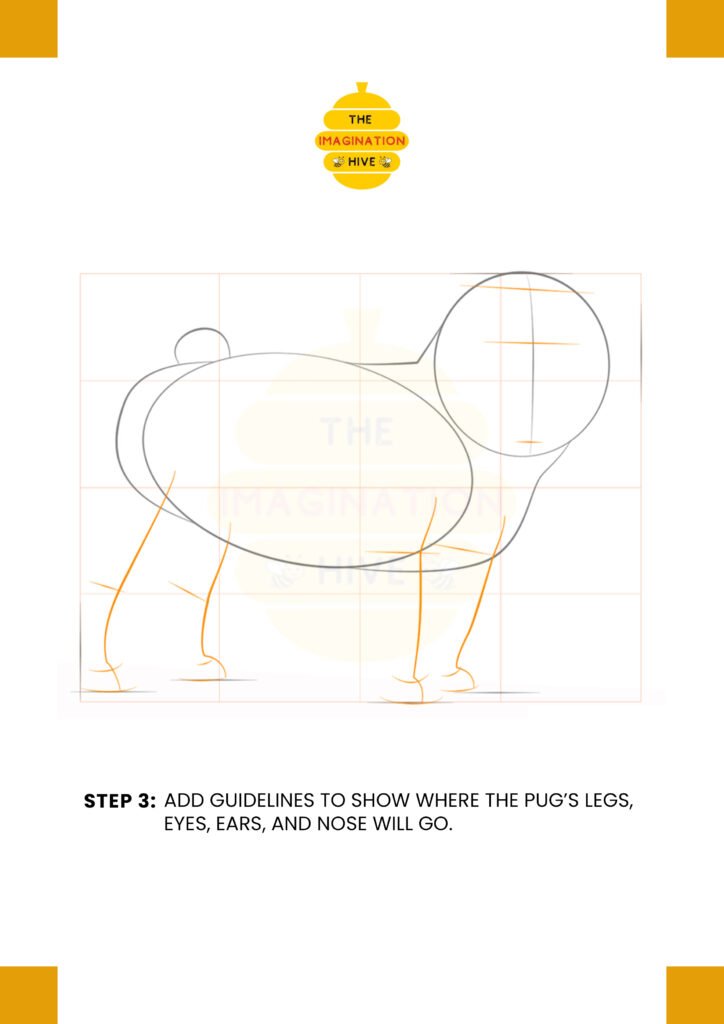
Add guidelines to show where the pug’s legs, eyes, ears, and nose will go.
Tip: Guidelines help keep all features aligned correctly.
Step 4:
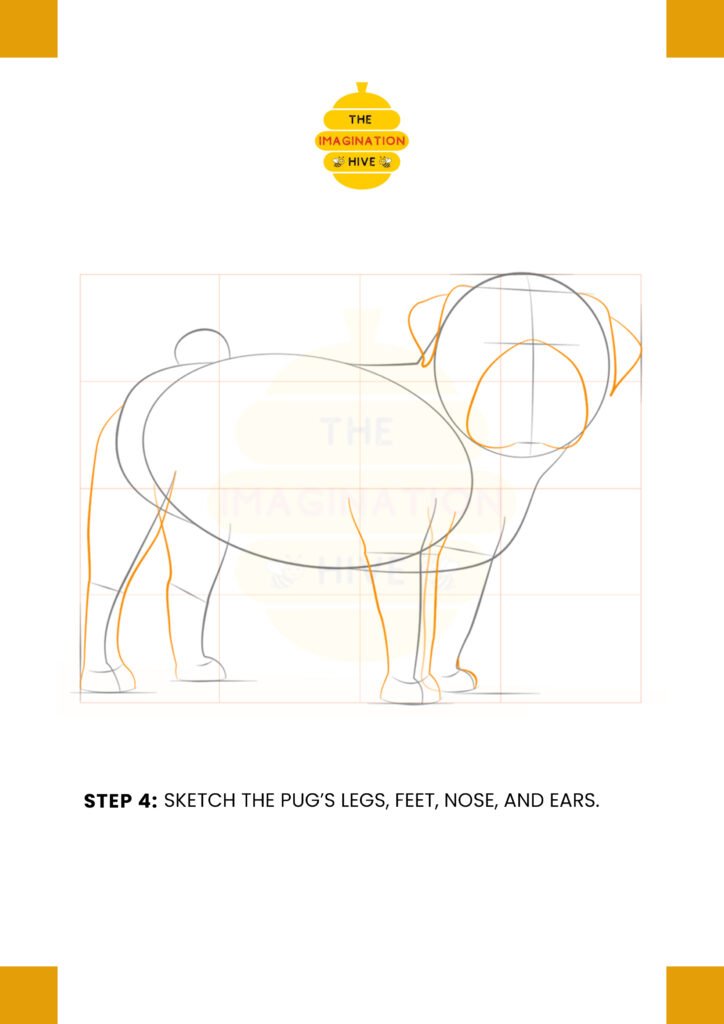
Sketch the pug’s legs, feet, nose, and ears.
Tip: Focus on simple outlines before adding details.
Step 5:
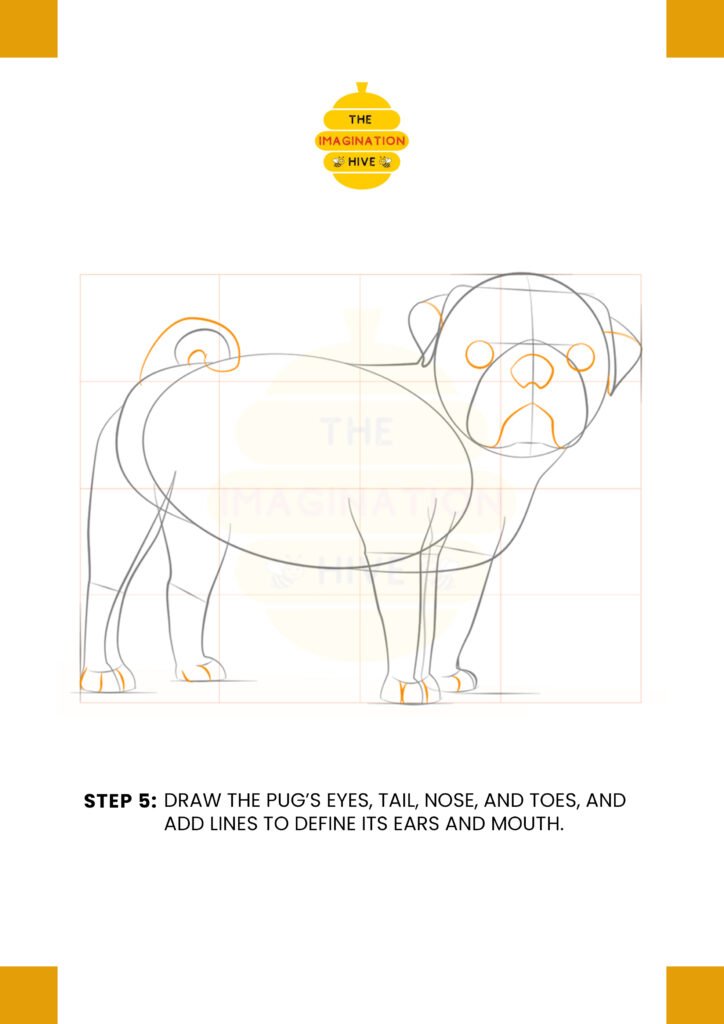
Draw the pug’s eyes, tail, nose, and toes, and add lines to define its ears and mouth.
Tip: Soft curves work best for the pug’s facial features.
Step 6:
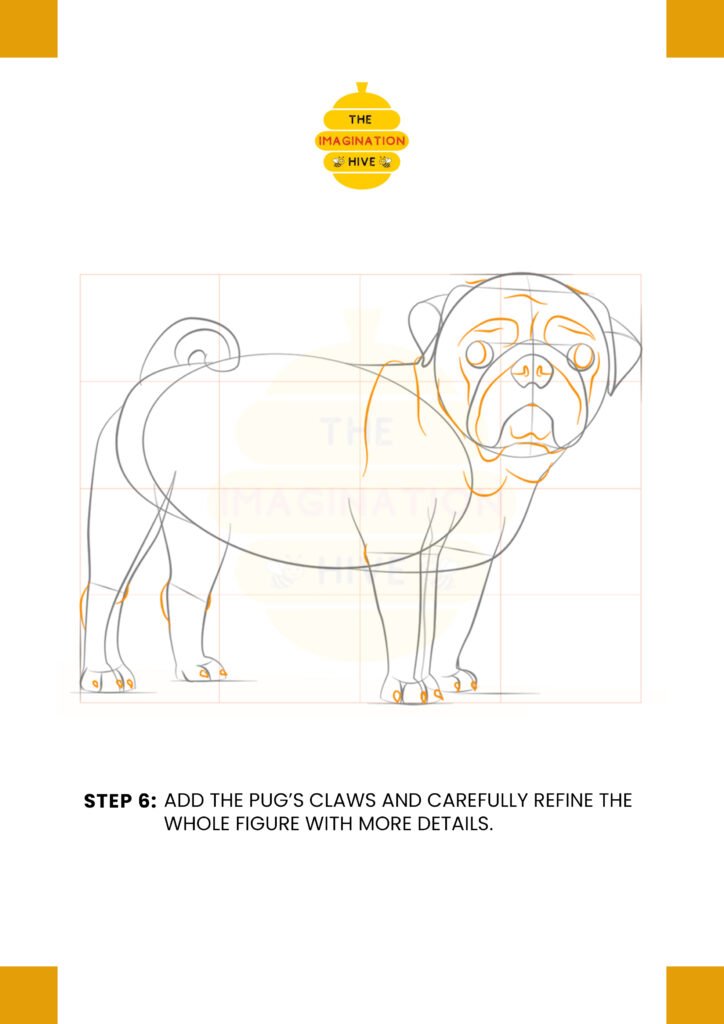
Add the pug’s claws and carefully refine the whole figure with more details.
Tip: Refine slowly to keep the drawing neat and balanced.
Step 7:
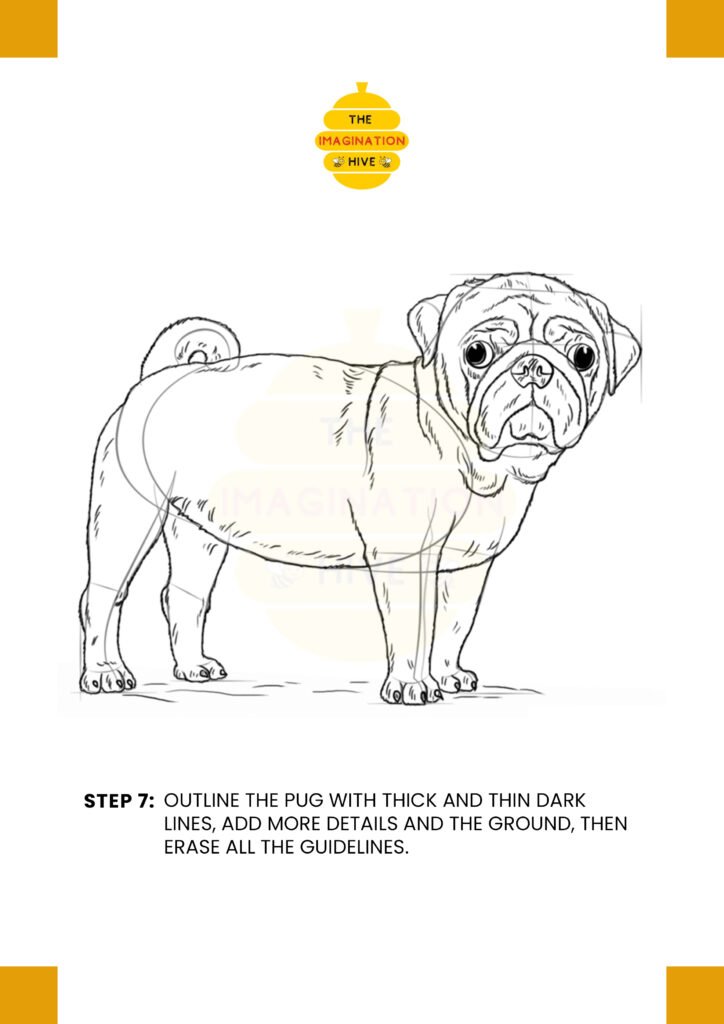
Outline the pug with thick and thin dark lines, add more details and the ground, then erase all the guidelines.
Tip: Thicker outer lines and thinner inner lines give a clean, finished look.