In this step-by-step tutorial, you’ll learn how to draw a polar bear by starting with simple shapes and gradually refining them into a strong, realistic walking pose.
STEP 1: Draw the Basic Head and Body Shapes
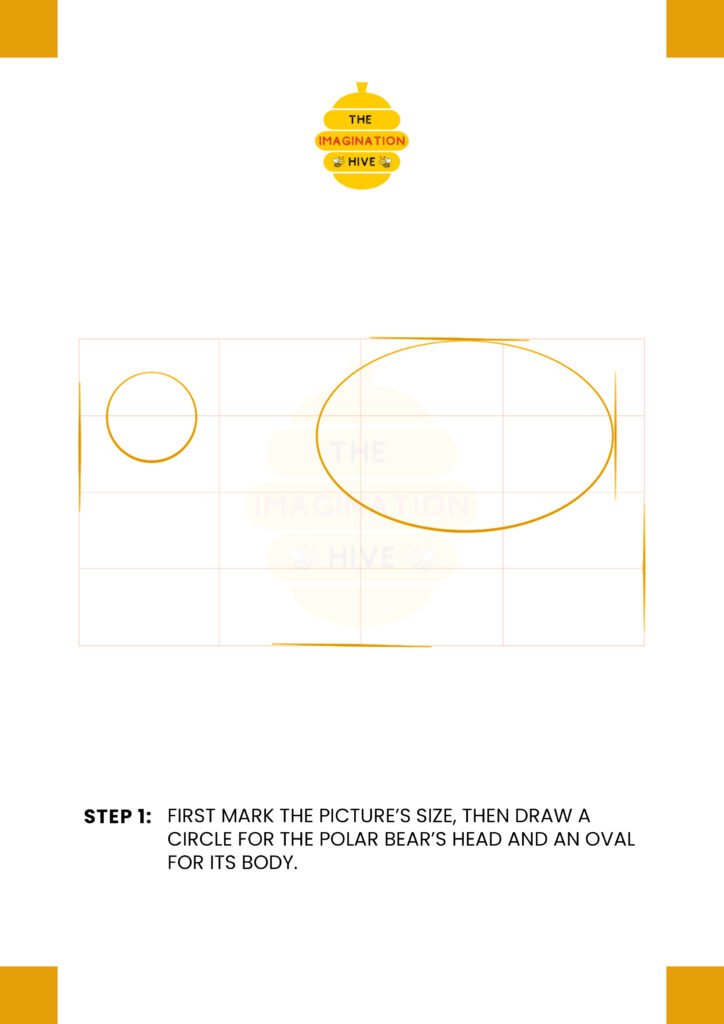
First, mark the picture’s size. Draw a circle for the polar bear’s head and a large oval for its body to establish the main proportions.
Short tip:
Keep these shapes light so you can easily adjust their size and position.
STEP 2: Connect the Head to the Body
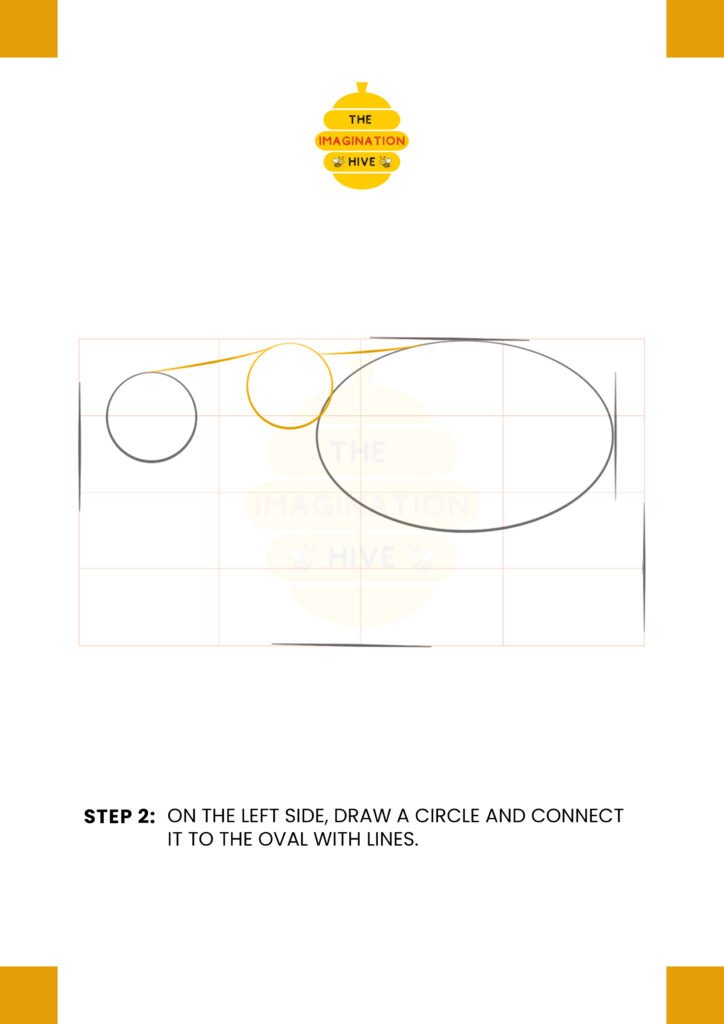
On the left side, draw another circle for the shoulder area and connect it to the body oval using straight guiding lines.
Short tip:
Straight guide lines help keep the body aligned and balanced.
STEP 3: Draw the Neck and Leg Shapes
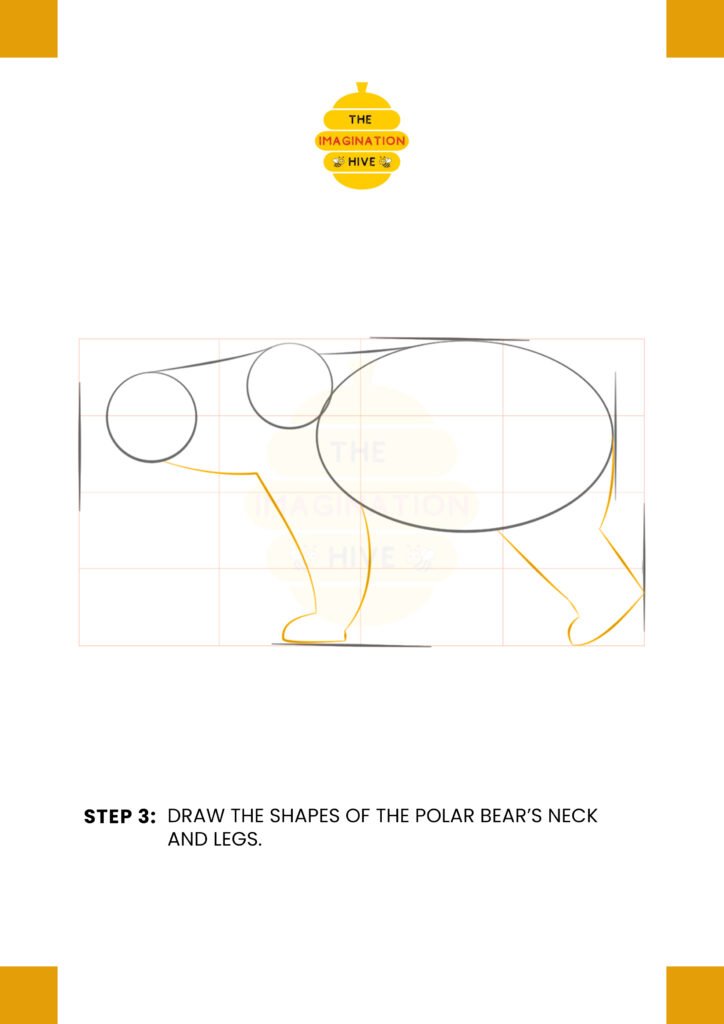
Sketch the shapes of the polar bear’s neck and legs using simple, blocky forms beneath the body.
Short tip:
Polar bear legs are thick and sturdy—avoid making them too thin.
STEP 4: Refine the Legs and Add a Head Center Line
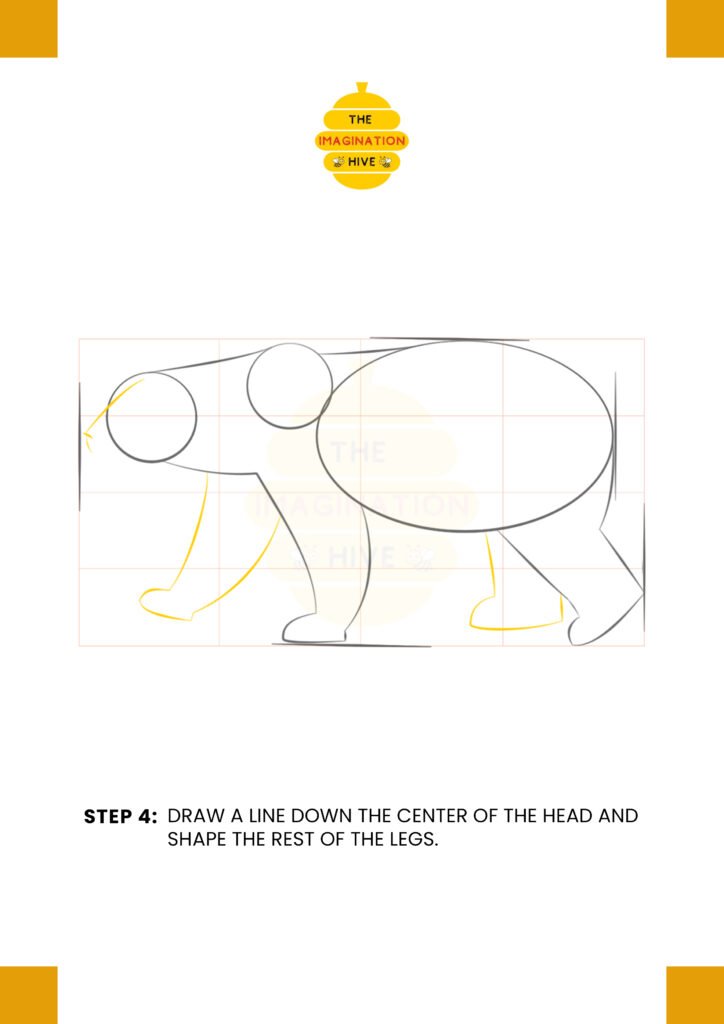
Draw a vertical line down the center of the head to guide facial features, then shape the remaining legs more clearly.
Short tip:
Use smooth curves to keep the legs looking natural and heavy.
STEP 5: Add the Snout, Ears, and Tail
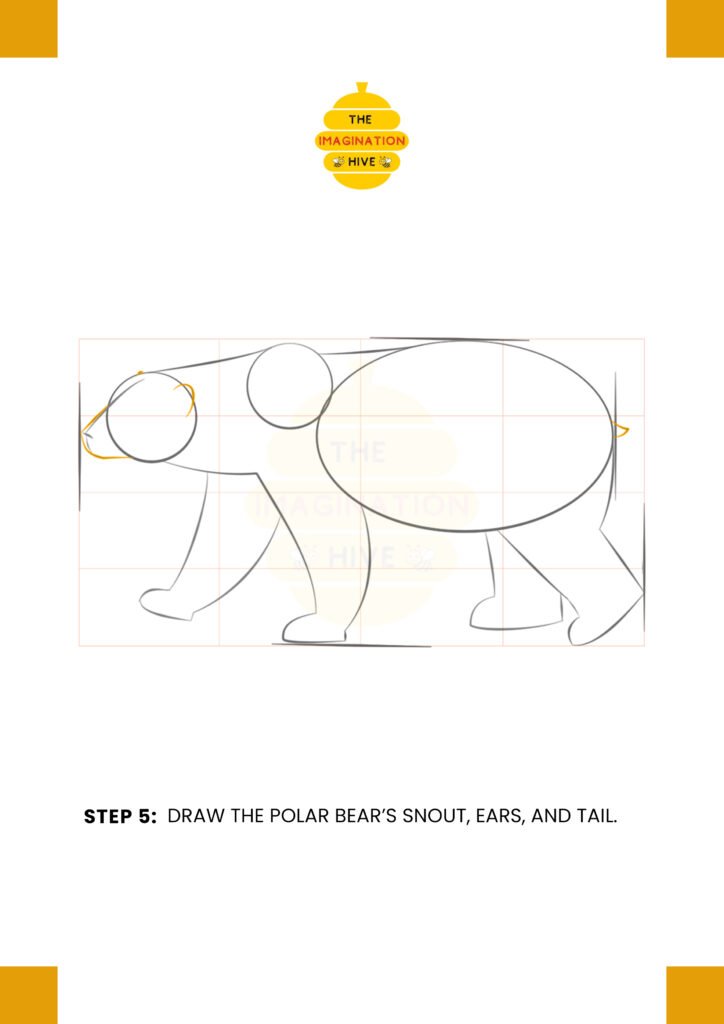
Draw the polar bear’s snout, small rounded ears, and short tail to define the animal’s character.
Short tip:
Keep the ears small to match a polar bear’s proportions.
STEP 6: Add Facial Features and Body Details
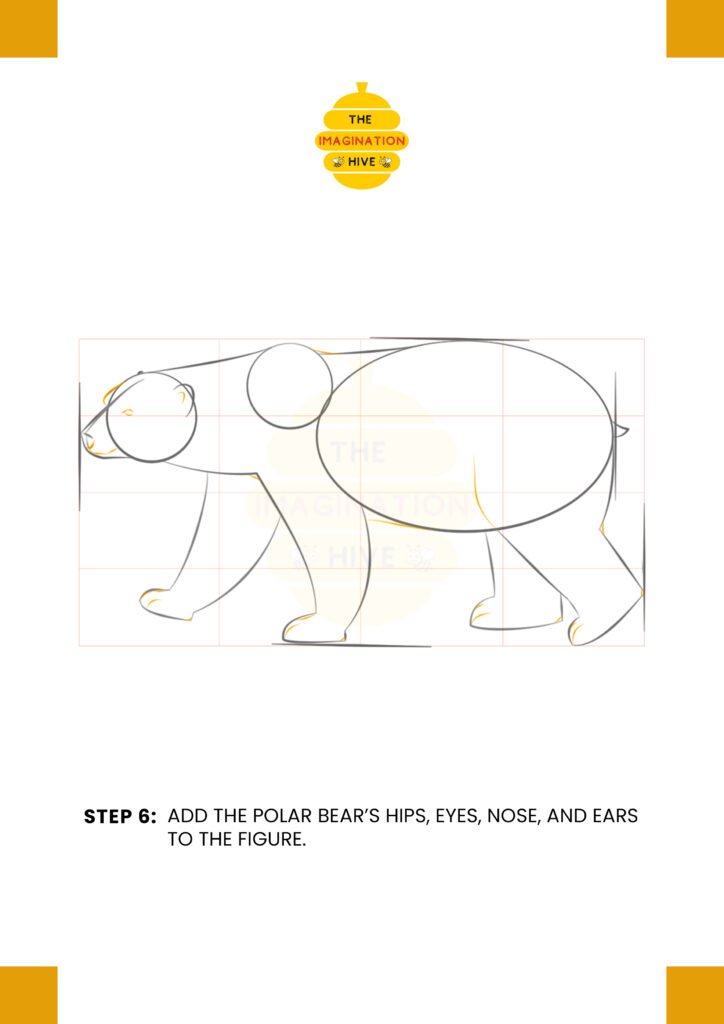
Add the eyes, nose, hips, and refine the body outline to improve realism and structure.
Short tip:
Small facial details make a big difference—add them carefully.
STEP 7: Final Outline and Cleanup
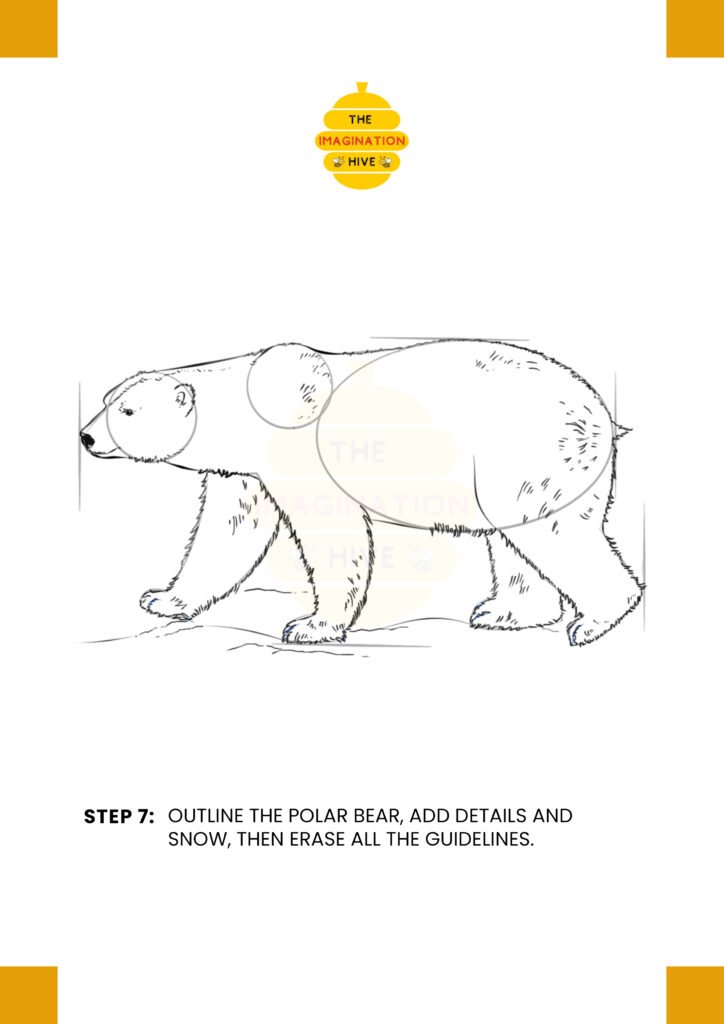
Outline the polar bear using thick and thin lines, add fur texture and snow details, then erase all remaining guidelines.
Short tip:
Vary line thickness to give the polar bear depth and a finished look.