This step-by-step drawing guide will help you create a platypus using simple shapes and gradual detailing, making the process easy and enjoyable for beginners and kids.
STEP 1: Draw the Basic Shapes
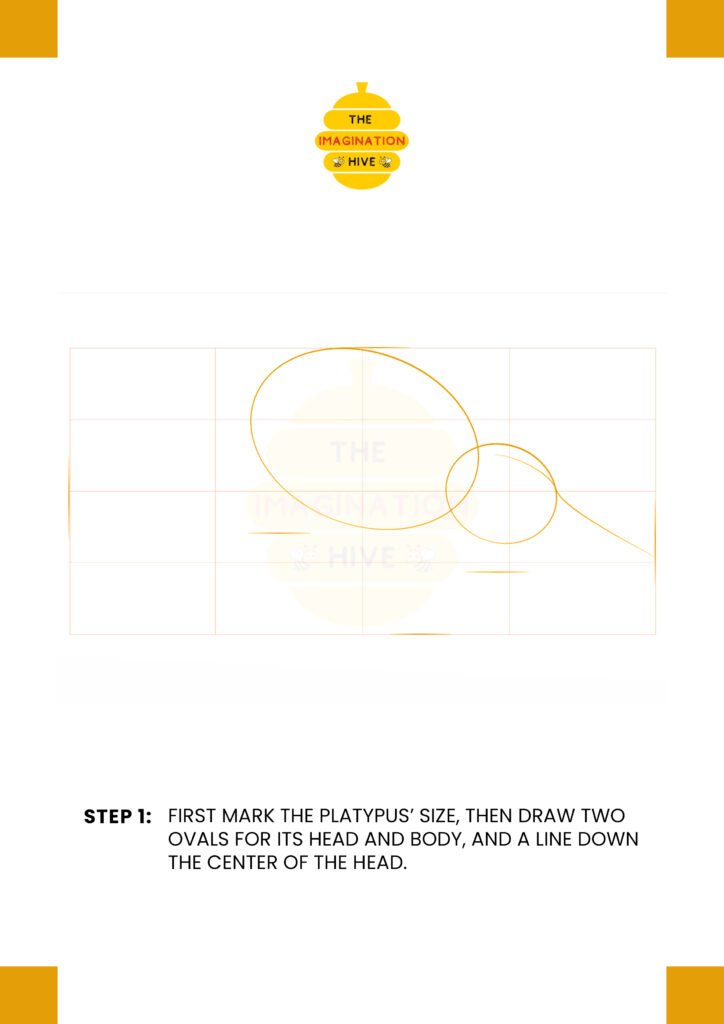
First, mark the platypus’s size on your page. Draw two simple ovals to represent the head and body, then add a straight guideline down the center of the head to help with symmetry.
Short tip:
Keep your lines light and loose so they’re easy to erase later.
STEP 2: Add Body and Tail Guidelines
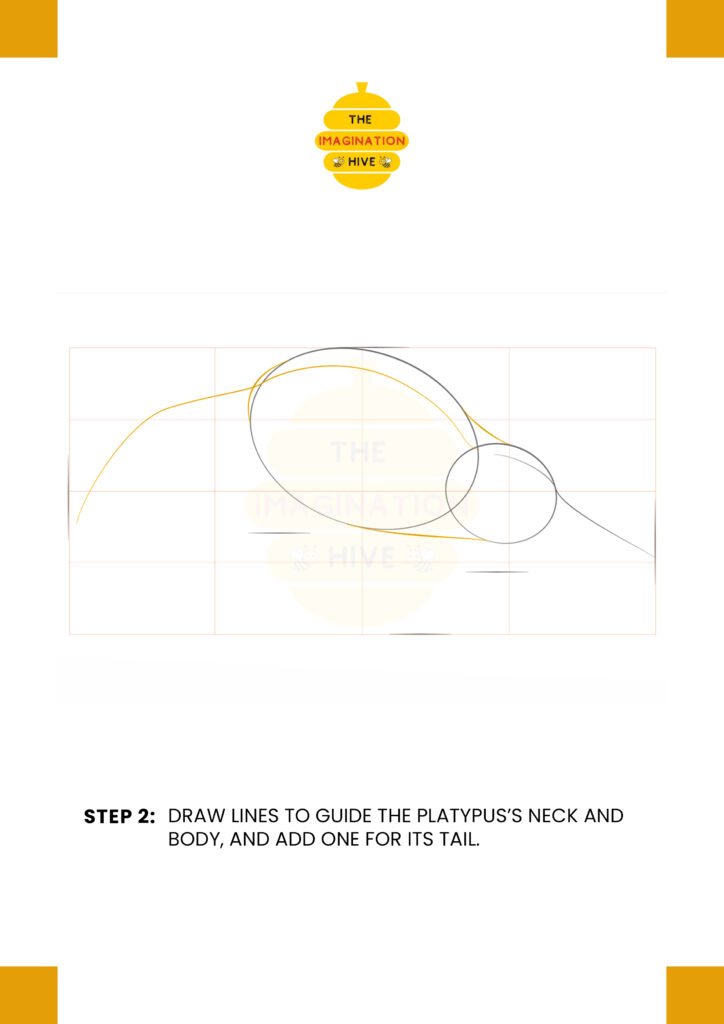
Draw smooth guiding lines to connect the head and body, forming the neck. Add a long curved line extending from the body to guide the shape of the tail.
Short tip:
Use long, flowing strokes to keep the platypus’s body looking natural.
STEP 3: Mark Legs and Mouth Placement
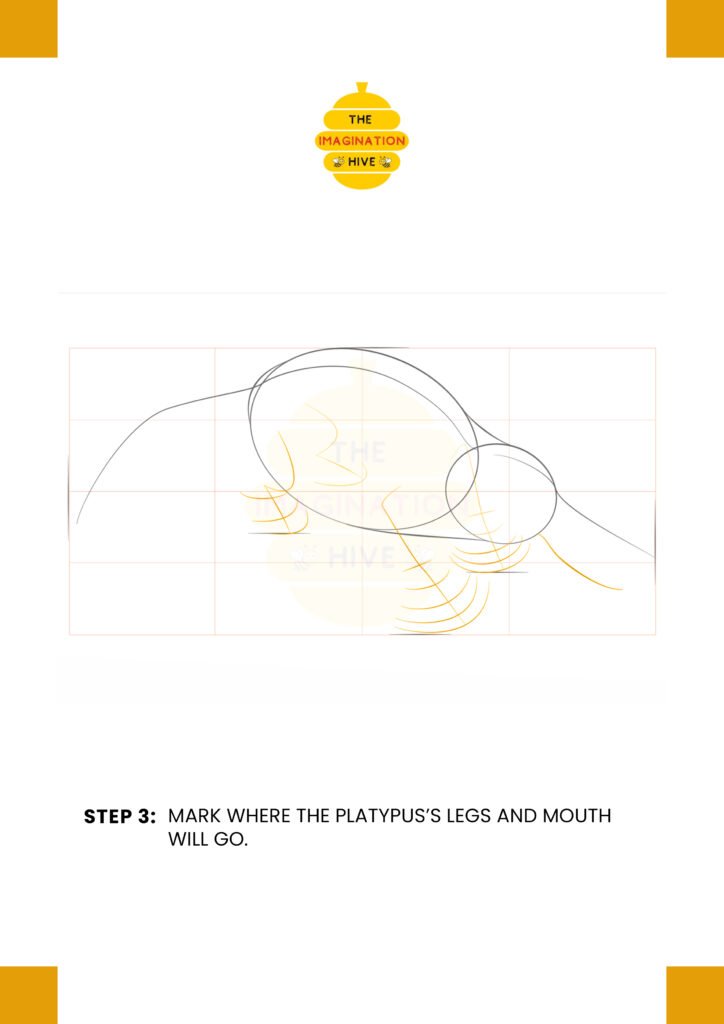
Mark where the platypus’s legs and mouth will go by sketching simple curved guidelines beneath the body and near the front of the head.
Short tip:
Placing guidelines first helps avoid uneven legs or facial features.
STEP 4: Shape the Legs and Beak
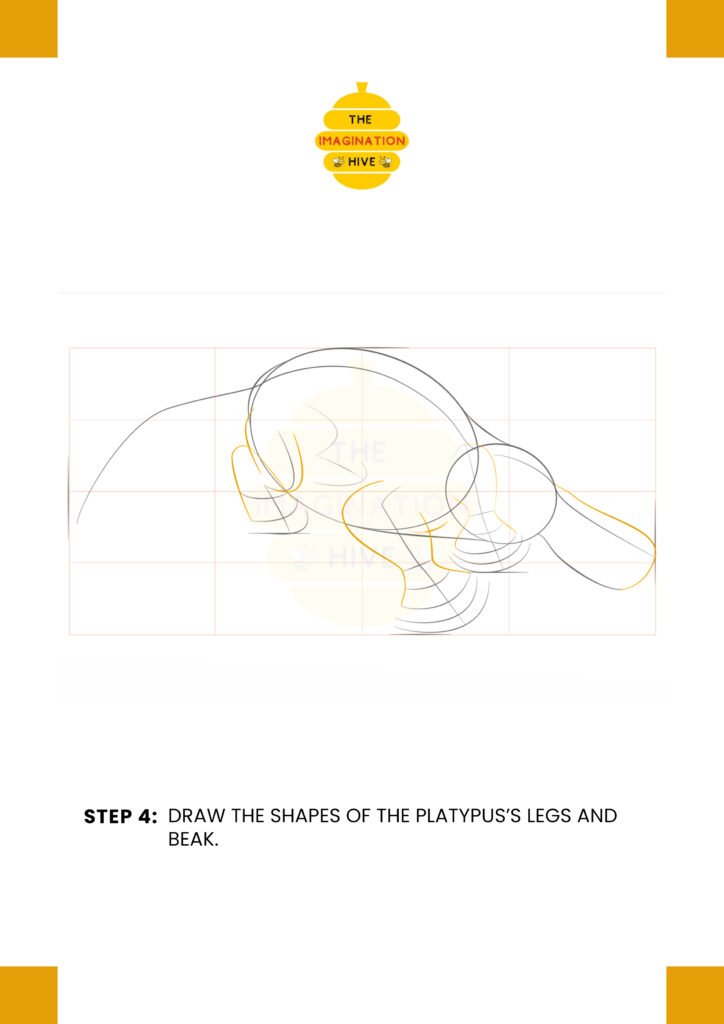
Draw the basic shapes of the platypus’s legs and beak, turning the guidelines into clearer forms while keeping the shapes simple.
Short tip:
Focus on overall shape, not details, at this stage.
STEP 5: Draw the Tail and Toes
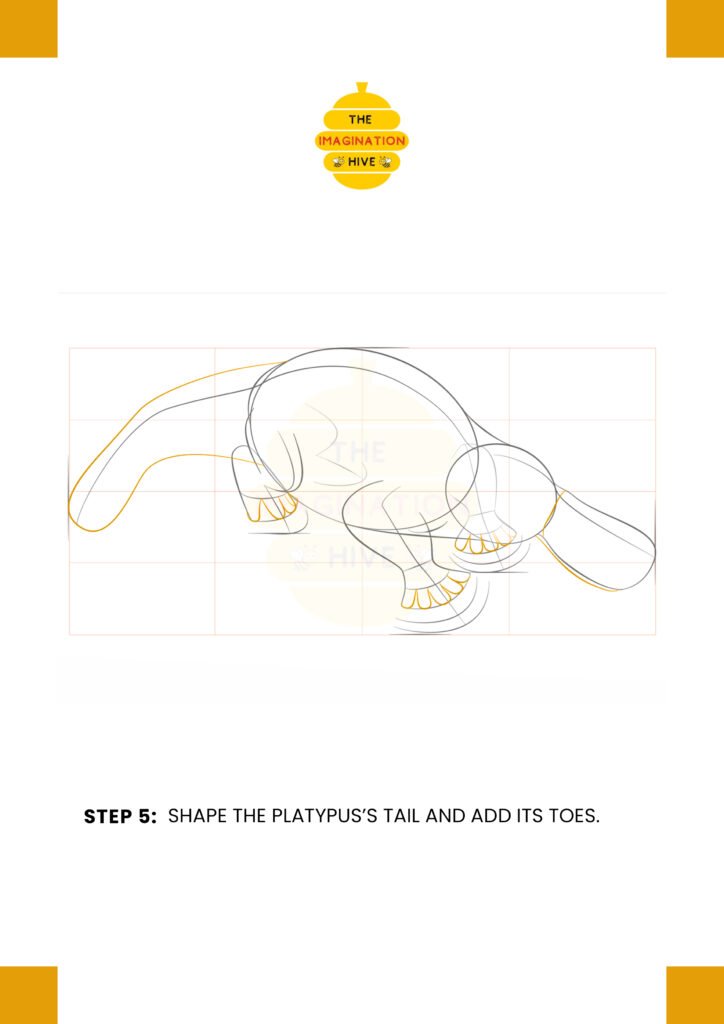
Shape the platypus’s tail and add its toes, rounding the edges to give the limbs a soft, natural look.
Short tip:
Webbed feet look best when drawn with rounded, connected lines.
STEP 6: Add Facial and Claw Details
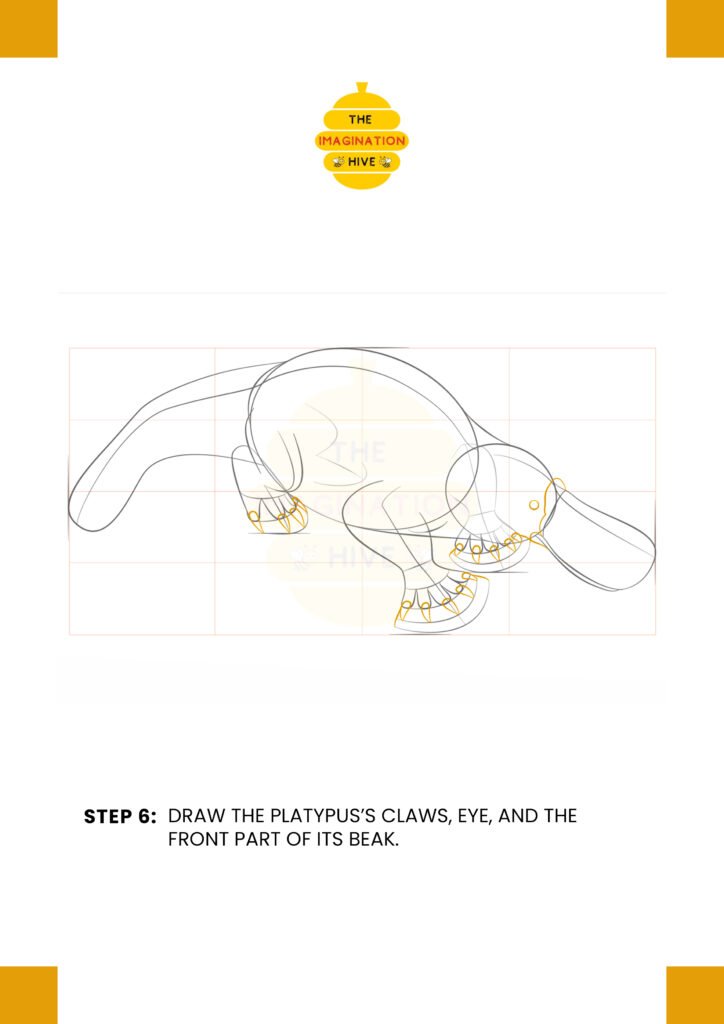
Add details like the claws, eye, and the front part of the beak, refining the face and feet without darkening the lines yet.
Short tip:
Small details stand out more when the rest of the drawing stays light.
STEP 7: Refine the Platypus
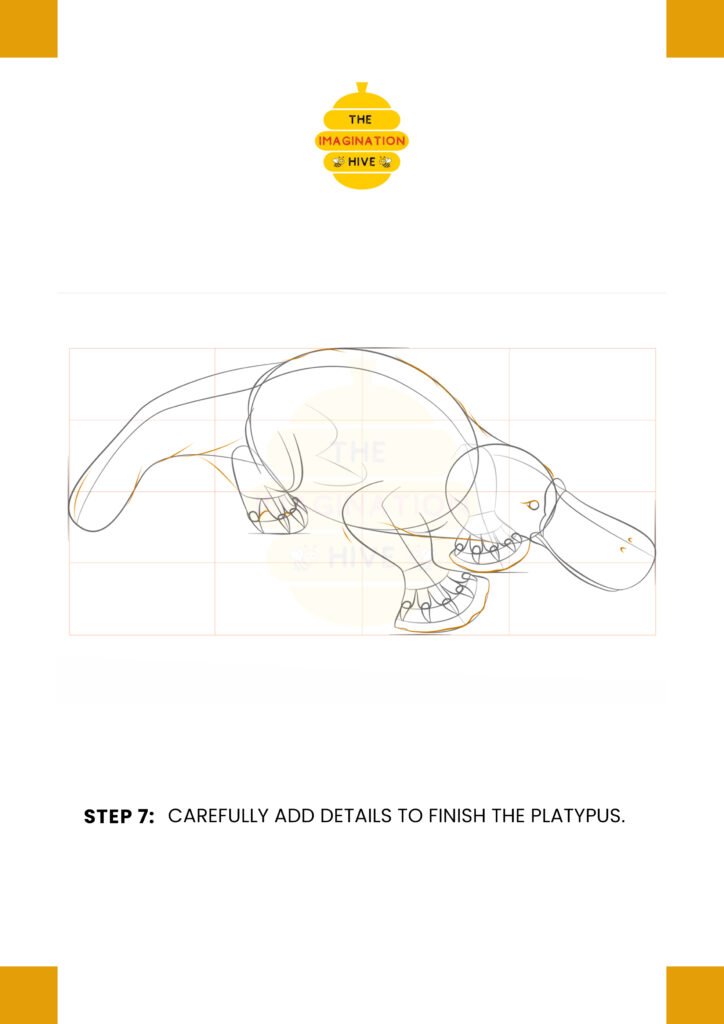
Carefully add final details to the platypus’s body, smoothing curves and adjusting proportions where needed.
Short tip:
Take your time refining — small tweaks make a big difference.
STEP 8: Final Outline and Cleanup
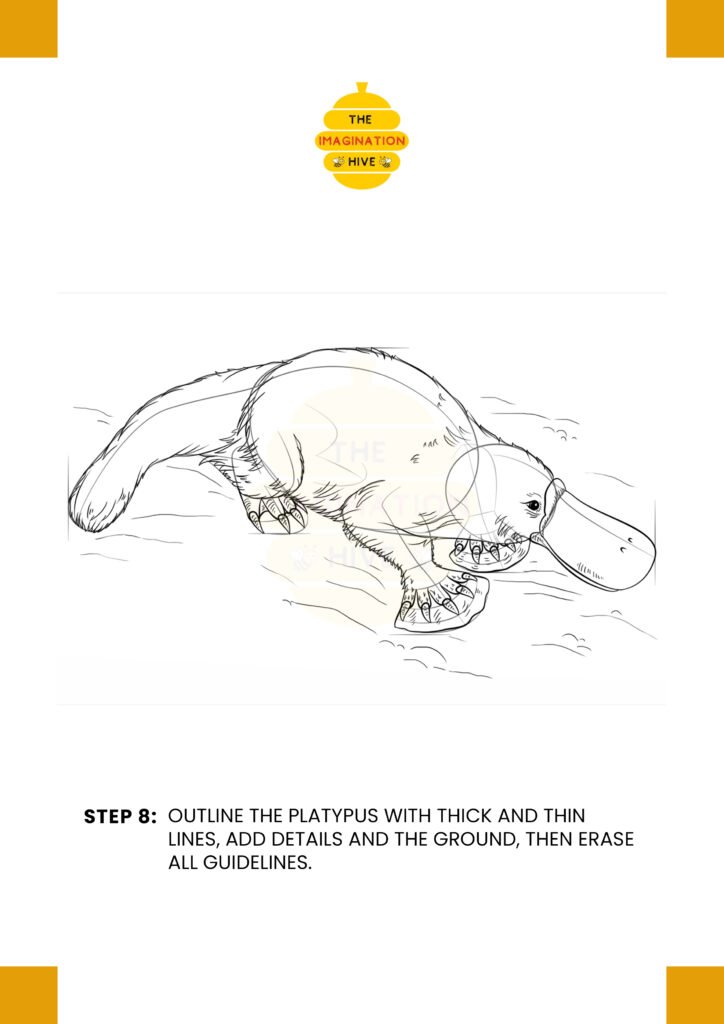
Outline the platypus with a mix of thick and thin dark lines, add ground details, and erase all remaining guidelines to finish the drawing cleanly.
Short tip:
Vary line thickness to give your drawing depth and a polished finish.