Step by step, you’ll learn how to draw a penguin by starting with simple shapes and gradually adding the body, wings, feet, and fine details.
STEP 1: Measure the Picture and Draw the Main Shapes
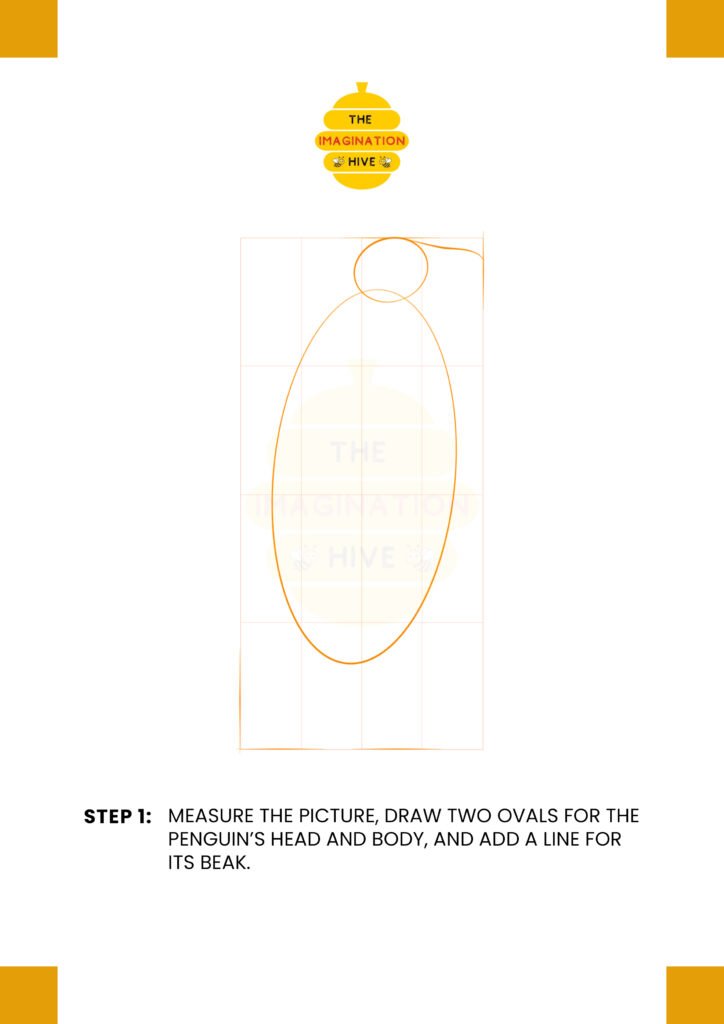
Measure the picture area, draw two ovals for the penguin’s head and body, and add a short line to show the direction of its beak.
Short tip:
Keep the ovals light and centred to help maintain balance.
STEP 2: Draw the Body and Neck Shapes
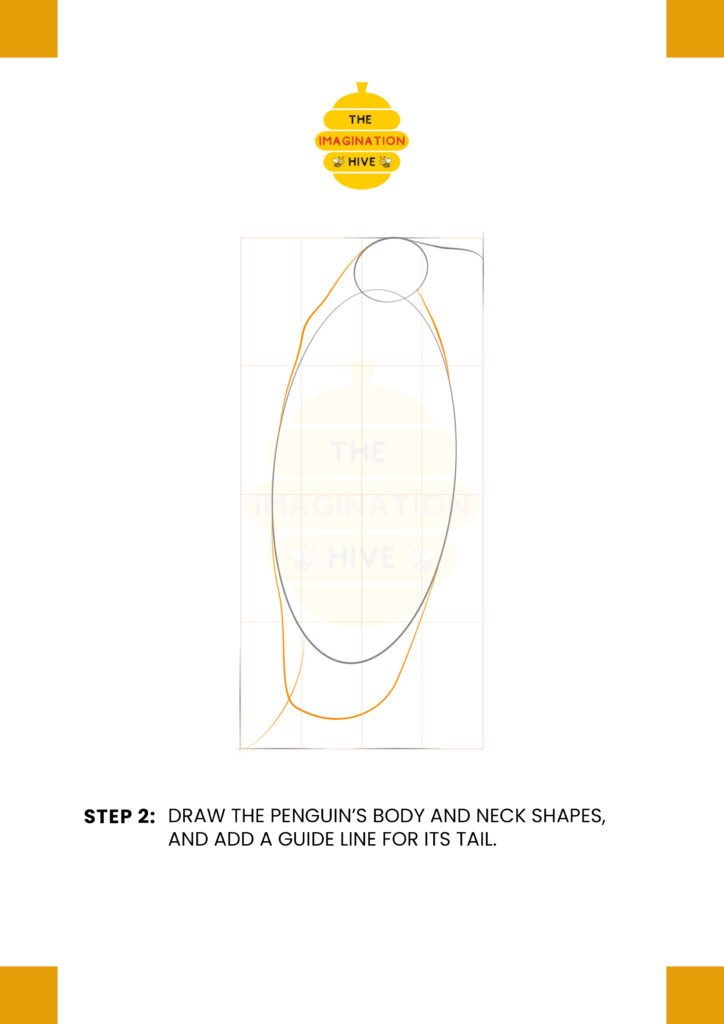
Refine the penguin’s body and neck shapes by connecting the head and body with smooth, curved lines, and add a guide line to indicate the tail position.
Short tip:
Long, smooth curves help create the penguin’s upright posture.
STEP 3: Add Guide Lines for Legs, Wing, and Mouth
Draw simple guide lines to show where the penguin’s legs, wing, and mouth will be placed before adding details.
Short tip:
Guide lines make it easier to keep both sides symmetrical.
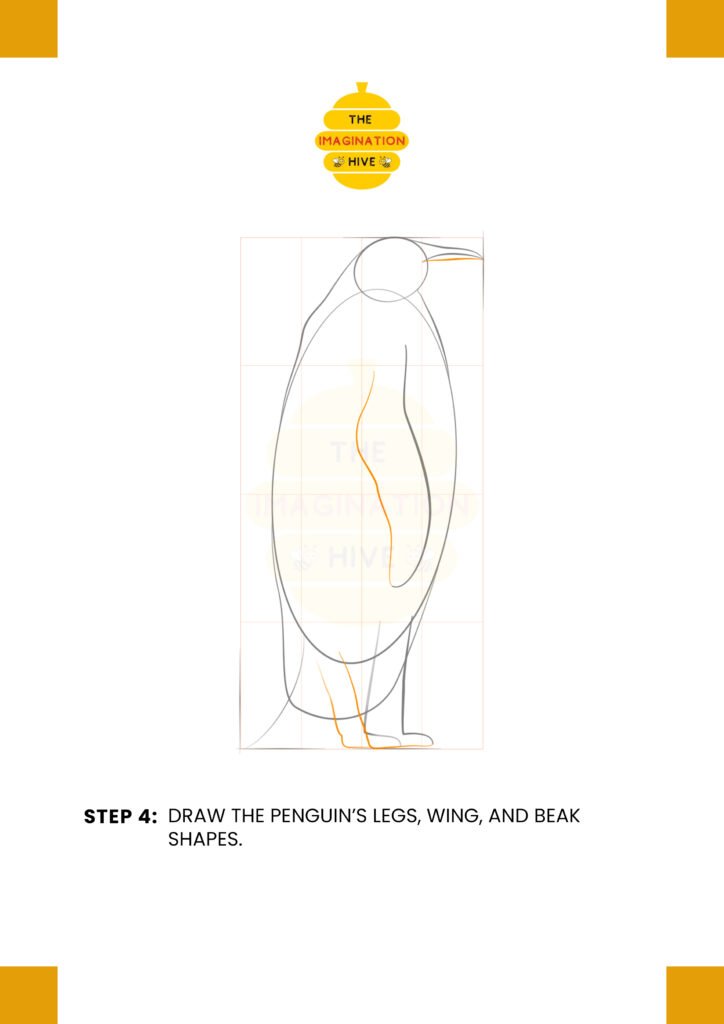
STEP 4: Draw the Legs, Wing, and Beak Shapes
Sketch the shapes of the legs, wing, and beak using the guides, focusing on overall placement rather than fine detail.
Short tip:
Keep the wing close to the body for a natural penguin pose.
STEP 5: Draw the Toes, Tail, and Head Details

Add the toes and tail, then draw extra lines on the head to define the face and beak more clearly.
Short tip:
Simple facial lines are enough at this stage—details come later.
STEP 6: Add Claws, Feathers, and Texture
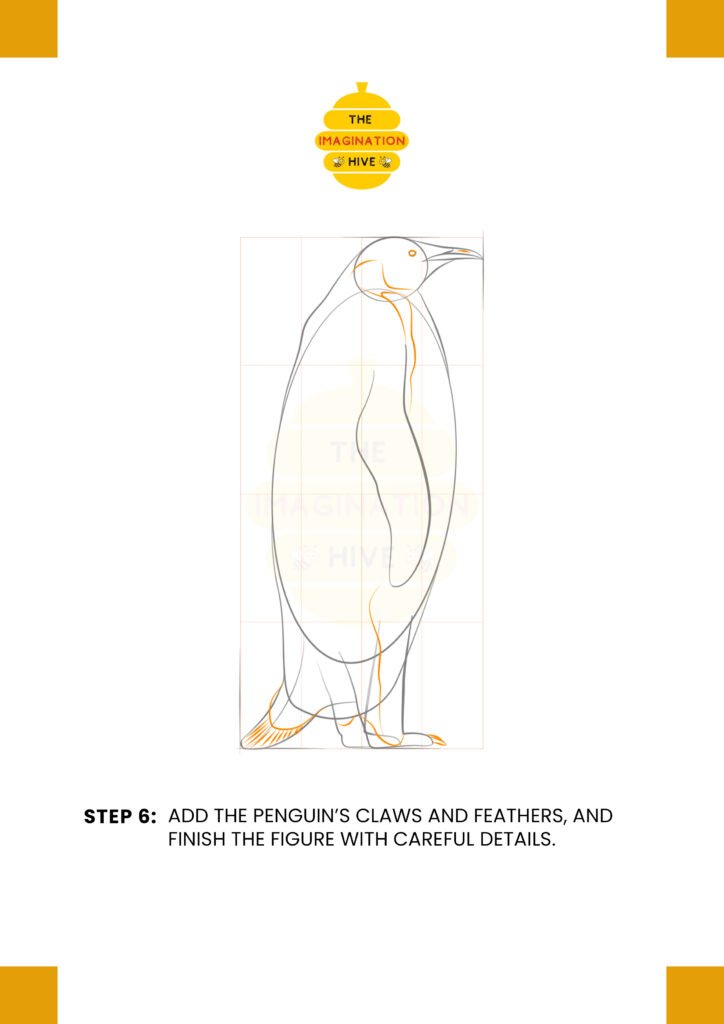
Draw the penguin’s claws and add feather texture along the body and wing, refining the shape as you go.
Short tip:
Use short, light strokes to suggest feathers without overdoing it.
STEP 7: Final Outline and Cleanup
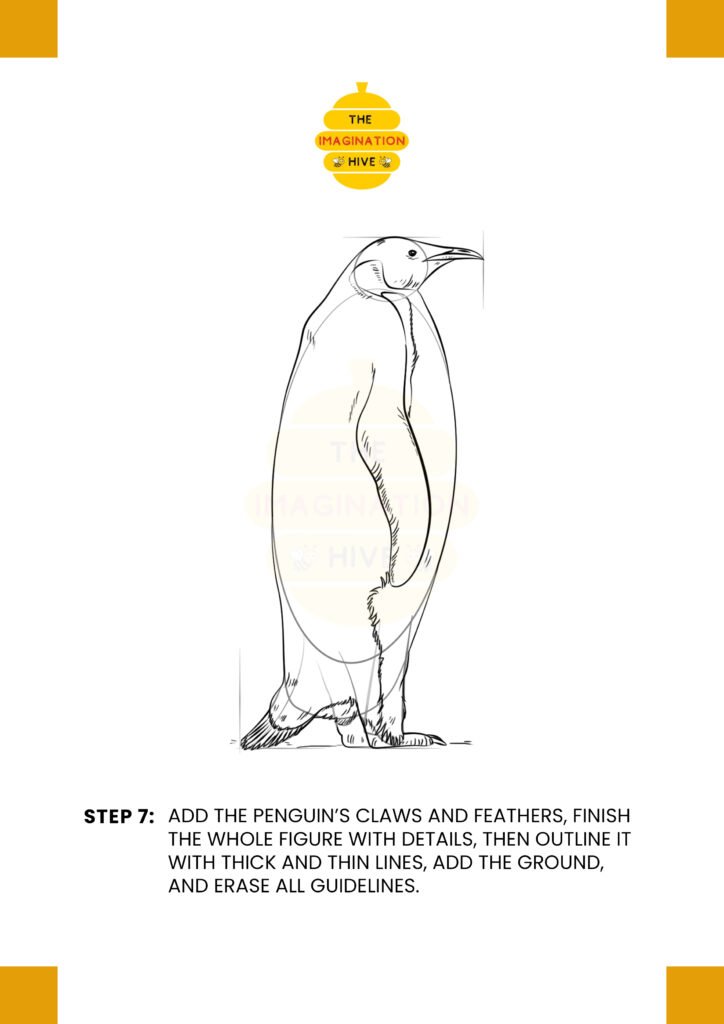
Finish the penguin by outlining it with thick and thin lines, adding the ground, refining details, and erasing all remaining guidelines.
Short tip:
Varying line thickness gives your penguin depth and a clean, finished look.