In this step-by-step tutorial, you’ll learn how to draw a parakeet by starting with simple shapes and gradually adding details to create a clean and realistic bird perched on a branch.
STEP 1: Draw the Basic Head, Body, and Perch Line
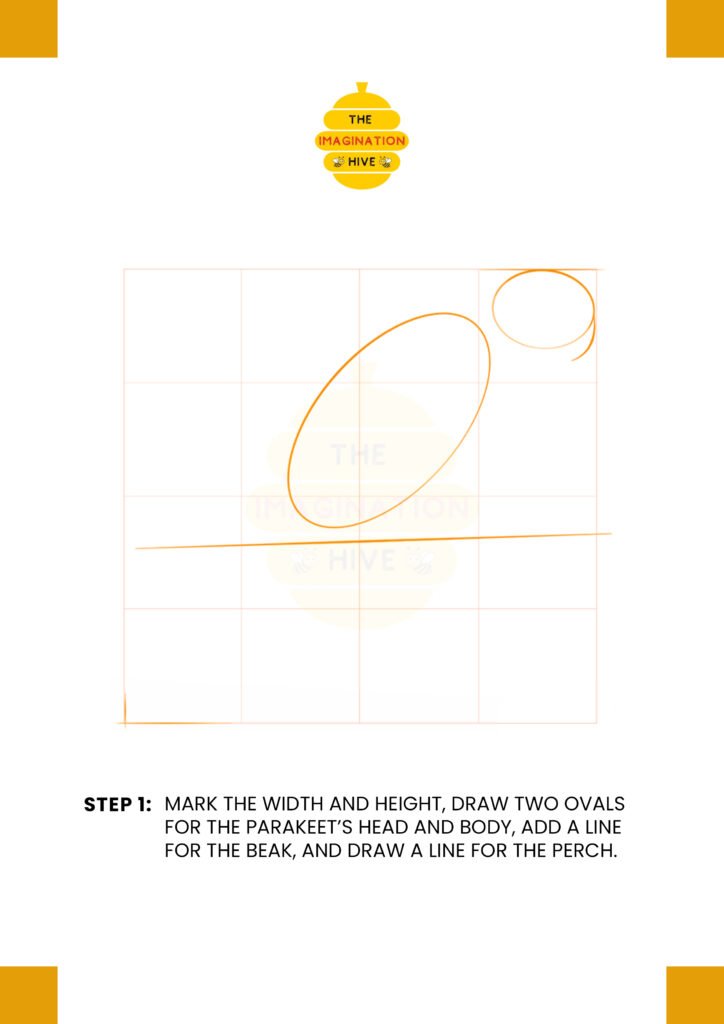
Mark the width and height of the drawing area, then draw two ovals—one for the parakeet’s body and one for its head. Add a center line for the beak and draw a straight line to represent the perch.
Short tip:
Keep all shapes light so you can easily adjust proportions.
STEP 2: Draw the Neck, Body, and Tail Guideline
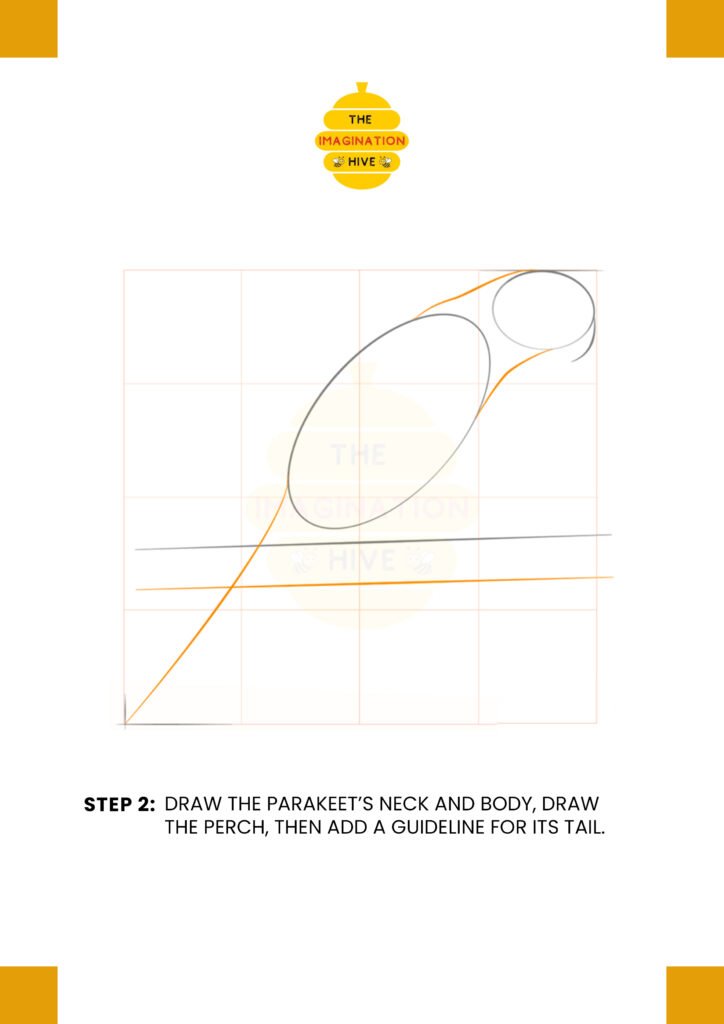
Connect the head and body with smooth lines to form the neck. Refine the body shape slightly and draw the perch more clearly, then add a long guideline for the tail.
Short tip:
A long tail line helps keep the parakeet balanced on the perch.
STEP 3: Add Guidelines for Legs, Feet, Wings, and Mouth
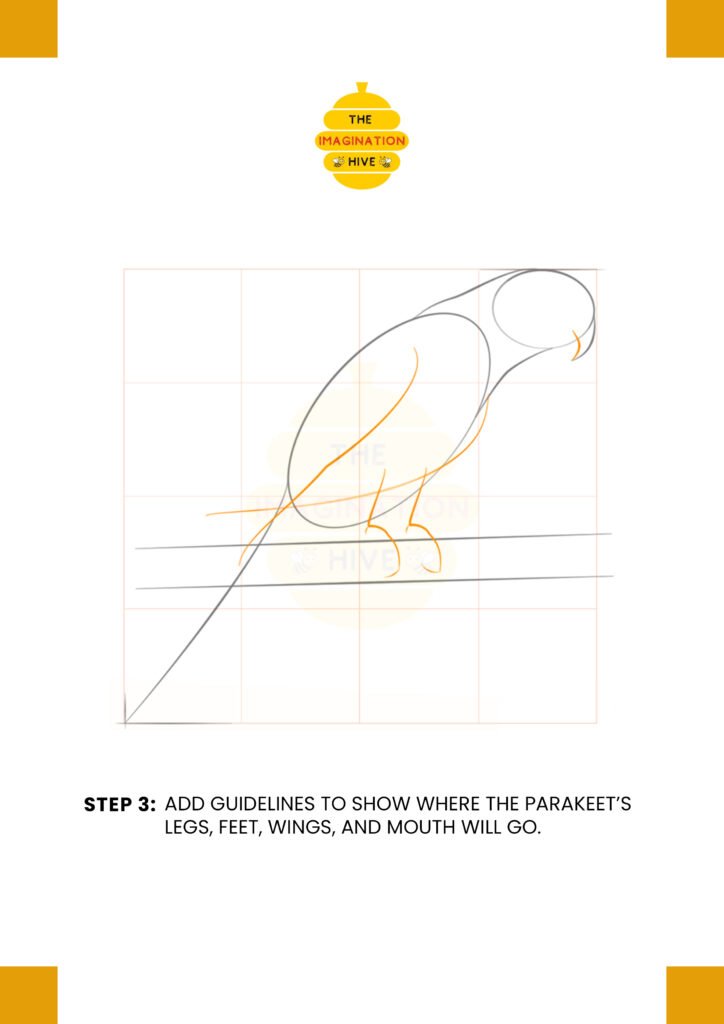
Sketch light guide lines to show where the legs, feet, wings, and mouth will be placed. These guides help organize the drawing before details are added.
Short tip:
Use simple lines—details come later.
STEP 4: Draw the Basic Shapes for Legs, Wings, and Beak
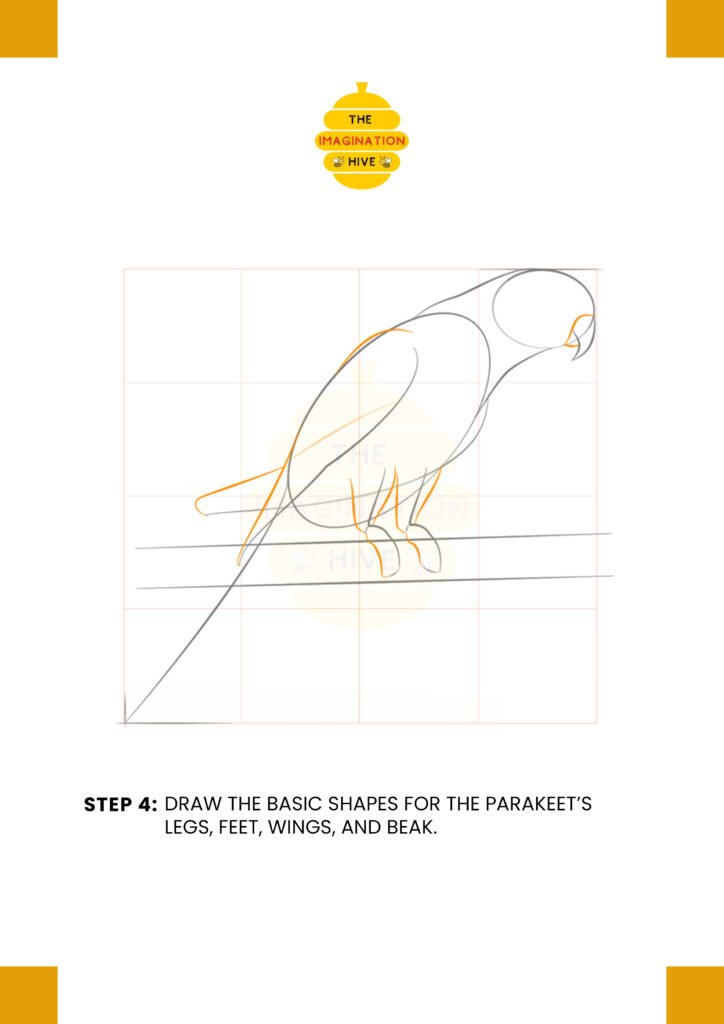
Begin shaping the legs and feet gripping the perch, outline the wing shape, and draw the curved beak using the head guideline.
Short tip:
Keep the beak small and curved for a natural parakeet look.
STEP 5: Add Details to the Wing, Eye, Toes, and Tail
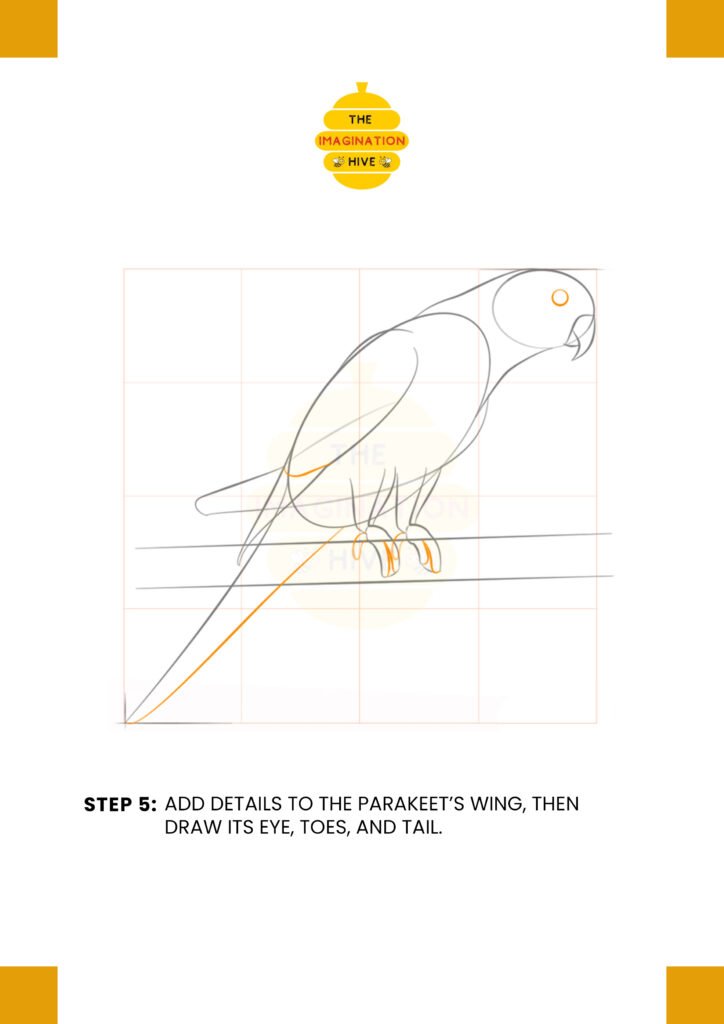
Refine the wing with feather lines, draw the eye, shape the toes around the perch, and define the tail more clearly.
Short tip:
Add details gradually to avoid overcrowding the drawing.
STEP 6: Refine Feathers and Claws
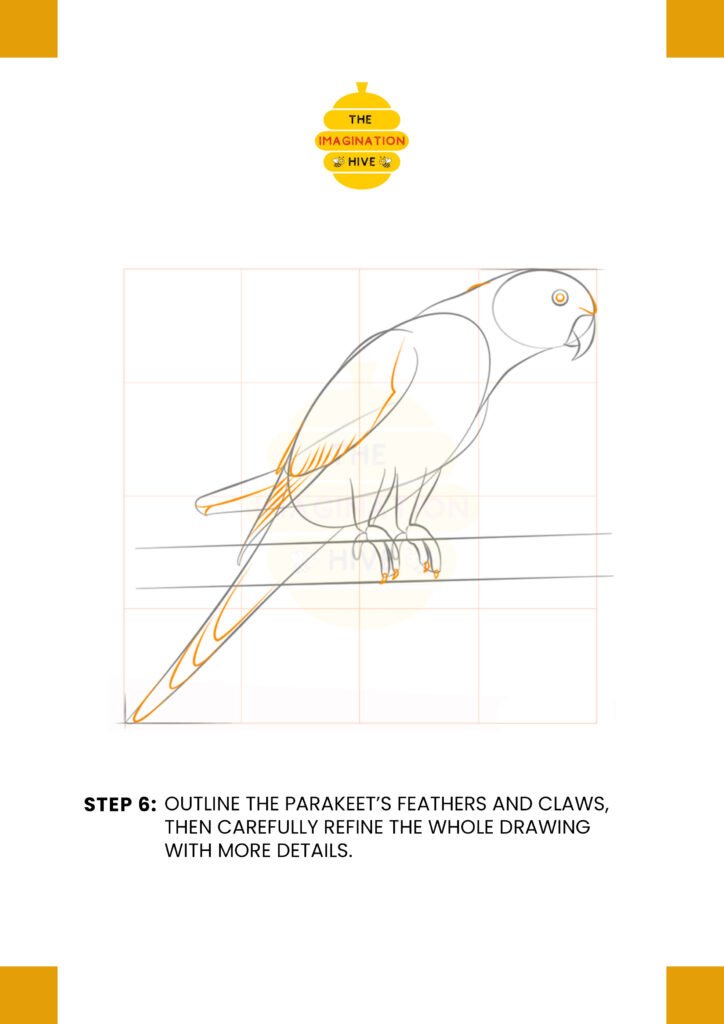
Outline the feathers on the wings and tail, refine the claws gripping the perch, and smooth the body lines.
Short tip:
Vary feather line lengths to add texture and depth.
STEP 7: Final Outline and Cleanup
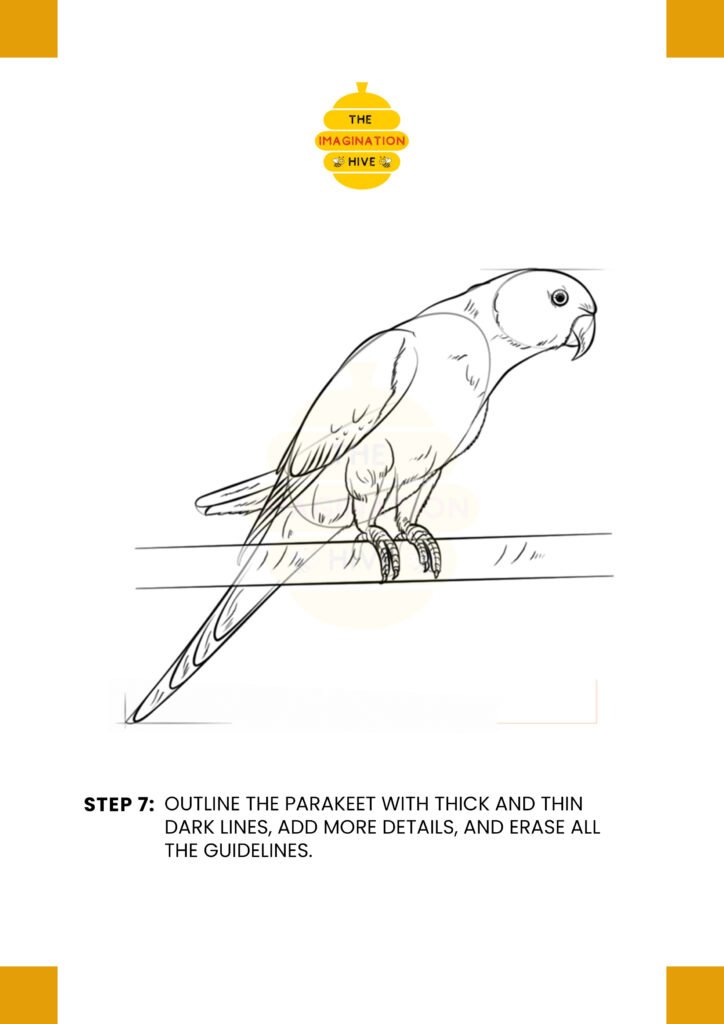
Outline the parakeet using thick and thin dark lines, add final details to the perch, and erase all remaining guidelines to complete the drawing.
Short tip:
Thicker outer lines help the parakeet stand out and look finished.