Drawing a moose may look challenging because of its large body and wide antlers, but if you break it into simple shapes, it becomes much easier. Follow these 8 clear steps and take your time with each one. By the end, you’ll have a strong and realistic moose standing proudly on your page.
Step 1 : Draw the Basic Ovals
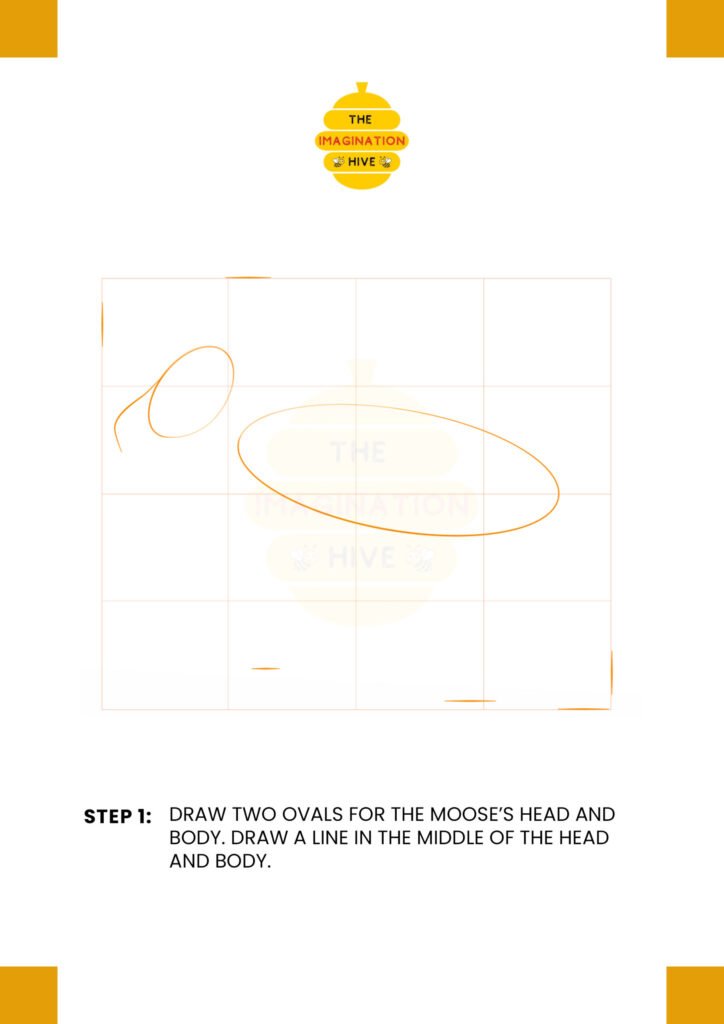
Start by sketching two ovals — a smaller one for the head and a larger tilted oval for the body. Add a light vertical line down the center of the head and a guiding line through the body to help with alignment and balance.
Short Tip: Keep your lines light
Light sketch lines make it easier to erase mistakes and adjust proportions later.
Step 2 : Shape the Neck and Body

Connect the head and body with smooth curved lines to form the neck and back. Round out the chest and belly to create the moose’s heavy build. Add a small curved line at the back to show where the tail will be.
Short Tip: Focus on smooth curves
Moose have large but flowing shapes, so avoid stiff or sharp lines.
Step 3 : Sketch the Legs and Lower Jaw
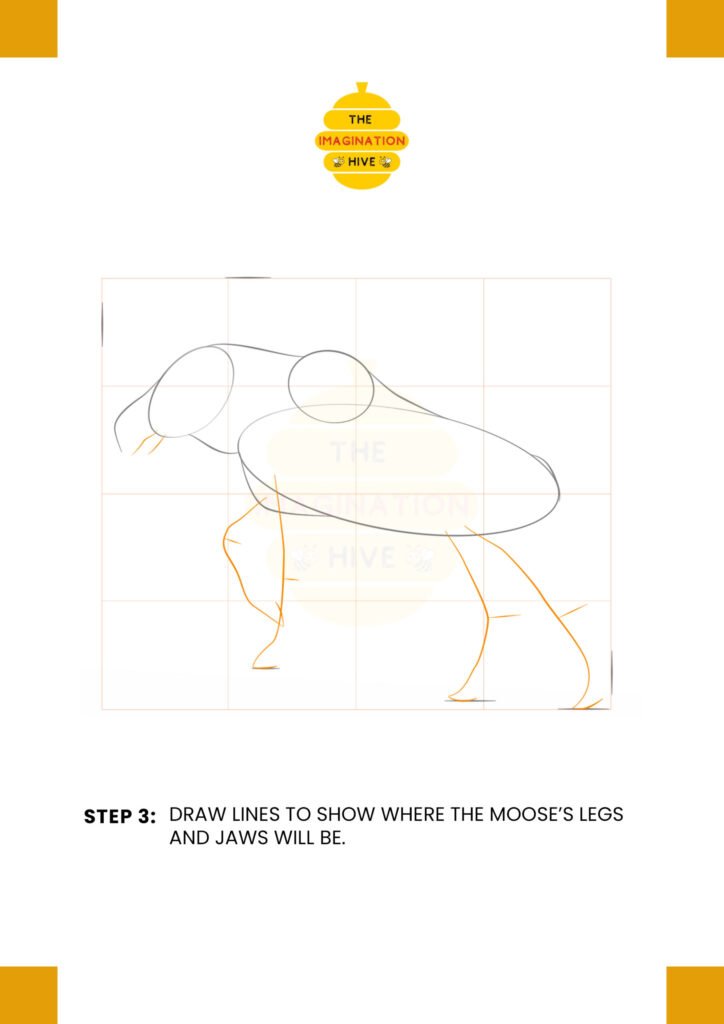
Draw simple straight lines to mark where the legs will go. Shape them into long, sturdy legs with slight bends at the joints. Add the lower jaw beneath the head to give the moose its long facial structure.
Short Tip: Check the balance
Make sure the legs look strong enough to support the moose’s large body.
Step 4 : Add Ears, Feet, and Antler Guides
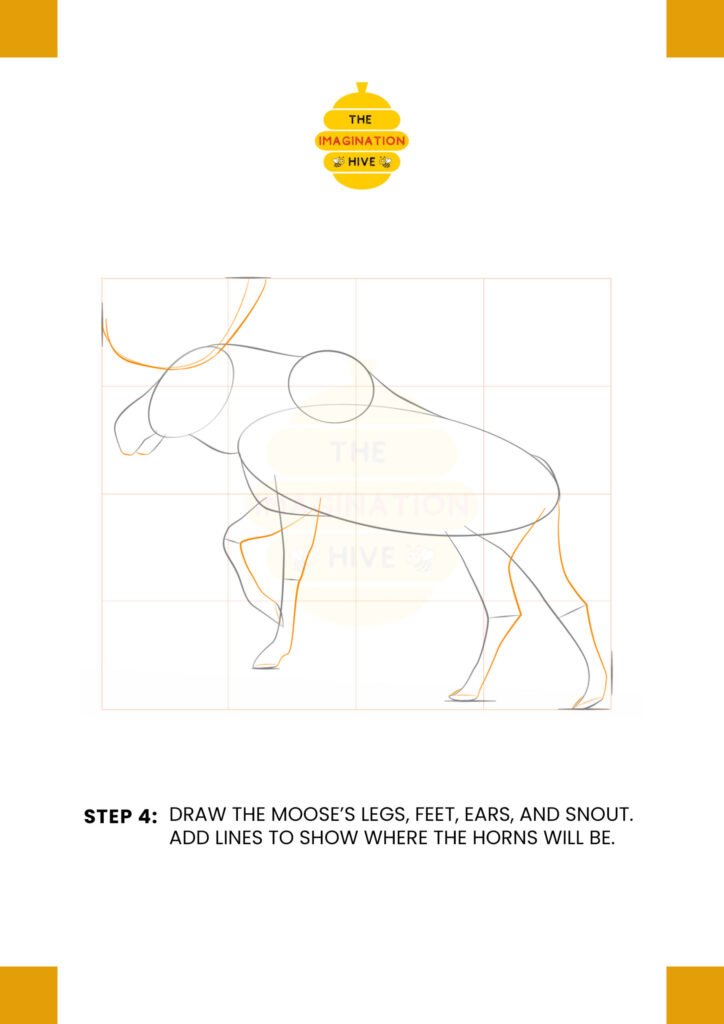
Draw the ears on top of the head and refine the snout shape. Add hooves at the bottom of each leg. Sketch light guiding lines above the head to show where the antlers will be placed.
Short Tip: Leave space above
Moose antlers are tall and wide, so give them enough room on your page.
Step 5 : Draw the Antlers and Tail
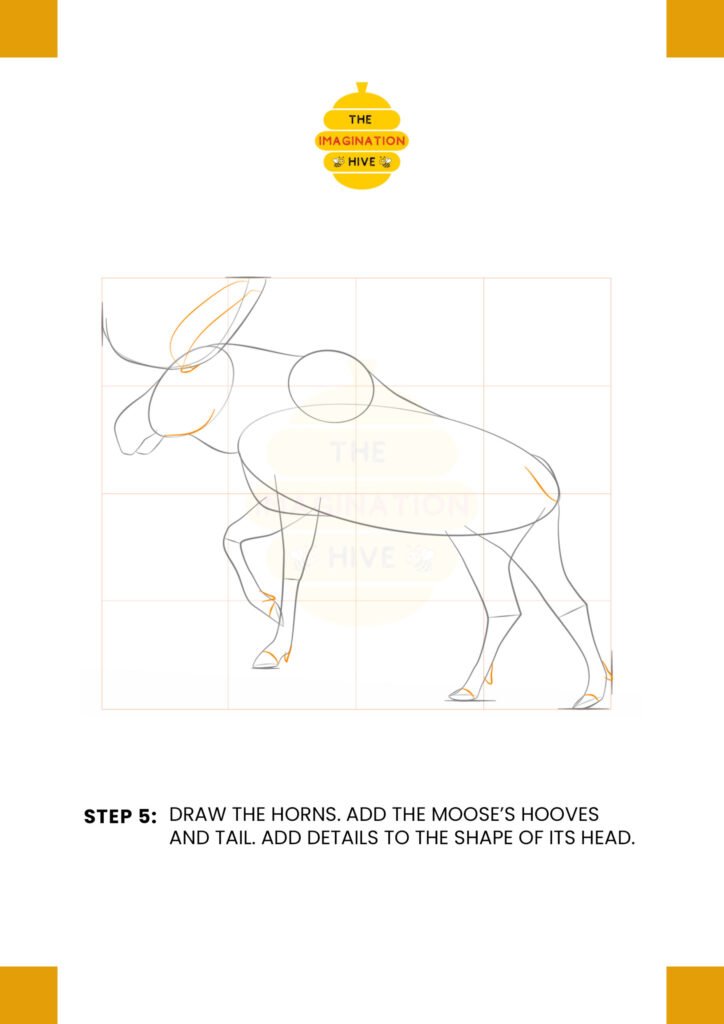
Carefully draw the large antlers, starting from the base and expanding outward with wide branching shapes. Refine the hooves and add the short tail at the back. Adjust the head shape if needed.
Short Tip: Build the antlers slowly
Start with the main structure first, then add smaller points and details.
Step 6 : Add Facial Features and Fur

Draw the eye, nose, and mouth. Add the hanging fur under the lower jaw. Begin sketching short fur lines along the neck, chest, and legs. Refine the body shape and back line.
Short Tip: Use short strokes
Small, quick lines help create natural-looking fur texture.
Step 7 : Refine the Whole Moose
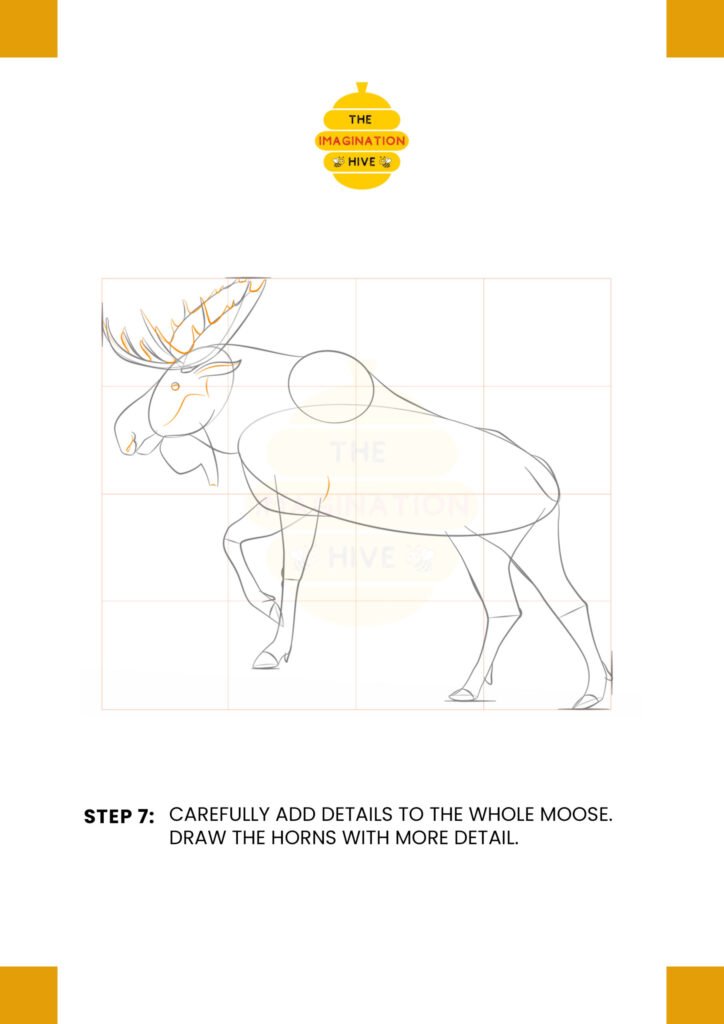
Go over the entire drawing and improve the shapes. Add more detail to the antlers and strengthen the legs. Make sure all parts connect smoothly and look balanced.
Short Tip: Step back and look
Looking at your drawing from a distance helps you spot small improvements.
Step 8 : Outline and Finish
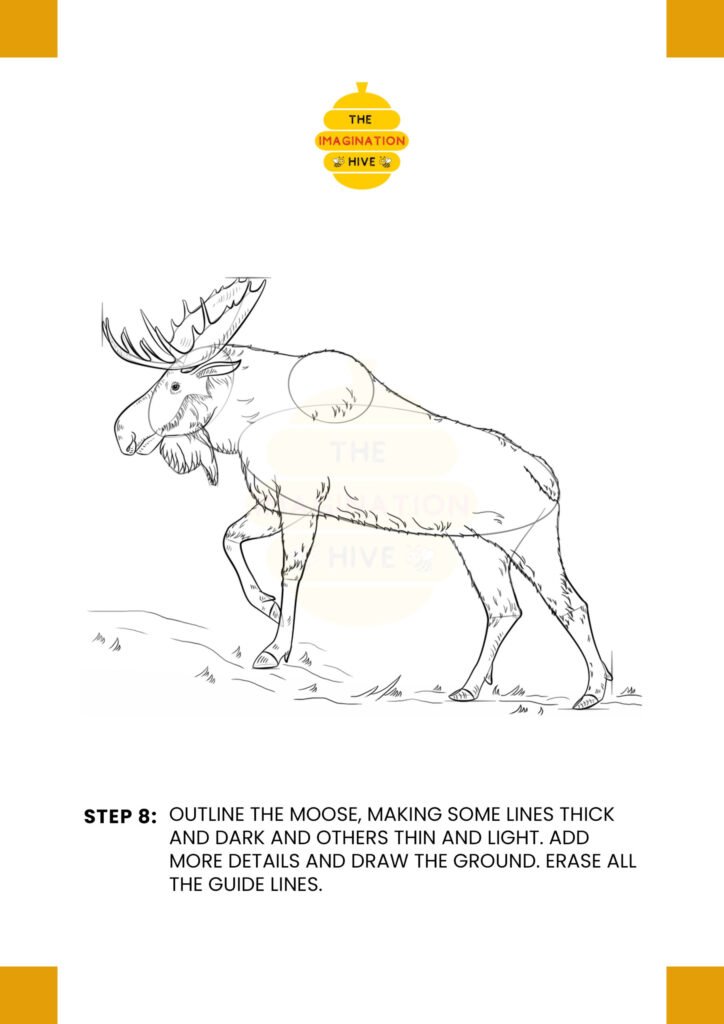
Outline the moose using darker lines, making some areas thicker and others thinner for depth. Add ground lines under the hooves and erase all guide lines. Add extra texture if you like.
Short Tip: Vary line thickness
Thicker outer lines and thinner inner details will make your moose look more realistic and bold.