Drawing a longhorn is a great way to practice large body proportions, strong legs, and wide, curved horns. Follow these steps to build the drawing gradually and finish with clean, confident lines.
STEP 1: Measure the Picture and Draw the Basic Shapes
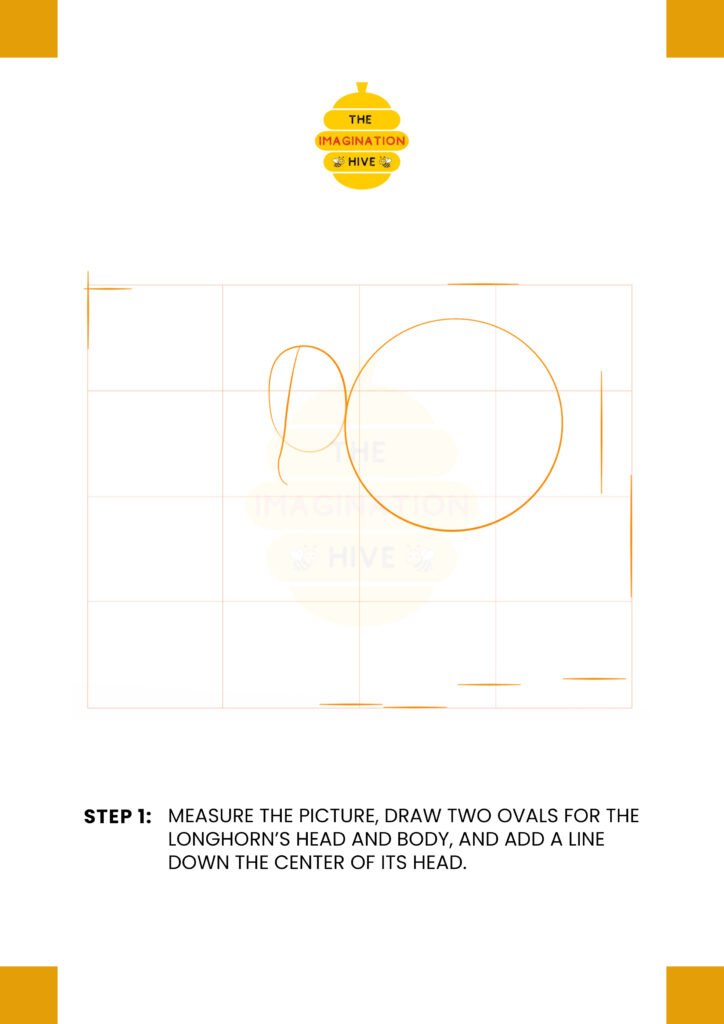
Measure your drawing area first, then draw two ovals—one for the longhorn’s body and a smaller one for the head. Add a straight guideline down the center of the head to help with symmetry.
Short tip:
Keep the ovals light and simple so they’re easy to adjust later.
STEP 2: Draw the Body, Neck, and Tail Line
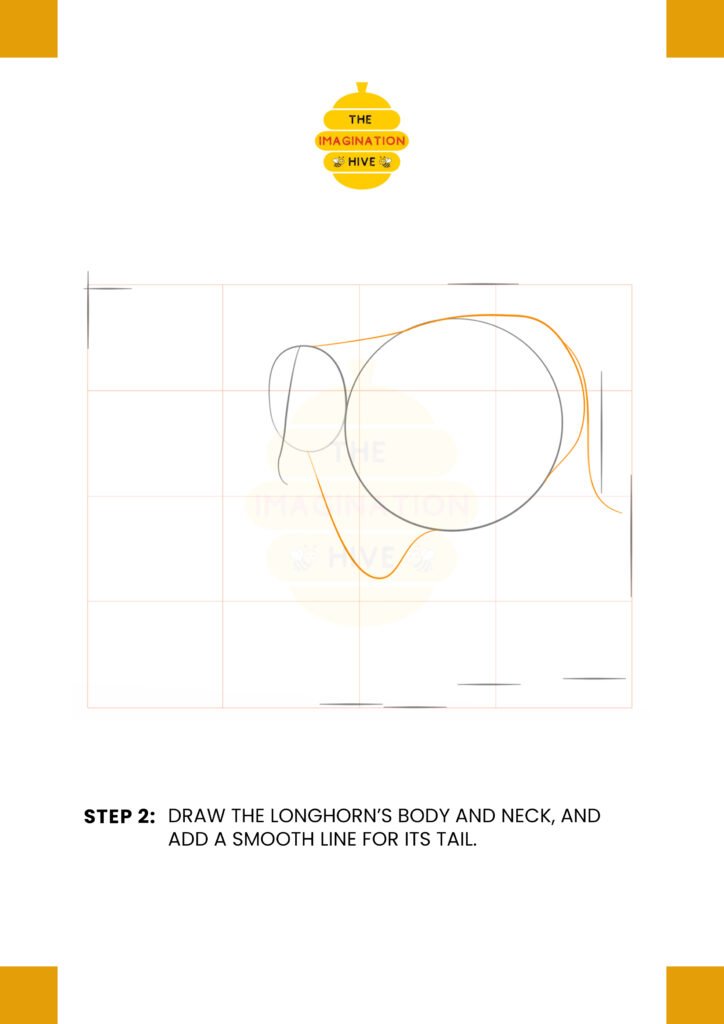
Connect the head and body with smooth lines to form the neck. Refine the body shape and add a flowing line at the back to mark the tail’s direction.
Short tip:
Use long, smooth strokes to show the longhorn’s calm stance.
STEP 3: Mark the Legs and Facial Guidelines
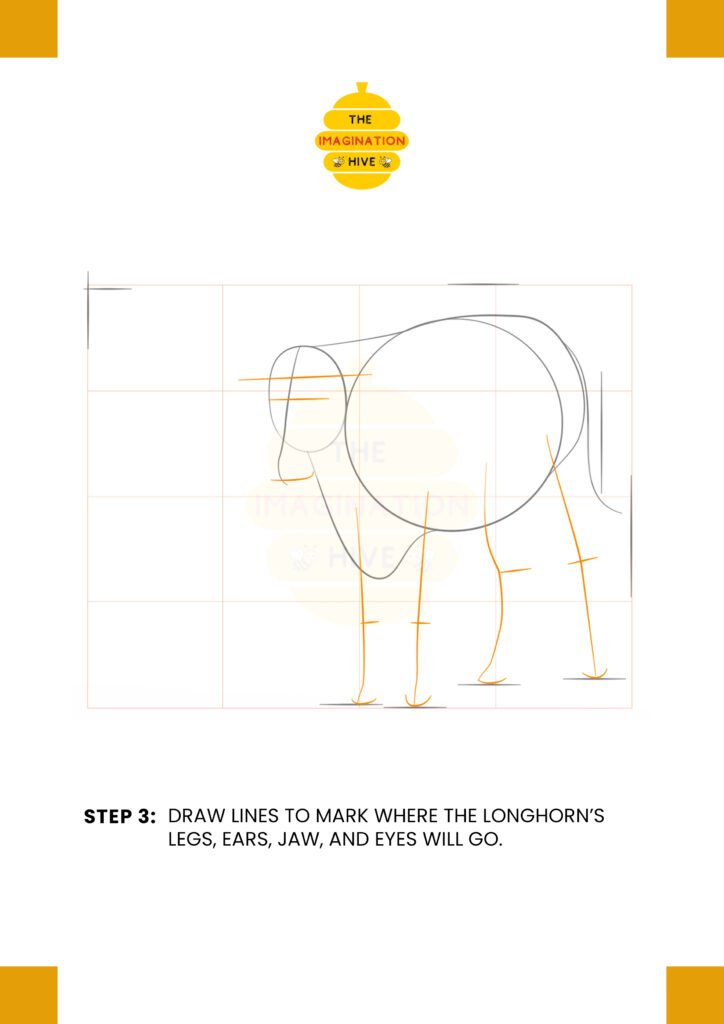
Draw simple lines to show where the legs will go, marking the joints lightly. Add short guide lines on the head for the eyes, ears, and jaw placement.
Short tip:
Spacing the legs evenly helps keep the body balanced.
STEP 4: Draw the Legs, Hooves, Ears, and Snout

Turn the leg guides into fuller leg shapes and add the hooves at the bottom. Sketch the ears and shape the snout, then lightly mark the horn direction.
Short tip:
Hooves should be small and slightly angled for a natural look.
STEP 5: Add the Eyes, Horns, and Head Details
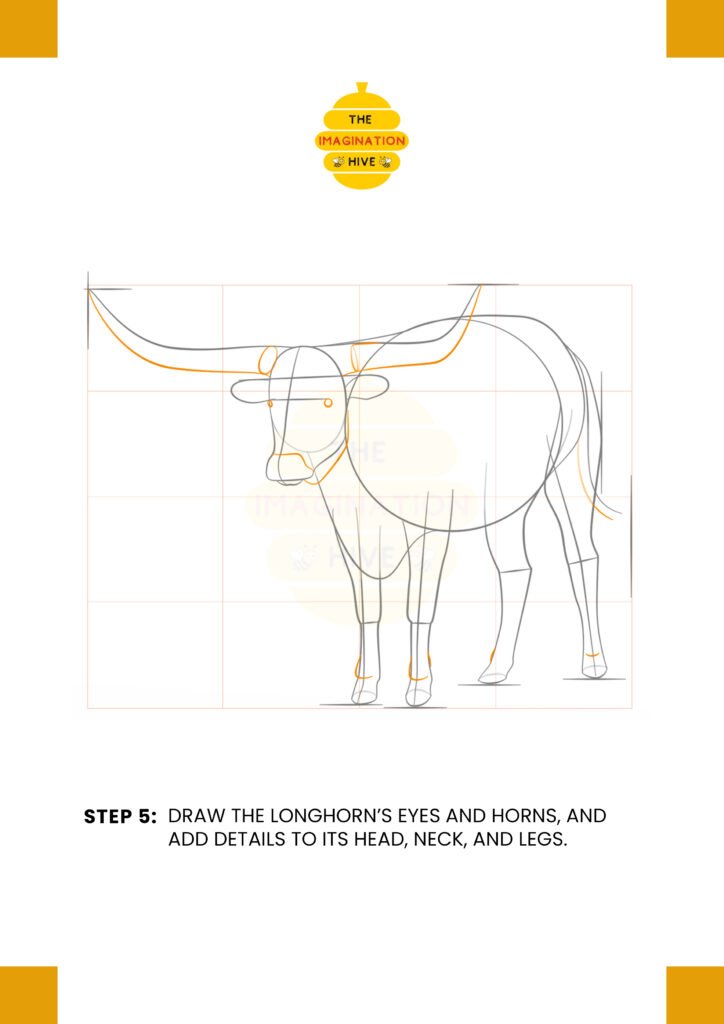
Draw the eyes and refine the face. Carefully sketch the long, curved horns extending outward from the head, keeping both sides balanced.
Short tip:
Check both horns against the center guideline to keep them even.
STEP 6: Finish the Body and Add Details
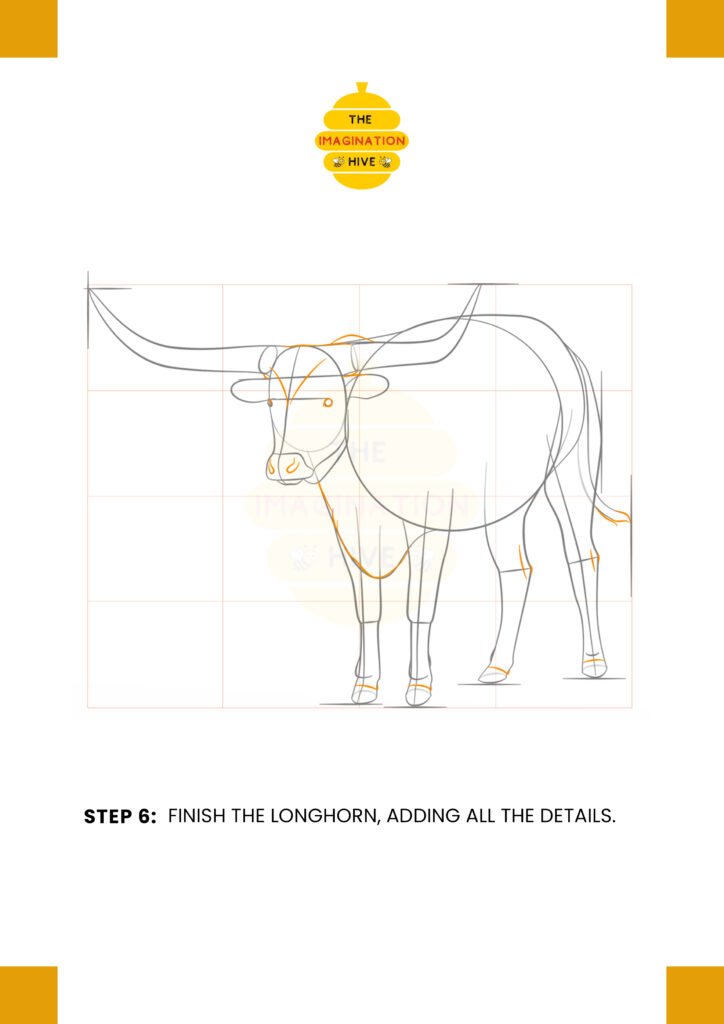
Refine the entire outline, add muscle definition to the legs and body, and clean up the tail shape.
Short tip:
Focus on smooth outlines before adding small details.
STEP 7: Final Outline and Cleanup
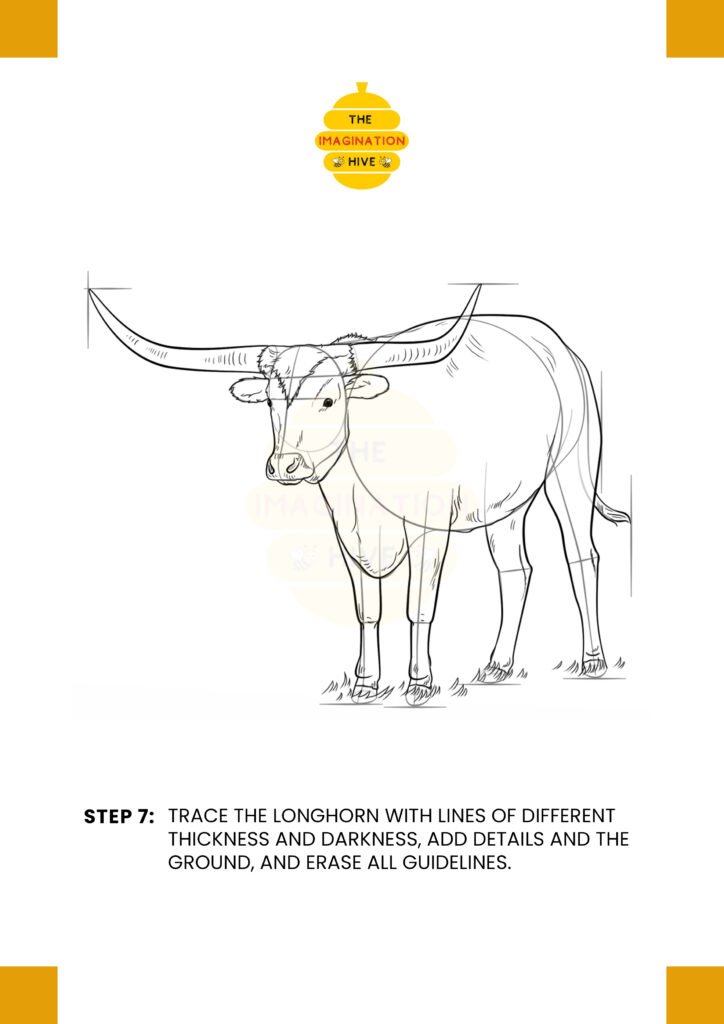
Trace the longhorn with lines of different thickness, add light ground details, and erase all remaining guidelines to complete the drawing.
Short tip:
Thicker outer lines help the longhorn stand out and look finished.