Learn how to draw a lobster from a top view by starting with simple shapes and gradually adding details to create a realistic sea creature.
Step 1:

Outline the lobster’s width and height, then draw the shape of its cephalothorax.
Short tip: Keep the shape symmetrical by lightly sketching a center guideline first.
Step 2:
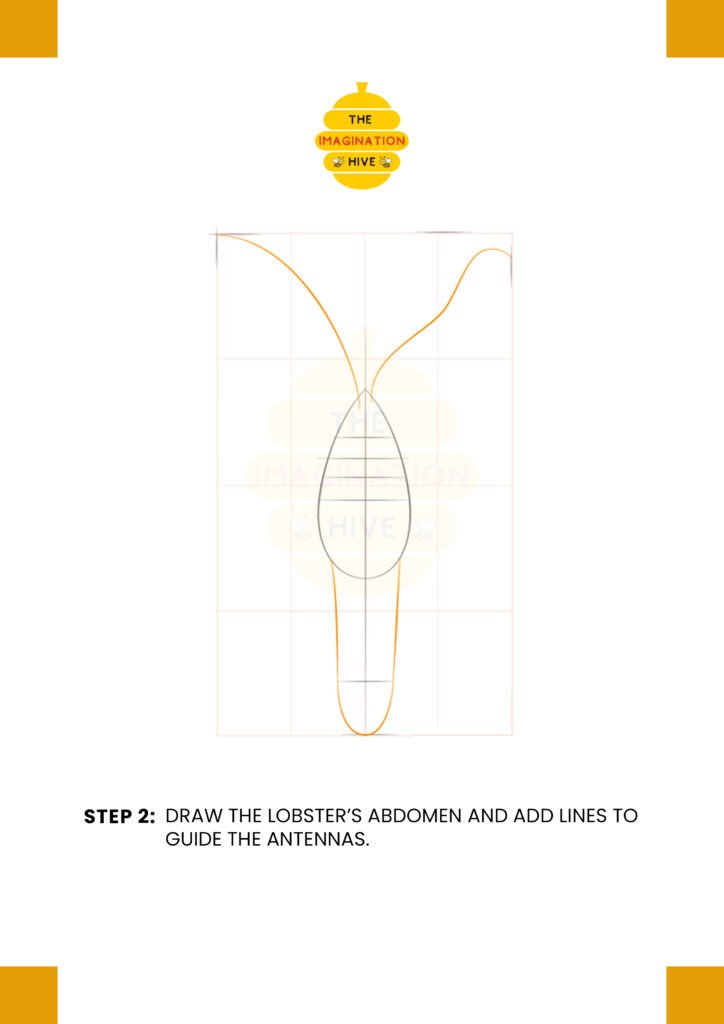
Draw the lobster’s abdomen and add lines to guide the antennas.
Short tip: Make the abdomen slightly longer than the head section for correct proportions.
Step 3:
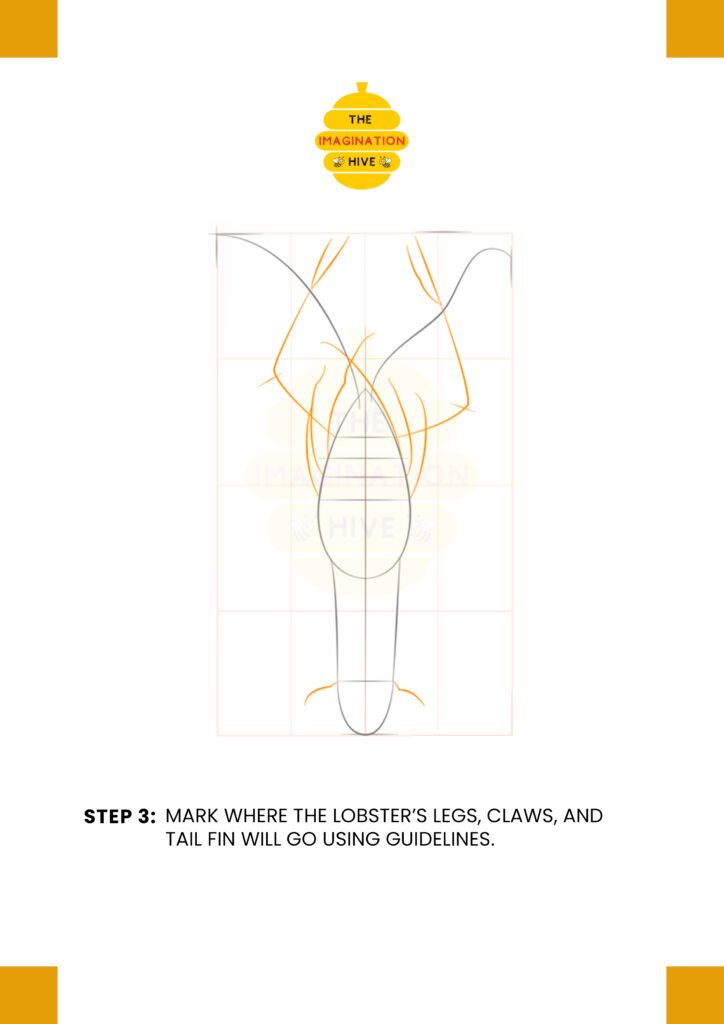
Mark where the lobster’s legs, claws, and tail fin will go using guidelines.
Short tip: Light guidelines help keep both sides of the lobster balanced.
Step 4:

Draw the lobster’s claws, food-handling appendages, and abdomen segments.
Short tip: Use curved, overlapping lines to show the hard shell segments clearly.
Step 5:
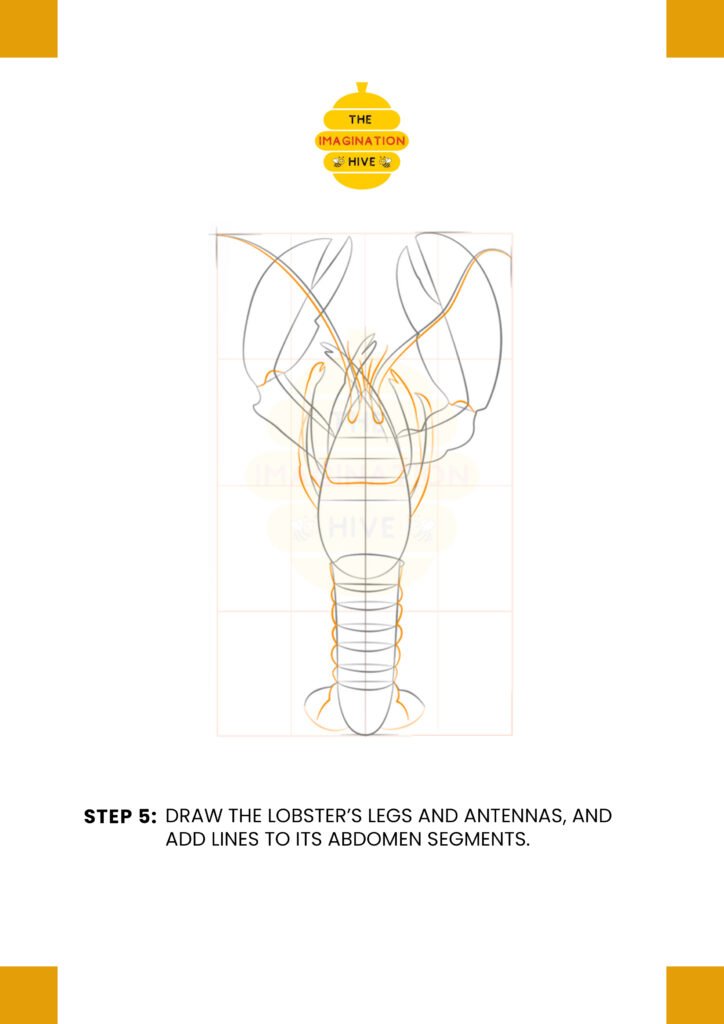
Draw the lobster’s legs and antennas, and add lines to its abdomen segments.
Short tip: Keep the antennas long and flowing to add movement to the drawing.
Step 6:
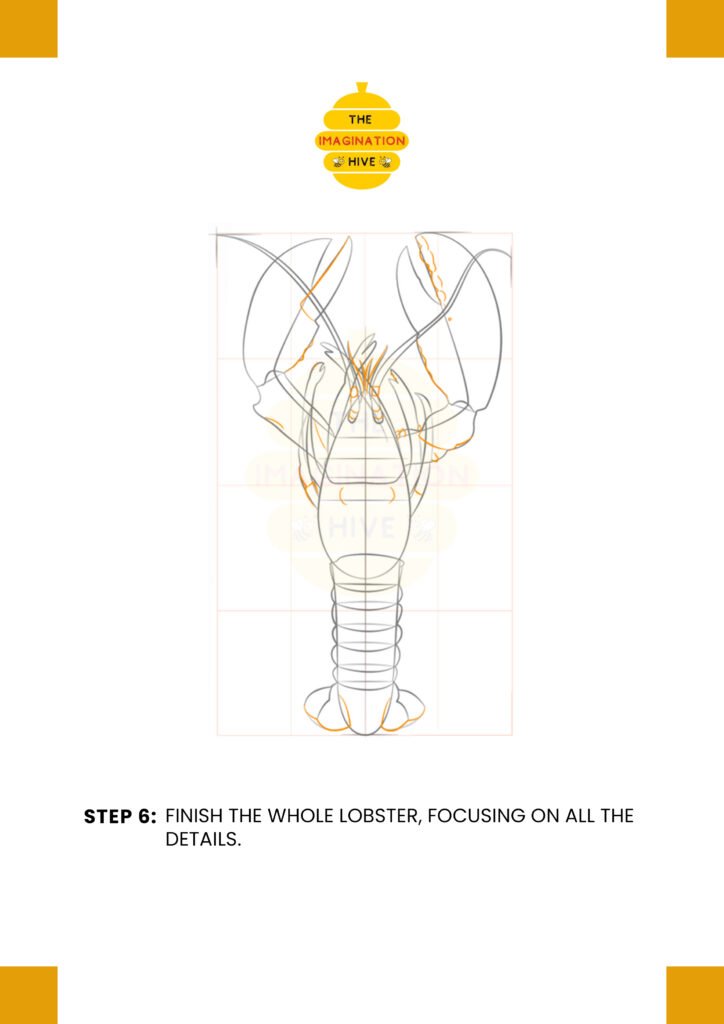
Finish the whole lobster, focusing on all the details.
Short tip: Refine the shapes slowly and add small textures to suggest a rough shell.
Step 7:

Outline the lobster with thick and thin lines, add details and bubbles, then erase all guidelines.
Short tip: Varying line thickness makes the lobster look more polished and complete.