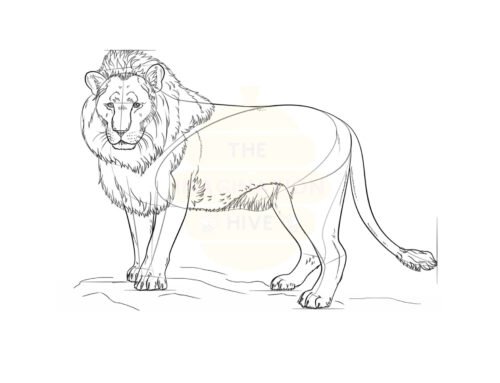
Learning how to draw a lioness is a wonderful way to practice animal proportions and graceful body shapes. In this easy step-by-step tutorial, we’ll build the drawing from simple ovals and guide lines, then slowly add details until your lioness looks realistic and strong. Just follow each step carefully, and take your time!
Step 1: Draw the Basic Head and Body Shapes
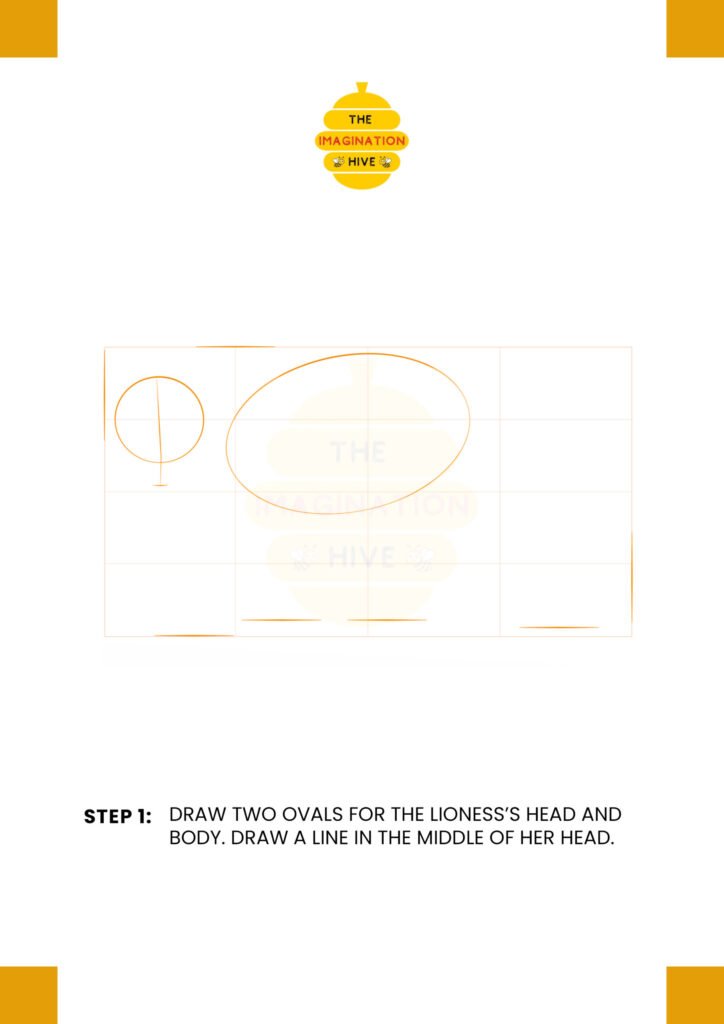
Start by drawing two ovals — a smaller one for the lioness’s head and a larger one for her body. Place the head slightly in front of the body. Draw a vertical line down the center of the head to help guide the placement of facial features.
Short tip: Keep your lines light and sketchy at this stage.
This makes it much easier to adjust proportions later without leaving heavy marks on your paper.
Step 2: Shape the Neck, Back, and Tail
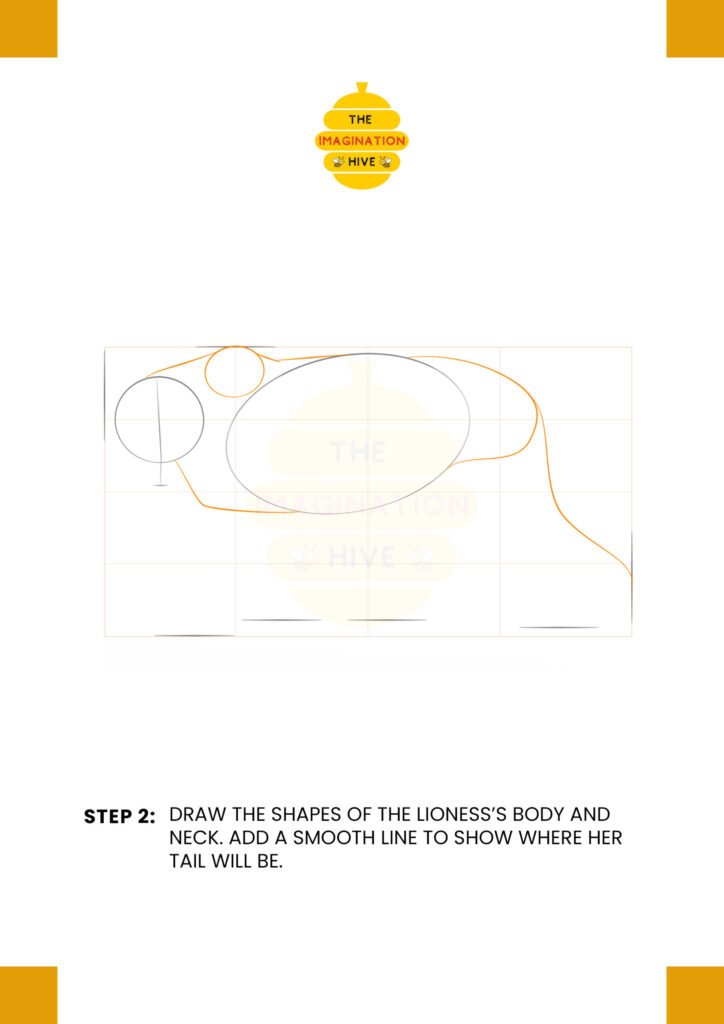
Connect the head and body with smooth curved lines to form the neck. Then outline the back and chest using gentle curves. Add a long flowing line at the back to mark where the tail will extend.
Short tip: Focus on smooth, flowing curves.
Lionesses have sleek, elegant bodies, so avoid sharp angles in the outline.
Step 3: Mark the Legs and Facial Guidelines
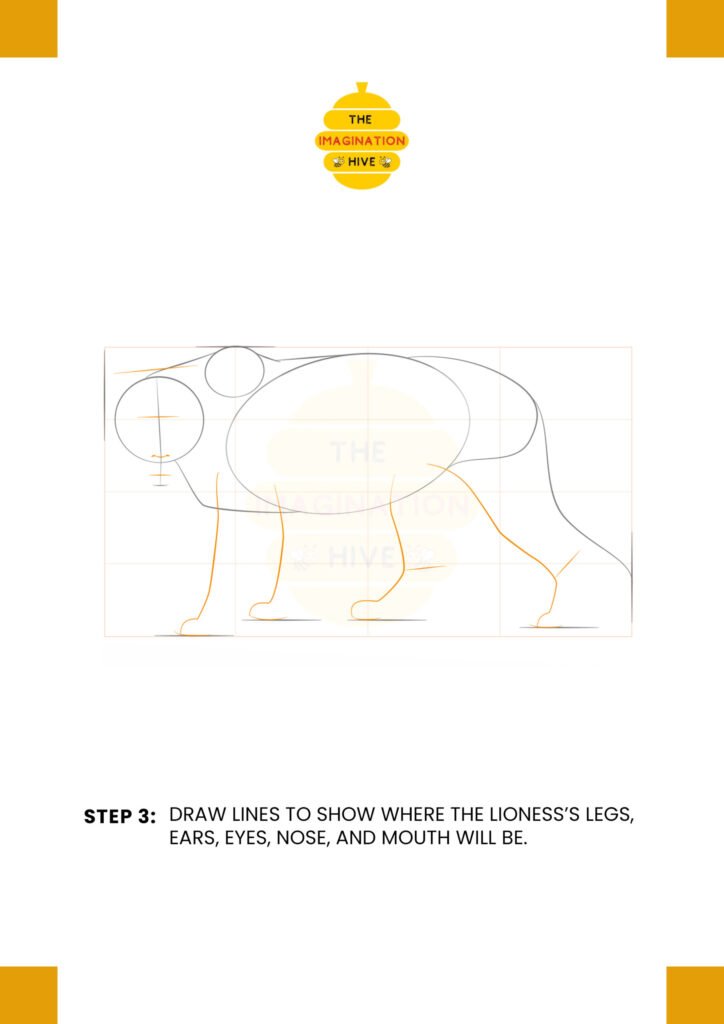
Sketch simple lines to show where the front and back legs will be positioned. Add light horizontal guide lines across the face to mark where the eyes, nose, and mouth will sit.
Short tip: Check the balance of the legs.
Make sure the paws line up naturally so the lioness looks stable and grounded.
Step 4: Draw the Legs, Ears, and Snout
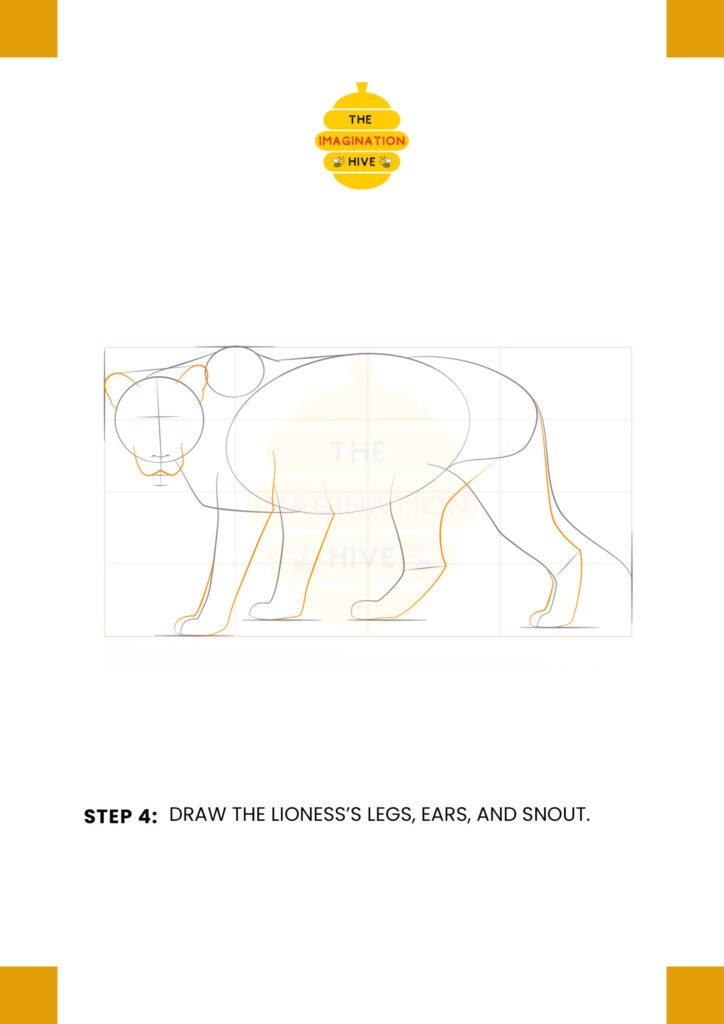
Now refine the legs by giving them shape and thickness. Add rounded paws at the bottom. Sketch the ears on top of the head and begin shaping the snout and muzzle area.
Short tip: Use soft curves for the ears and muzzle.
This helps give the lioness a gentle yet strong appearance.
Step 5: Add the Nose, Lower Jaw, Toes, and Tail
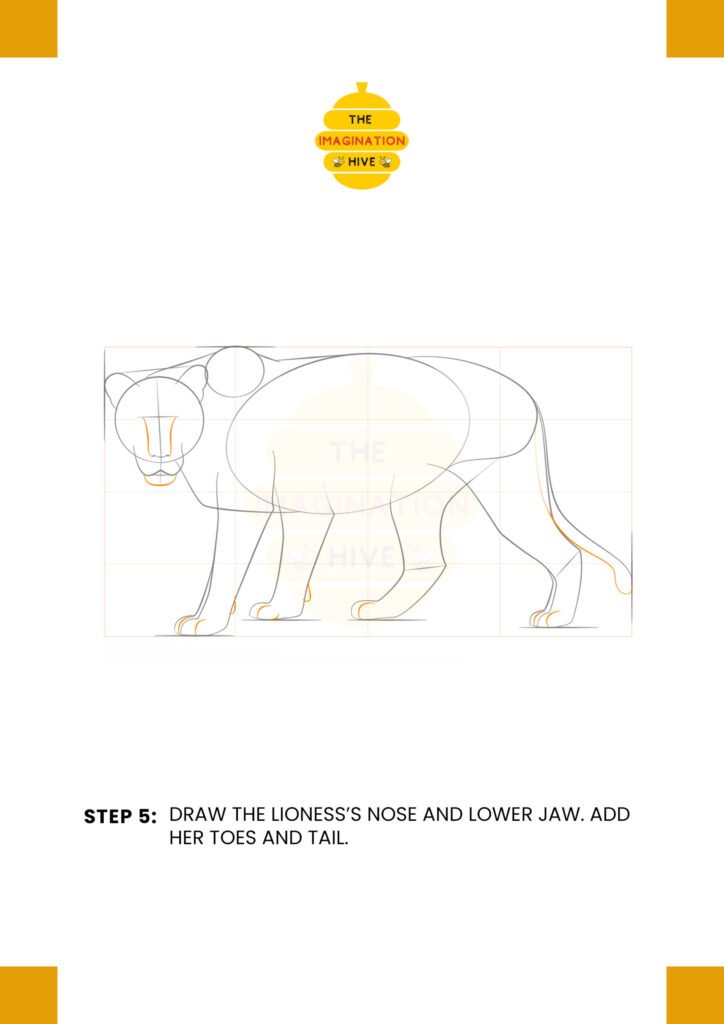
Draw the nose and define the lower jaw. Add small curved lines to show the toes on each paw. Refine the tail by giving it thickness and adding the small tuft at the end.
Short tip: Keep facial features centered on your guide lines.
This ensures the lioness’s face looks symmetrical and realistic.
Step 6: Draw the Eyes and Add Leg Details
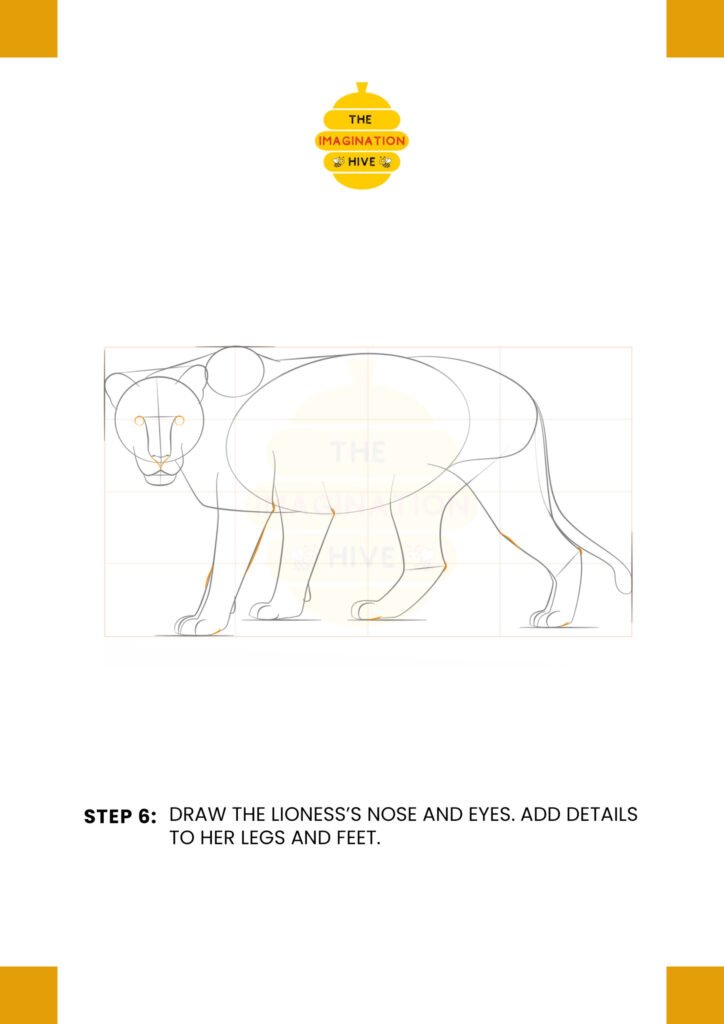
Carefully draw the eyes using the horizontal guide line. Add small details to the legs and paws, such as joint curves and paw separation lines.
Short tip: Pay attention to eye shape.
Lioness eyes are slightly almond-shaped, which gives them their focused look.
Step 7: Refine the Entire Body
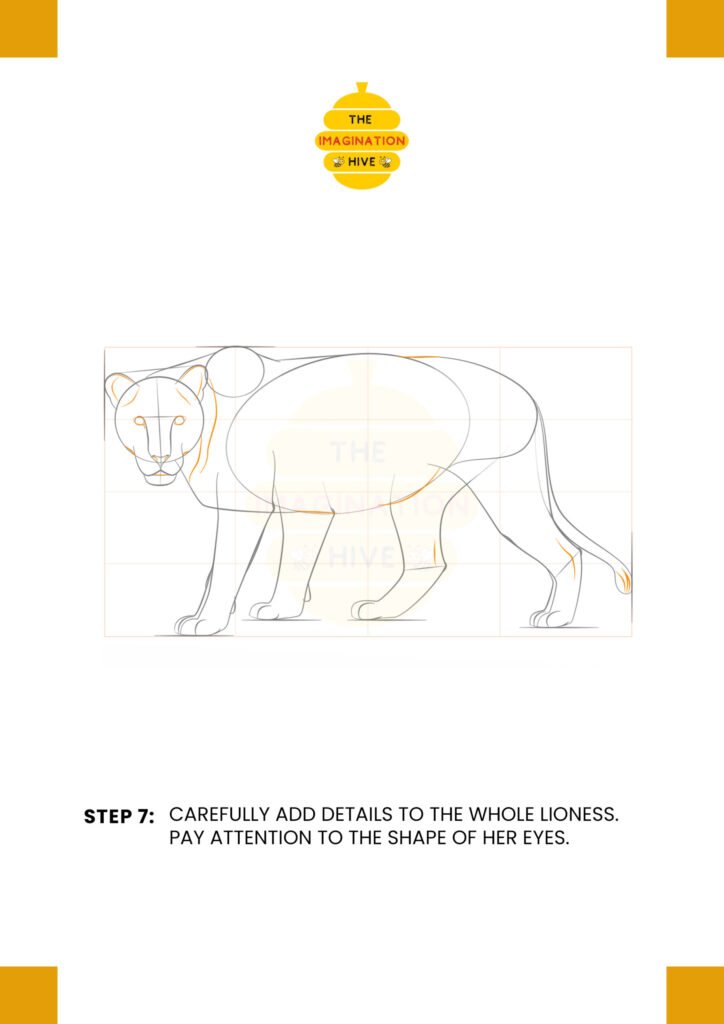
Go over the whole drawing and refine the outline. Smooth out curves along the back, belly, and legs. Add subtle details around the neck, face, and tail to enhance realism.
Short tip: Step back and review your proportions.
Looking at your drawing from a short distance helps you notice areas that may need adjustment.
Step 8: Final Outline and Details
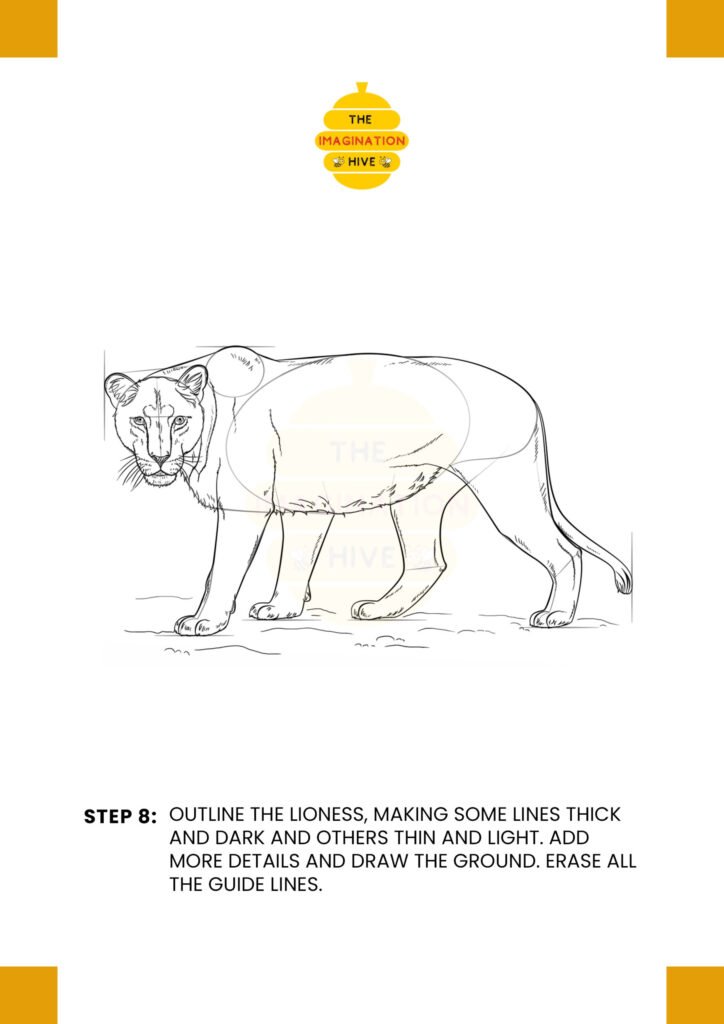
Darken the main outline of the lioness. Vary your line weight — make some lines thicker and others lighter for depth. Add texture details like light fur strokes and draw the ground beneath her feet. Finally, erase all remaining guide lines.
Short tip: Use thicker lines on the outer edges.
This makes your lioness stand out clearly and gives the drawing a finished, professional look.
You’ve now completed your lioness drawing! Keep practicing, and each time you draw, you’ll notice your skills improving even more. 🦁✨