In this step-by-step tutorial, you’ll learn how to draw a hyena by starting with simple shapes and gradually refining the body, legs, and facial details to create a strong, realistic walking pose.
STEP 1: Measure and Draw Basic Shapes
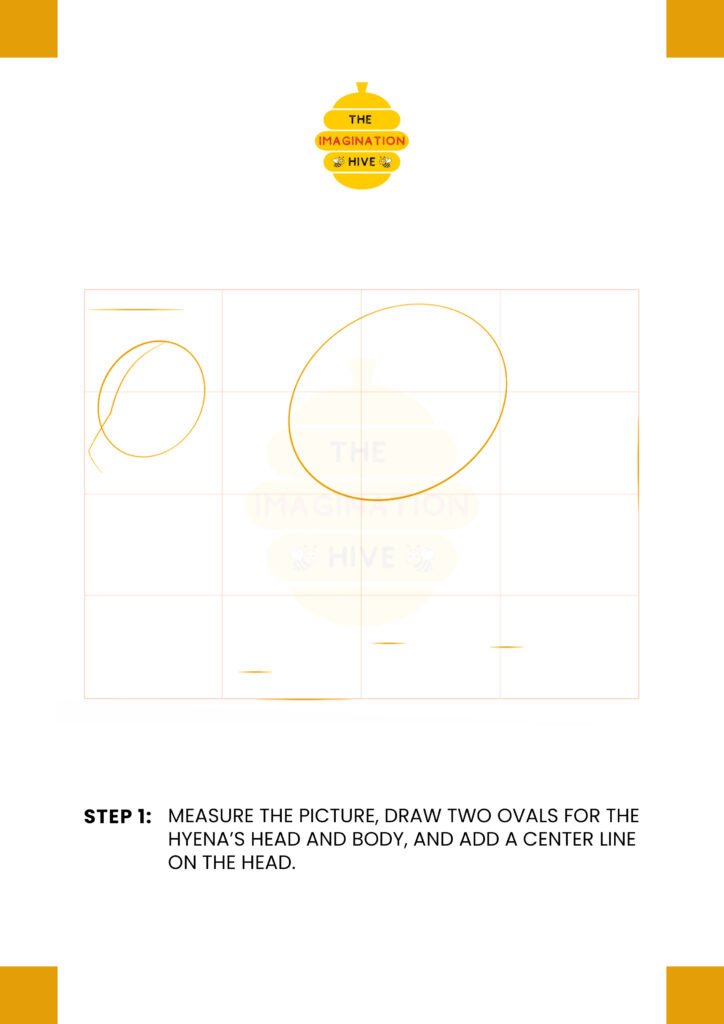
Measure the picture, draw two ovals for the hyena’s head and body, and add a center line on the head to guide the facial features.
Short tip:
Keep these shapes light and loose so they’re easy to adjust later.
STEP 2: Draw the Body Shape and Tail Guide
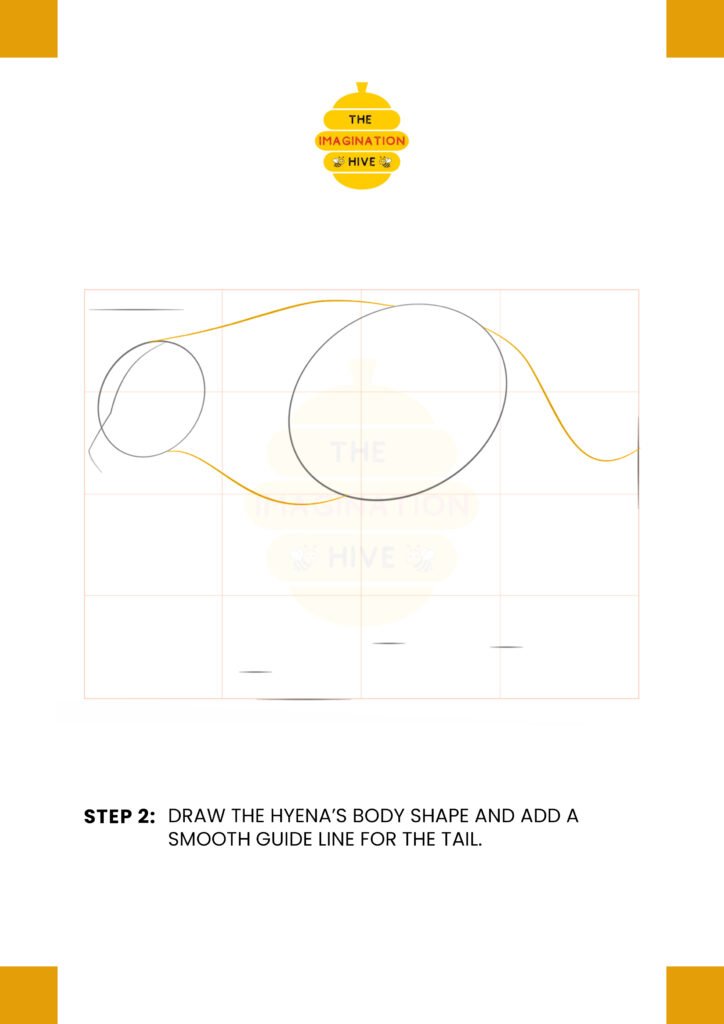
Connect the head and body with smooth lines to form the back and belly, then add a flowing guideline to show the direction of the tail.
Short tip:
A slightly sloped back helps capture the hyena’s natural posture.
STEP 3: Add Guidelines for Legs and Snout
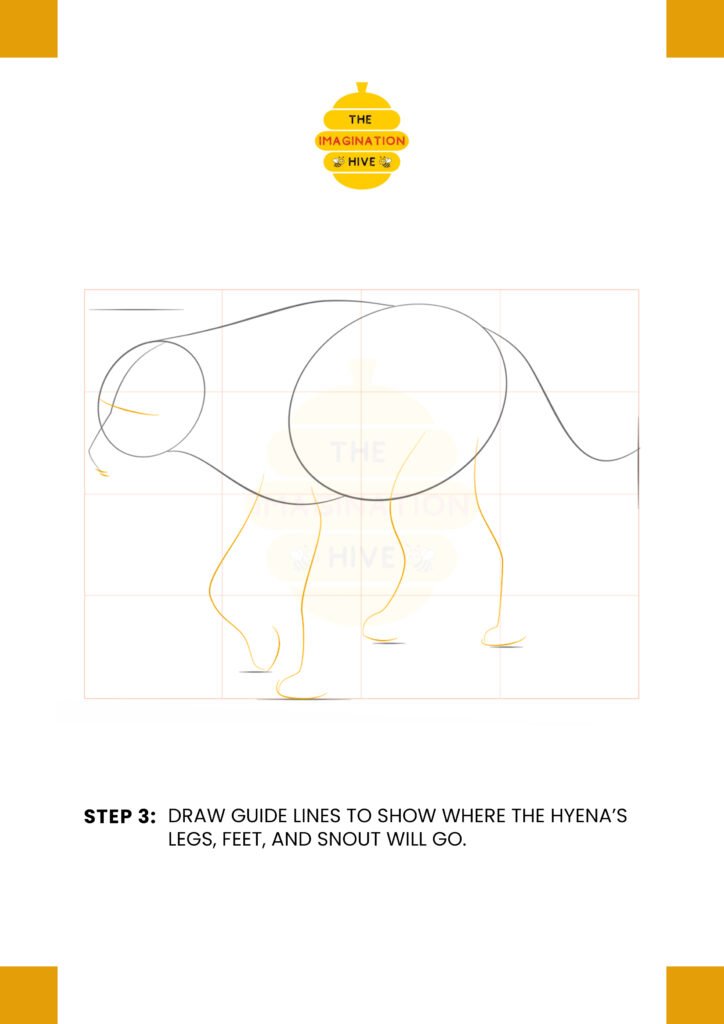
Draw simple guide lines to show where the hyena’s legs, feet, and snout will go, keeping everything balanced and grounded.
Short tip:
Focus on placement, not detail—these are only guides.
STEP 4: Sketch the Legs, Feet, and Snout
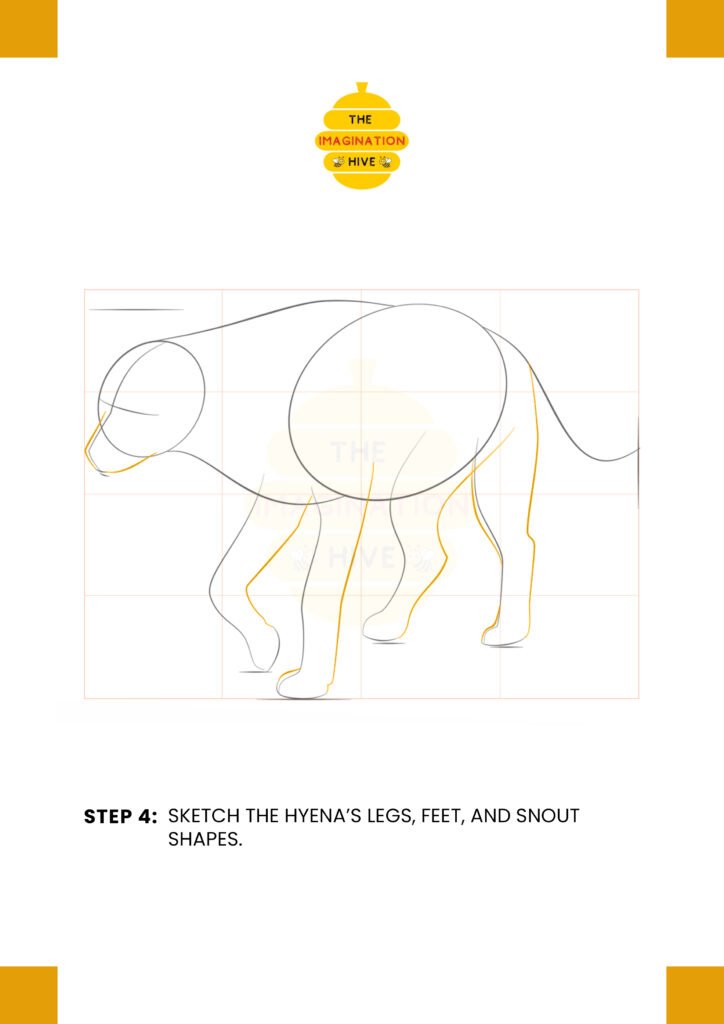
Turn the guidelines into basic leg and foot shapes, and sketch the snout to begin forming the head.
Short tip:
Hyena legs are sturdy—avoid making them too thin.
STEP 5: Draw Toes, Jaws, Ears, and Tail
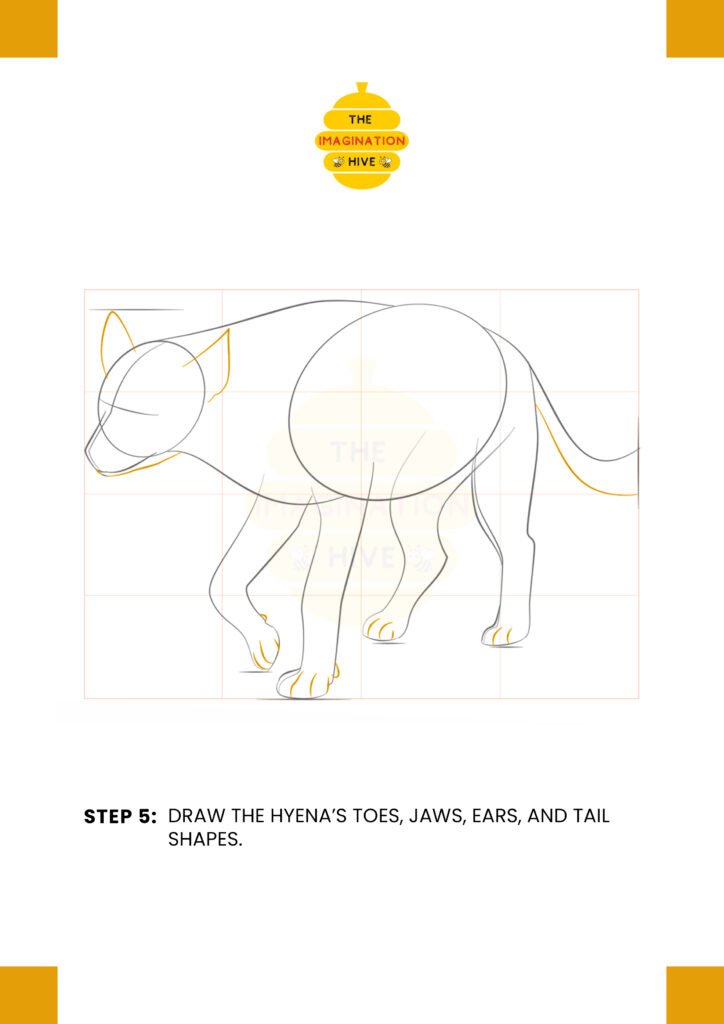
Add the toes on each foot, refine the jaw shape, draw the ears, and shape the tail using smooth curves.
Short tip:
Pointed ears and a thick neck help define the hyena’s character.
STEP 6: Add Facial Features and Refine Legs
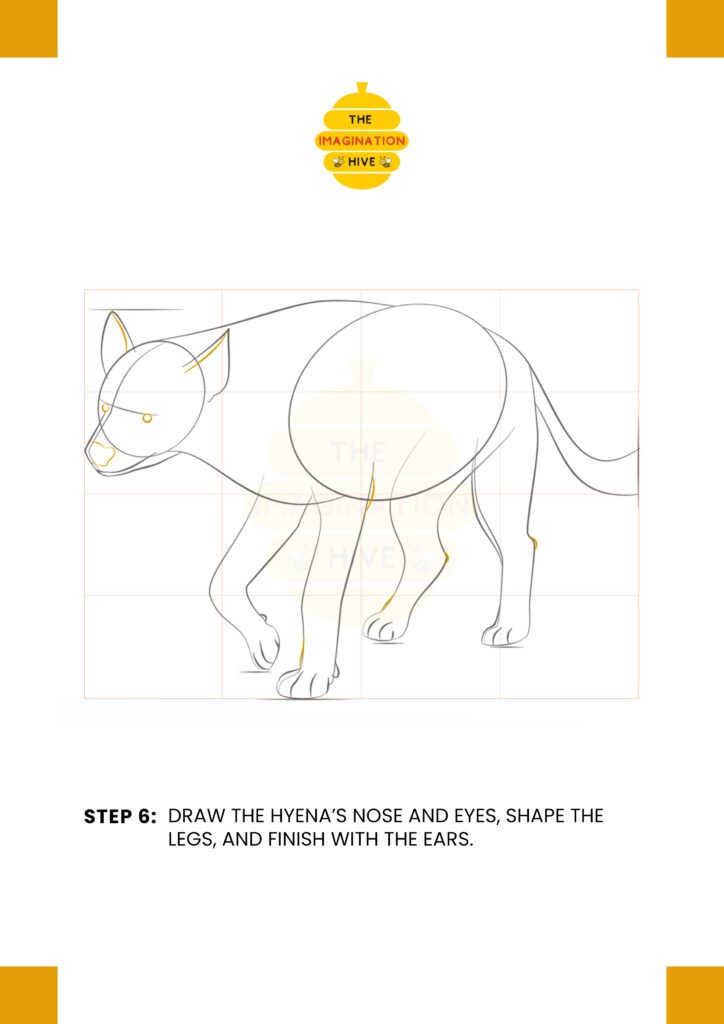
Draw the hyena’s nose and eyes, then adjust the leg shapes to look more natural and muscular. Finish refining the ears.
Short tip:
Small facial details make a big difference—place them carefully.
STEP 7: Finish the Hyena’s Details
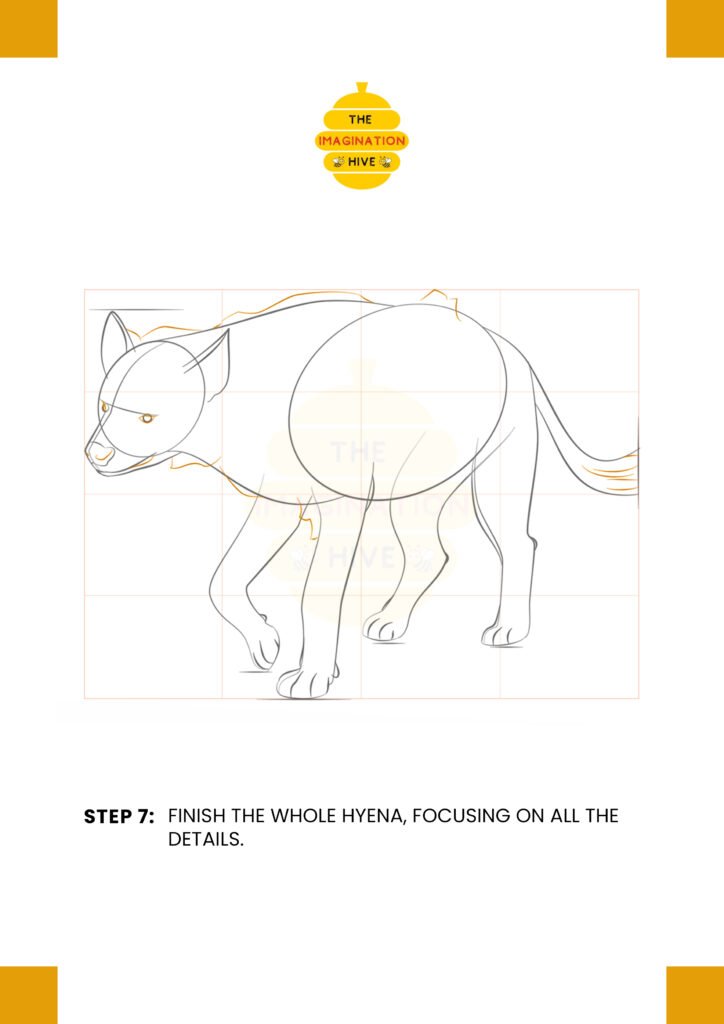
Refine the entire body by smoothing lines and adding fur texture along the back, neck, and tail.
Short tip:
Use short strokes to suggest fur without overloading the drawing.
STEP 8: Outline and Clean Up
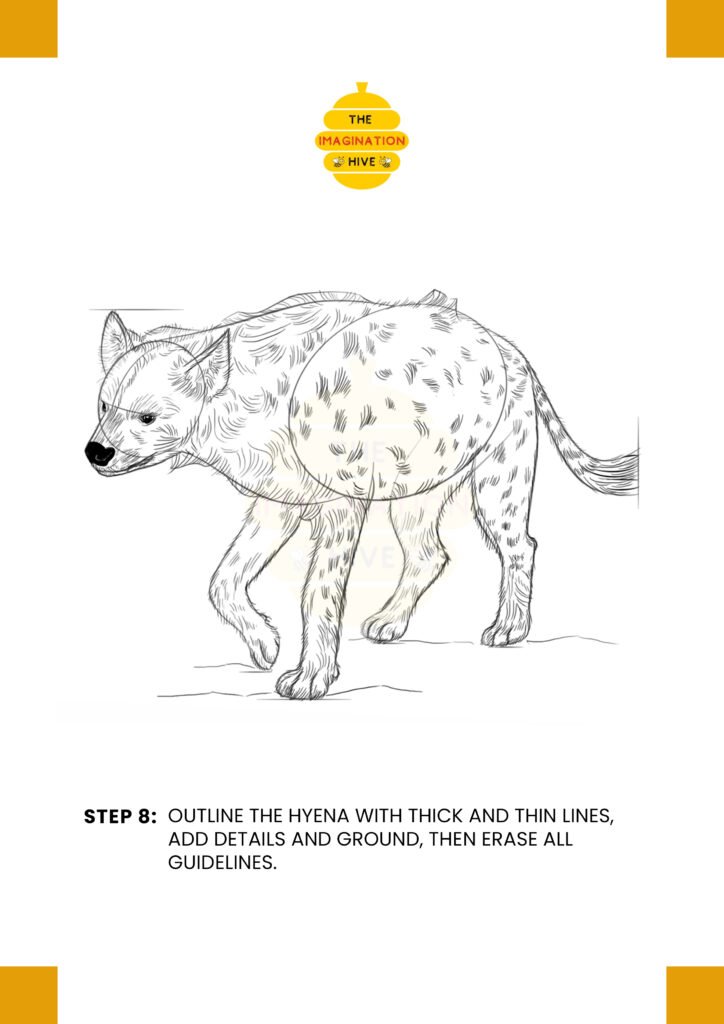
Outline the hyena with thick and thin lines, add ground details, and erase all remaining guidelines for a clean finish.
Short tip:
Varying line thickness adds depth and makes the drawing look complete.