Learning how to draw a hippo is easier than you think! In this simple step-by-step guide, you’ll start with basic shapes and slowly build up details until your hippo looks strong, round, and realistic. Just grab a pencil, draw lightly at first, and follow along carefully.
Step 1: Draw the Basic Shapes
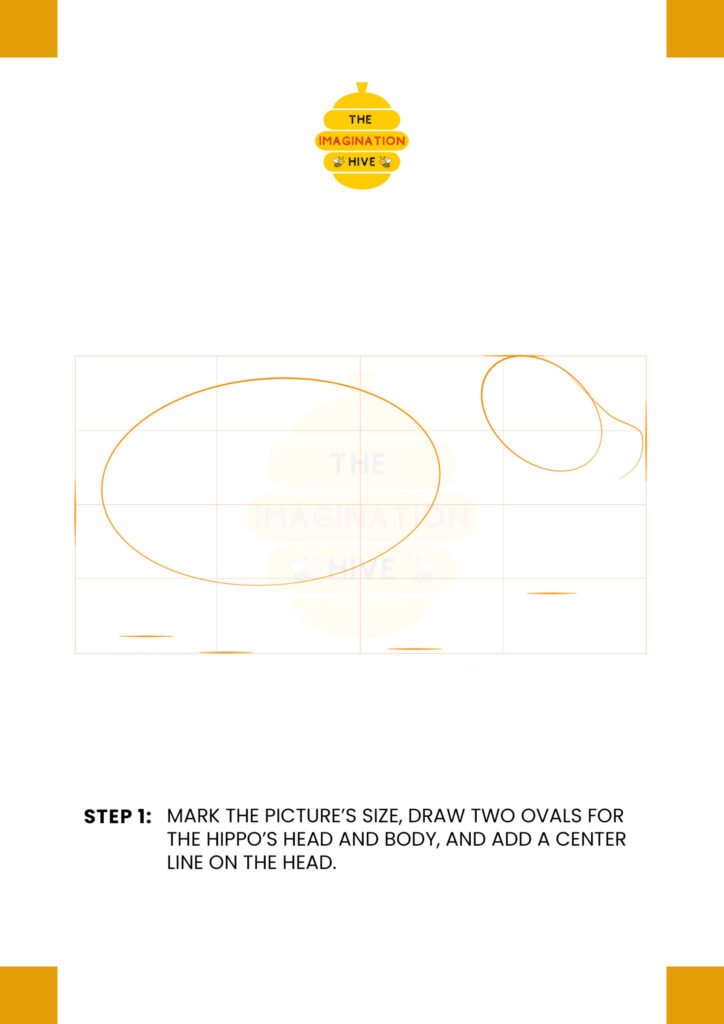
Start by marking the size of your drawing area. Draw one large oval for the hippo’s body and a smaller oval for the head. Add a vertical center line on the head to help place the facial features correctly.
Short tip: Keep your lines light so you can erase them later.
These simple shapes will act as your foundation and help you keep the proportions balanced.
Step 2: Outline the Body and Neck
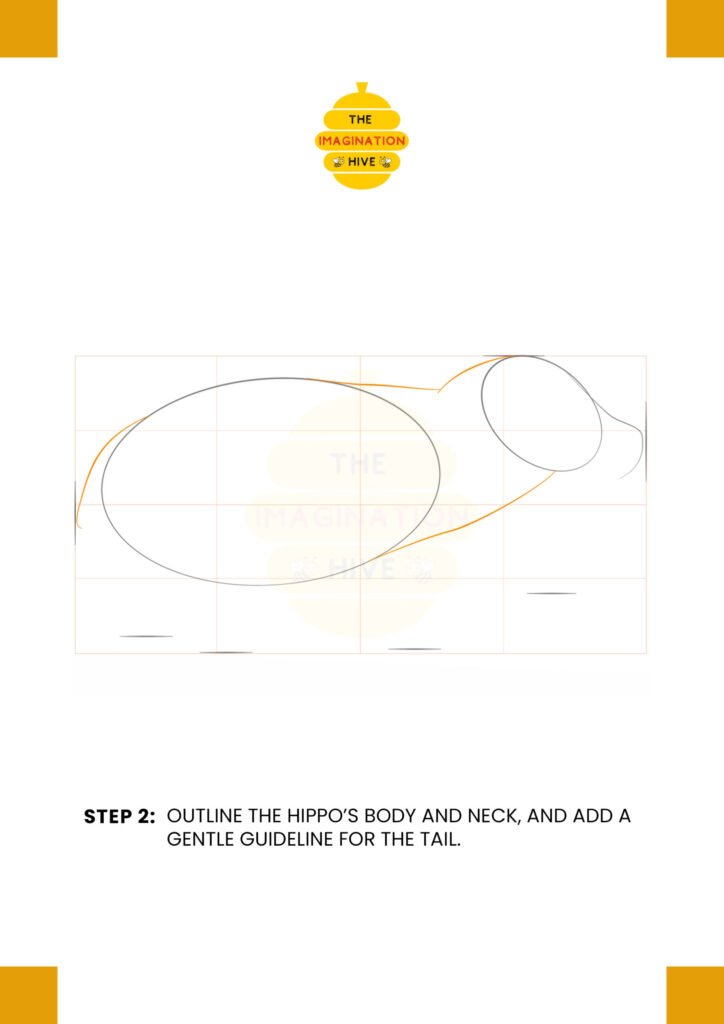
Now connect the head and body by sketching the neck. Smoothly outline the hippo’s rounded back and belly. Add a soft guideline at the back for the tail.
Short tip: Focus on smooth, curved lines to show the hippo’s heavy body.
This step helps your hippo start looking more natural and less like simple ovals.
Step 3: Add Leg and Snout Guidelines
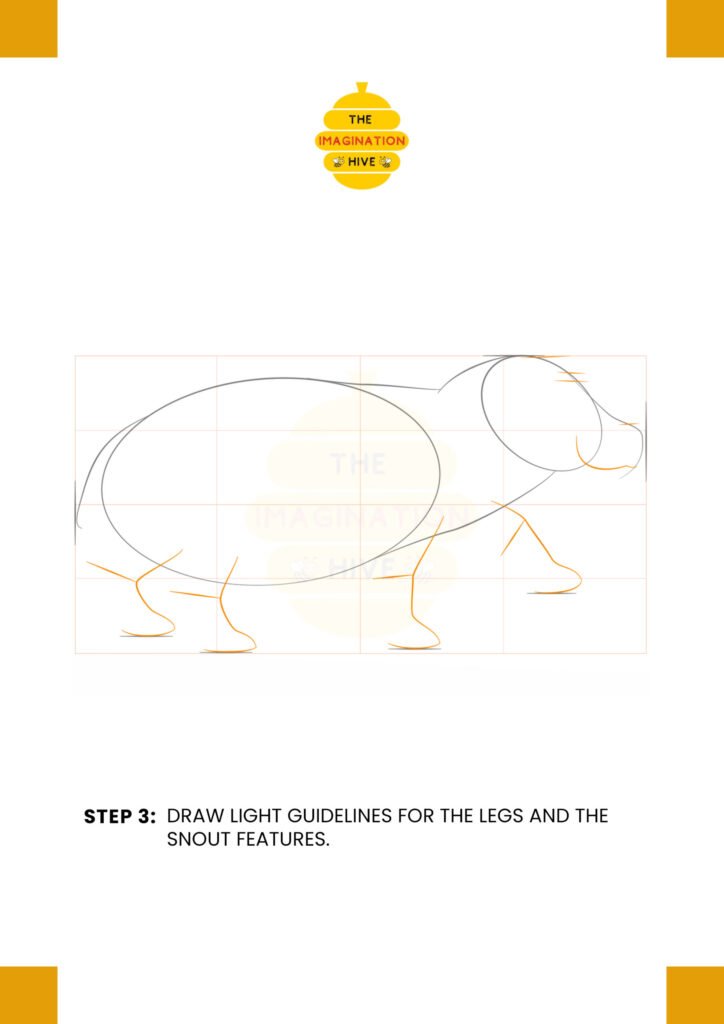
Lightly draw guidelines for all four legs. Sketch simple shapes to show where the legs bend and where the feet will rest. Add guiding lines on the snout area to prepare for facial features.
Short tip: Keep the legs short and thick — hippos have sturdy legs.
These guidelines help position everything correctly before adding details.
Step 4: Shape the Ears, Legs, and Snout
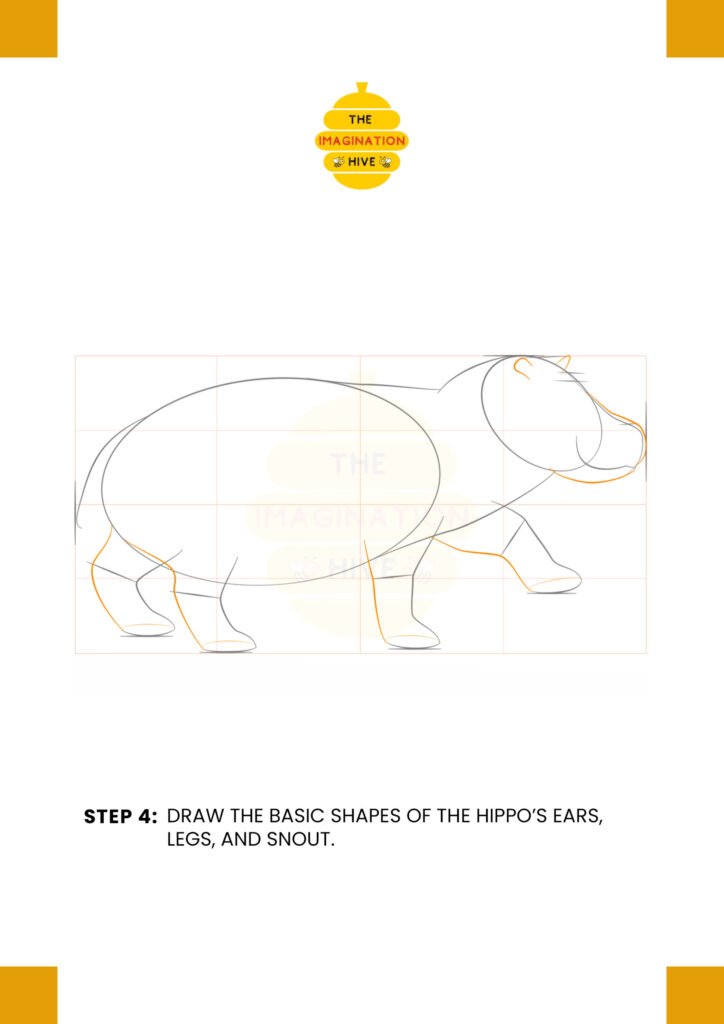
Draw the small rounded ears on top of the head. Define the legs by shaping them thicker and more natural. Refine the snout by adding curves to show the mouth area.
Short tip: Hippo ears are small compared to the large head.
Your hippo is now clearly taking shape!
Step 5: Add Toes and Tail Details
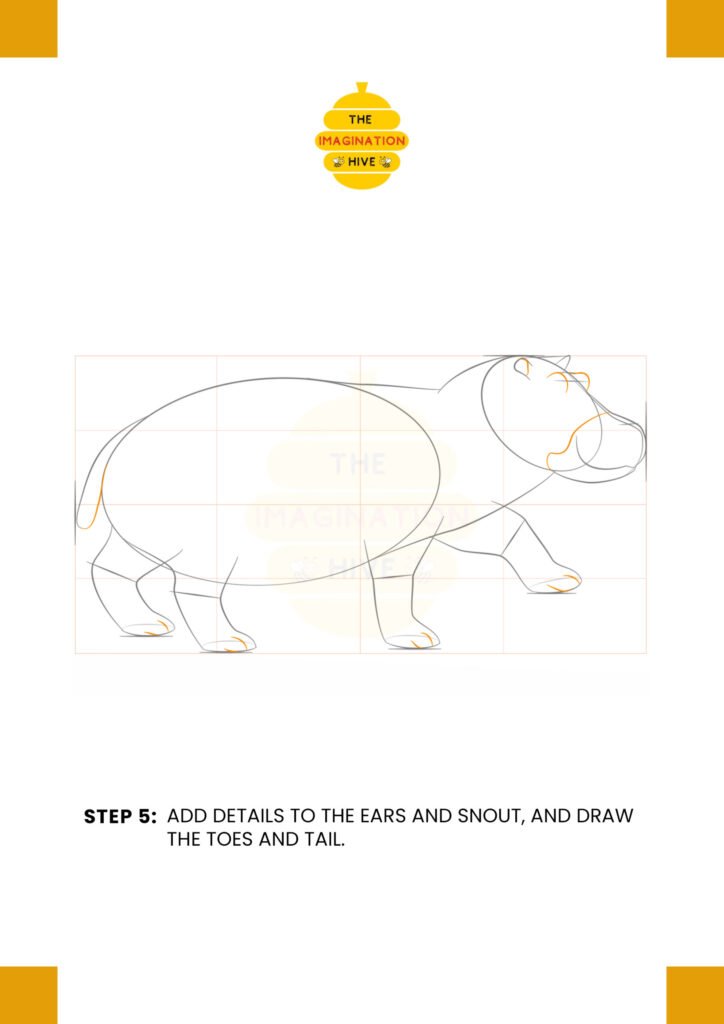
Draw the toes at the bottom of each foot using small curved lines. Refine the snout and ear shapes, and sketch the short tail at the back.
Short tip: Add small curved lines to show the toes clearly.
Details like toes and tail bring your drawing closer to completion.
Step 6: Refine the Face and Neck
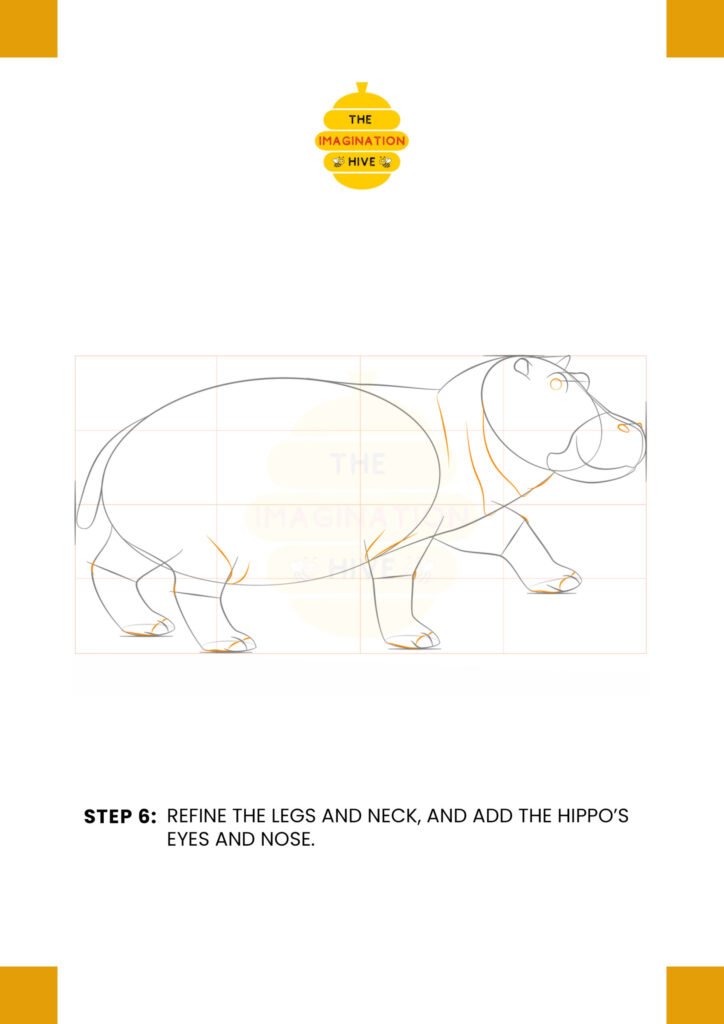
Now add the eyes and nose. Refine the neck lines and smooth out any uneven areas on the legs. Make the snout more defined and balanced.
Short tip: Place the eyes slightly above the center of the head.
At this stage, your hippo should look complete but still lightly sketched.
Step 7: Final Refinements
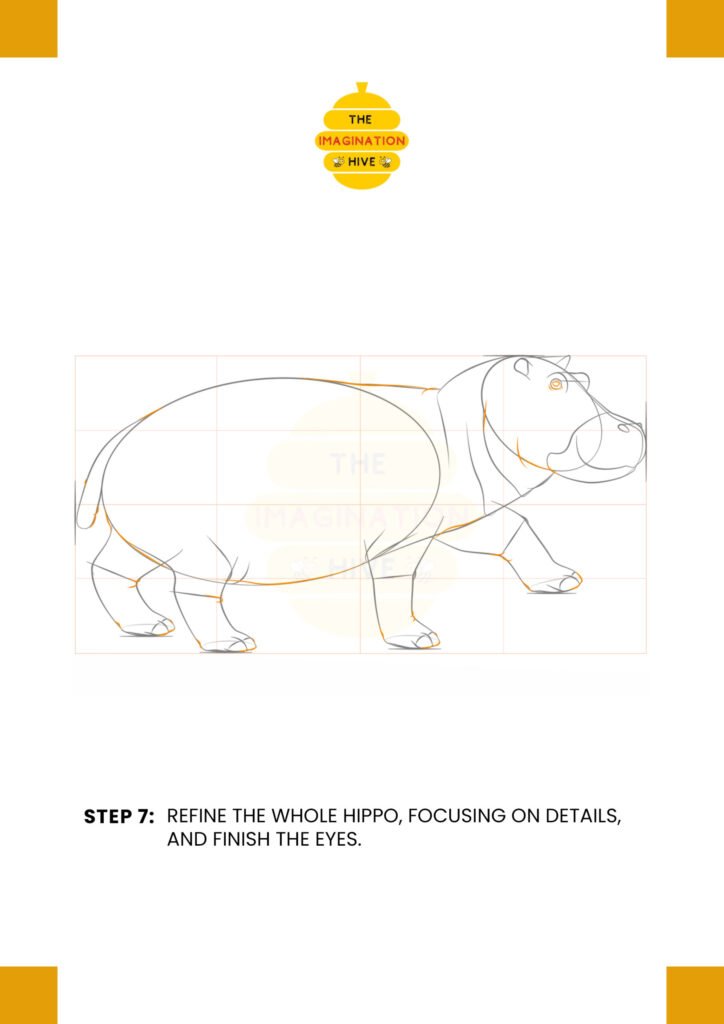
Go over the entire drawing and refine the outlines. Add small details such as skin folds around the legs and neck. Finish the eyes by adding pupils and small highlights.
Short tip: Add gentle wrinkle lines to make the hippo look realistic.
Your hippo now has personality and depth!
Step 8: Outline and Finish
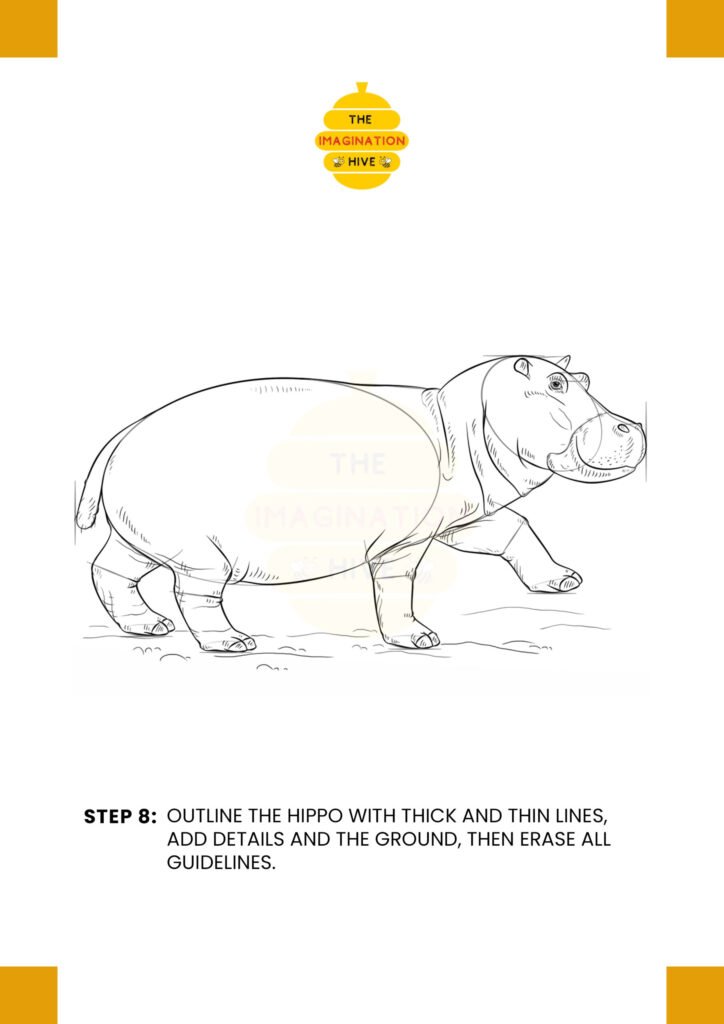
Carefully trace over your final lines with darker strokes. Add ground lines beneath the feet to show where the hippo is standing. Erase all extra guidelines.
Short tip: Use thicker lines for the outer edges and thinner lines for details.
And that’s it! 🎉 You’ve successfully drawn a hippo step by step. Keep practicing and try drawing it in different poses next time!