Learning how to draw a giraffe is easier when you break the process into simple, manageable steps. By starting with basic shapes and gradually refining the details, you can create a tall, graceful giraffe with accurate proportions and realistic features.
STEP 1: Measure the Picture and Draw the Basic Shapes
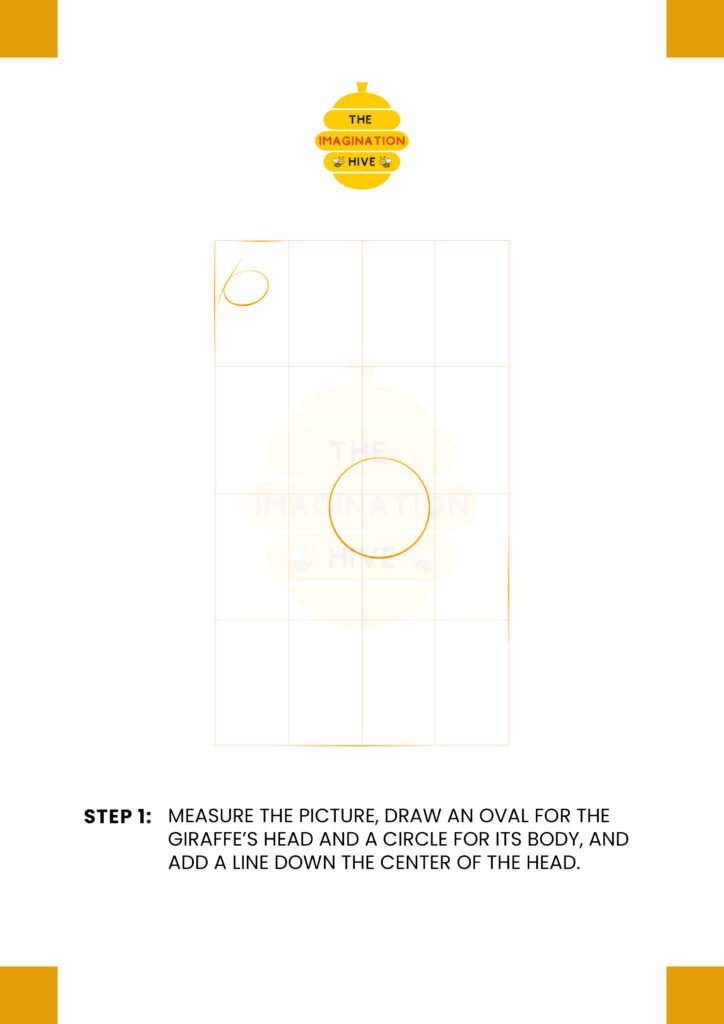
Step 1 starts by measuring your drawing space. Draw a small oval for the giraffe’s head and a larger circle for its body, then add a light vertical guideline down the center of the head to help place facial features correctly.
Short tip:
Keep your lines light at this stage so they’re easy to erase later.
STEP 2: Draw the Giraffe’s Neck and Back
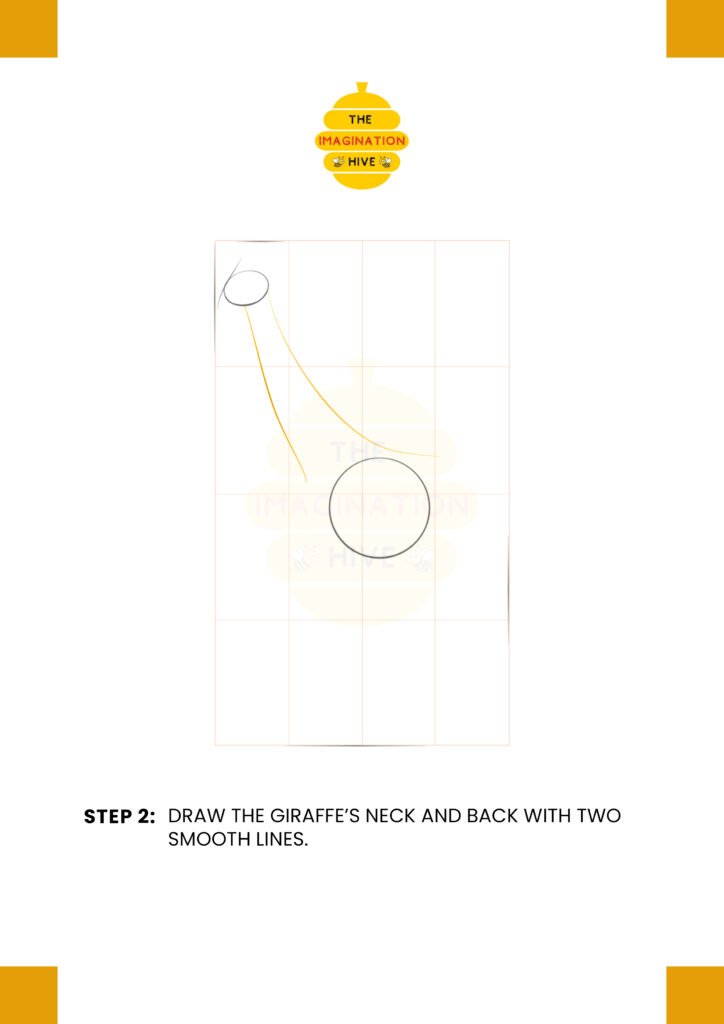
Step 2 focuses on connecting the head and body. Draw two long, smooth lines to form the giraffe’s neck, gently curving them into the back for a natural flow.
Short tip:
Avoid sharp angles — giraffes have long, elegant curves.
STEP 3: Draw the Legs and Hooves
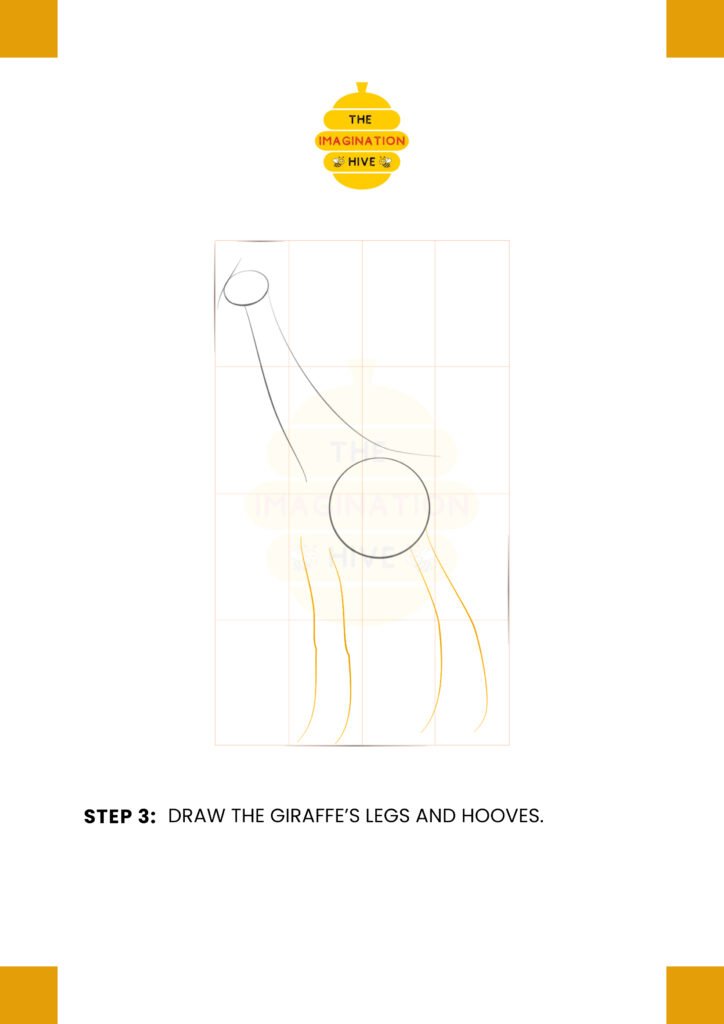
Step 3 adds the legs by sketching long, straight guide lines beneath the body. Indicate the hooves with small shapes at the bottom of each leg.
Short tip:
Make the front legs slightly straighter and the back legs more angled for balance.
STEP 4: Outline the Face, Tail, and Chest
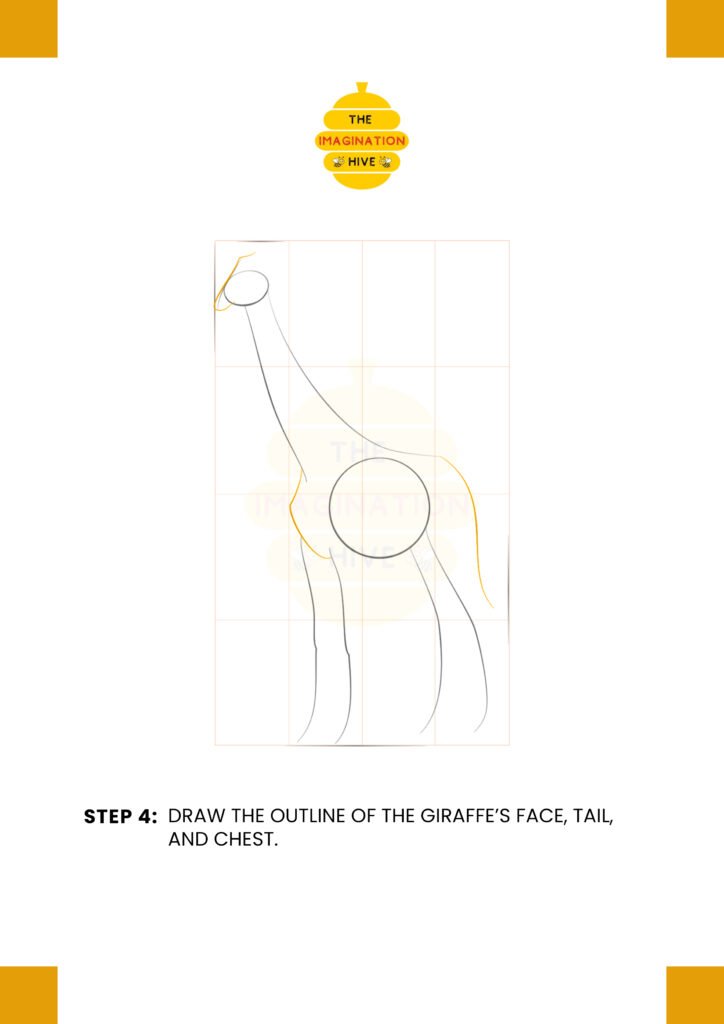
Step 4 refines the giraffe’s outline. Shape the face, define the chest area, and add a simple line for the tail extending from the back of the body.
Short tip:
Use gentle curves to keep the giraffe looking relaxed and natural.
STEP 5: Add Guides for Legs, Ears, and Horns
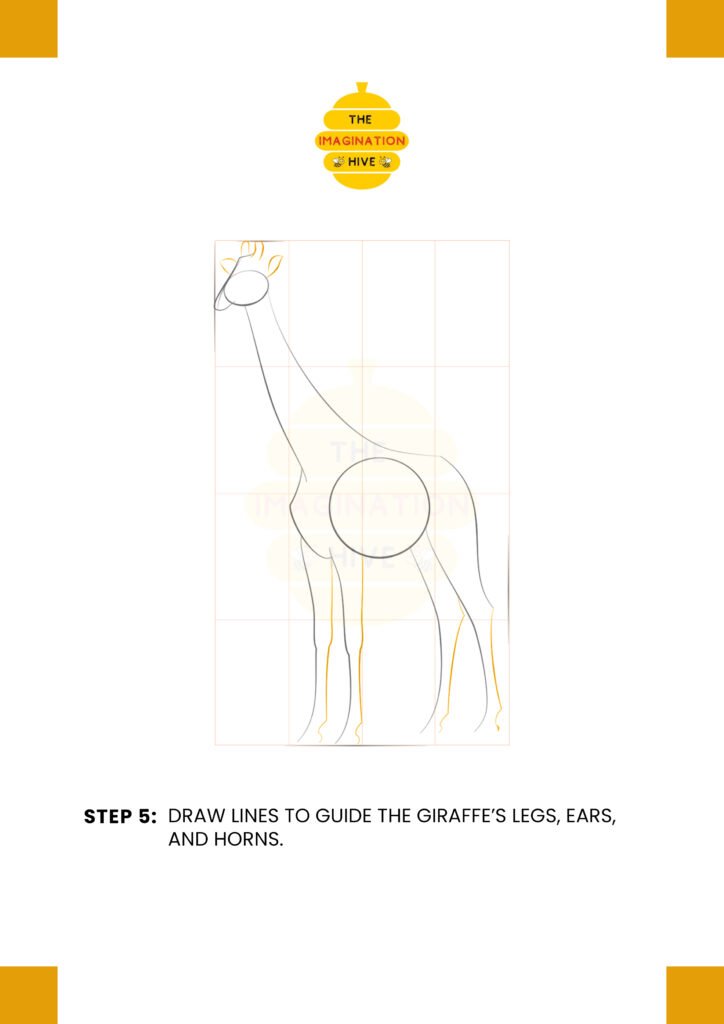
Step 5 places additional guide lines for the giraffe’s ears, ossicones (horns), and leg joints. This helps ensure correct placement before final detailing.
Short tip:
Small shapes and short lines work best for delicate features like ears and horns.
STEP 6: Add Details to the Head, Joints, and Tail
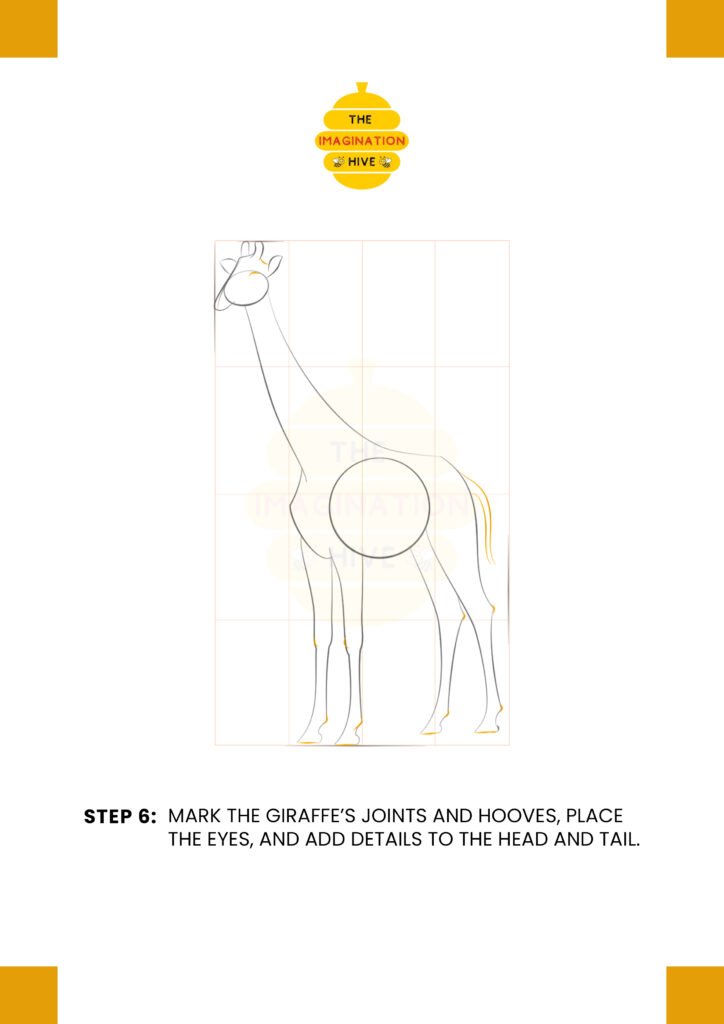
Step 6 adds definition. Draw the eyes, mark the joints on the legs, refine the hooves, and add details to the tail and face.
Short tip:
Don’t rush — this step brings personality to your giraffe.
STEP 7: Finish the Giraffe with Details
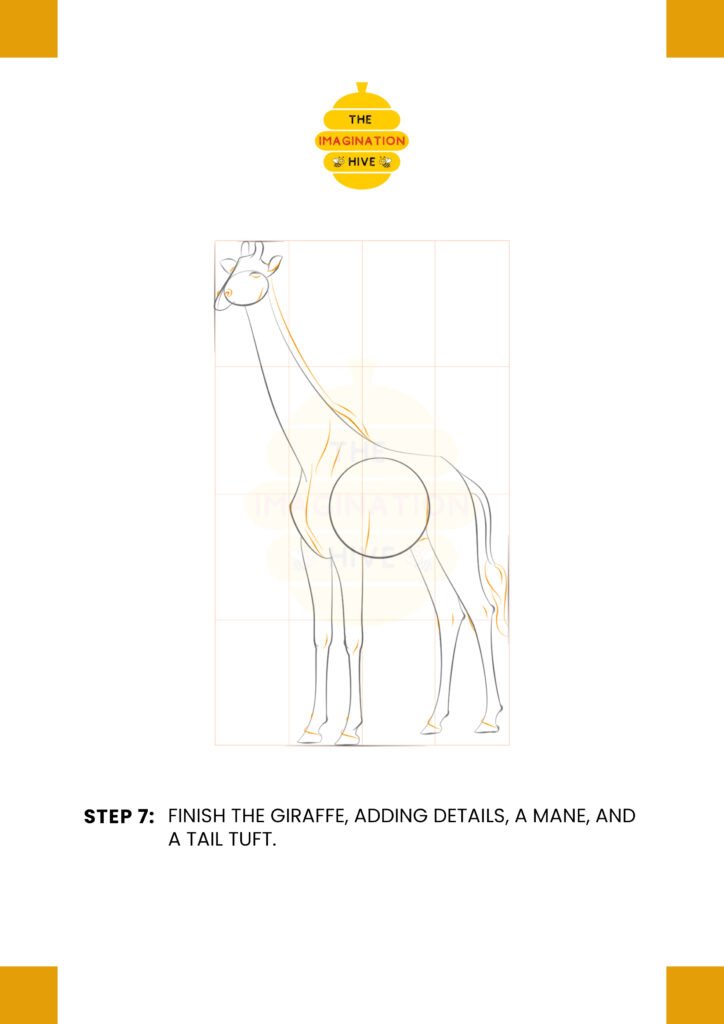
Step 7 completes the drawing by adding the mane along the neck, refining body contours, and sketching the tail tuft.
Short tip:
Use short, repeated strokes to suggest fur and texture.
STEP 8: Outline, Add Texture, and Erase Guidelines
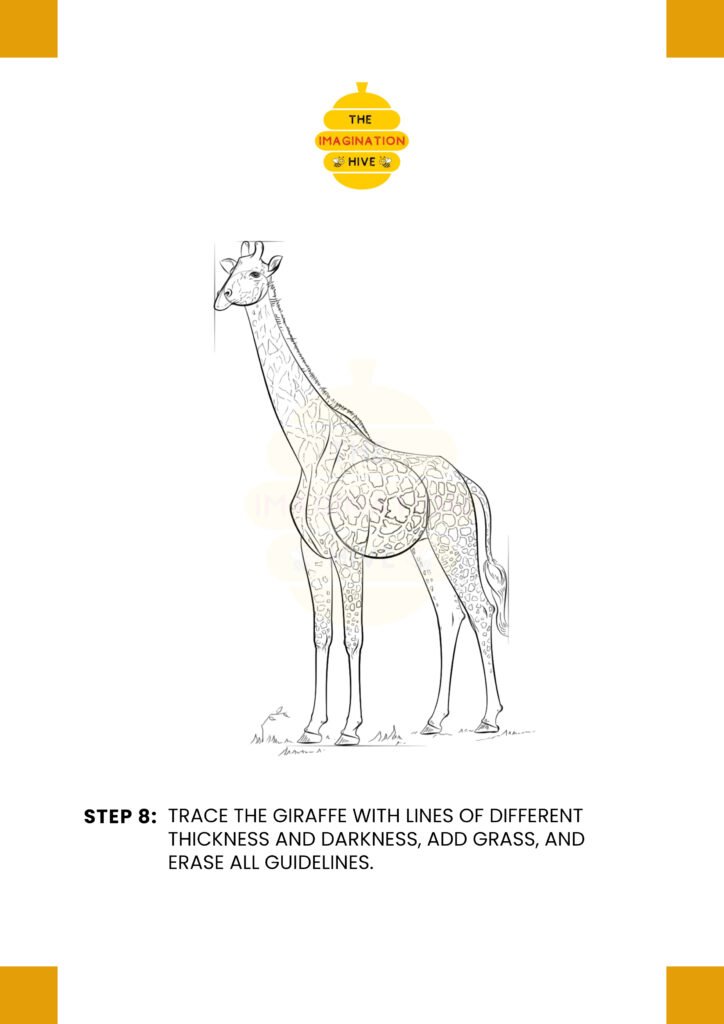
Step 8 is the final step. Trace over your drawing with thicker and thinner lines, add the giraffe’s distinctive spot patterns and grass, then erase all remaining guidelines.
Short tip:
Vary line thickness to give your drawing depth and a polished look.