In this step-by-step tutorial, you’ll learn how to draw a woodpecker perched on a tree by starting with simple shapes and guidelines, then gradually refining the bird’s body, beak, feathers, and claws.
STEP 1: Mark the Width and Height

Mark the overall width and height of the drawing area. Draw two ovals for the woodpecker’s head and body, add a straight line for the beak, and sketch the tree trunk beside it.
Short tip:
Keep all guide lines light so they’re easy to erase later.
STEP 2: Draw the Neck, Body, and Tree Trunk

Connect the head and body ovals to form the neck. Refine the body shape along the tree trunk and add a smooth guideline for the tail.
Short tip:
Let the body follow the vertical flow of the tree.
STEP 3: Add Guidelines for Legs, Wings, and Mouth

Sketch simple guide lines to show where the legs, wings, and mouth will be placed. This helps keep the pose balanced.
Short tip:
Focus on placement, not detail, at this stage.
STEP 4: Draw Basic Shapes for Legs, Wings, and Beak

Begin shaping the legs, wings, and beak using the guidelines as reference. Keep forms simple and clean.
Short tip:
Think of the wings as layered shapes, not feathers yet.
STEP 5: Add Details to the Wing and Head
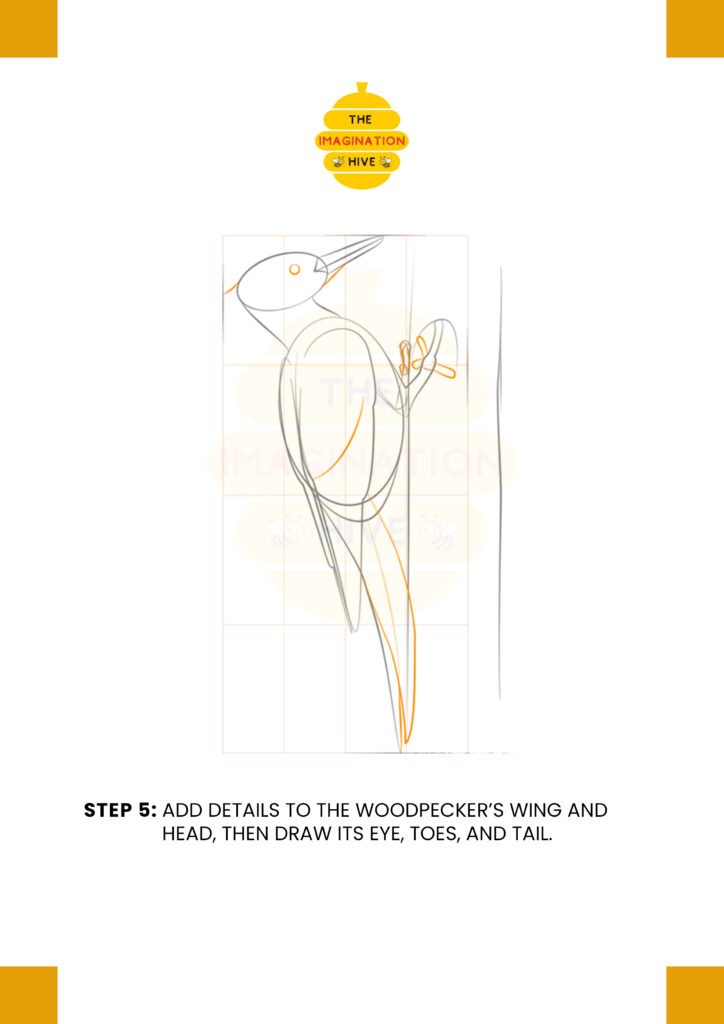
Refine the wing and head shapes, then draw the eye, toes, and tail to give the woodpecker more character.
Short tip:
Small facial details bring the bird to life—add them carefully.
STEP 6: Outline Feathers and Claws

Outline the feathers on the wings and body, draw the claws gripping the tree, and refine the overall form.
Short tip:
Use short strokes to suggest feather texture.
STEP 7: Final Outline and Cleanup
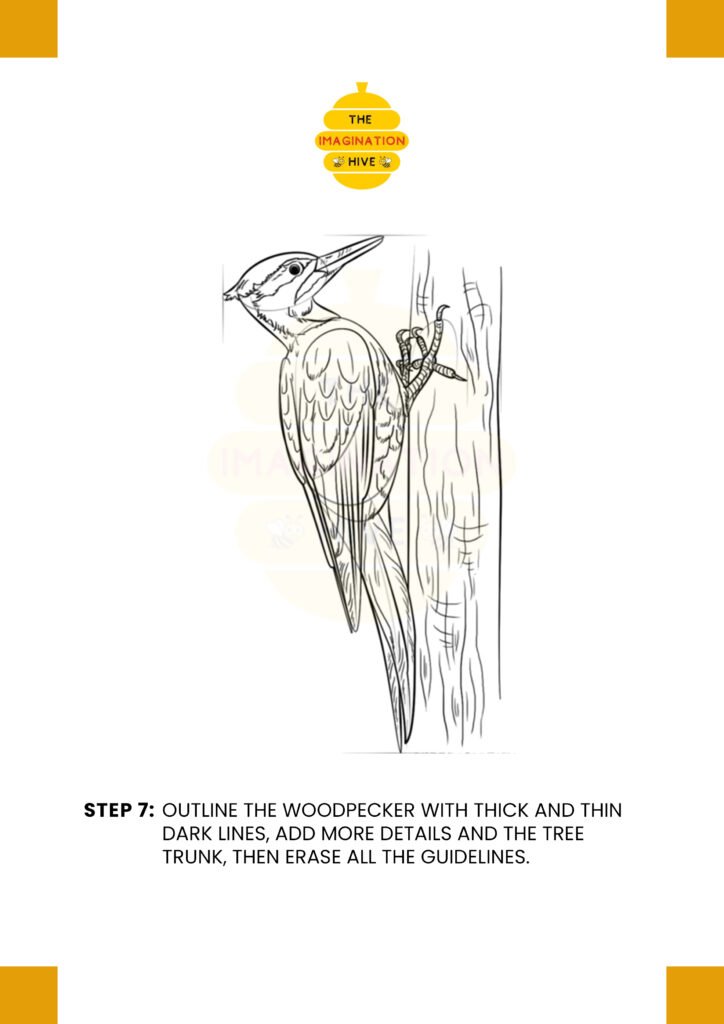
Outline the woodpecker with thick and thin dark lines, add details to the tree trunk, and erase all remaining guidelines.
Short tip:
Vary line thickness to create depth and a polished finish.